King Cake with Caramel Crunch & Cream Cheese Frosting

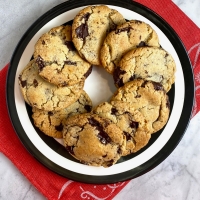
Every Mardi Gras, I have made the same King Cake for as long as I can remember. It was a big deal for me to try a new version!

I was drawn to this recipe because I liked the idea of adding texture with the caramel crunch layer- and my family loves cream cheese frosting. It was delicious. The frosting was definitely a winner, but next time I would omit the caramel crunch- the cake didn’t need the extra sweetness. I still included it as an option in the recipe below.

The recipe was adapted from Food and Wine, adapted from The Good Book of Southern Baking by Kelly Fields with Kate Heddings. I weighed the ingredients and modified the method. I used a cake pan but may opt for a cake ring or springform pan next time so that it would be easier to transfer the cake to a rack to decorate.

I decorated the cake with the traditional Mardi Gras sanding sugars. The recipe notes that the green, purple, and gold sugars represent faith, justice, and power, respectively, a nod to the “three kings.” Instead of placing a plastic baby inside, our family tradition is to place chocolate inside (a few dark chocolate chips this year). The person who receives the special slice with chocolate will have a lot of luck this year. 🙂

Yield: One 10-inch cake

For the Cake:

  • 300 g (2 1/2 cups) bread flour
  • 80 g (2/3 cup) all-purpose flour
  • 2 tsp instant yeast
  • 2 eggs, at room temperature
  • 1 cup whole milk
  • 28 g (2 T) lard (28g) (you can use vegetable shortening or butter, but it won’t be as delicious)
  • 67 g (1/3 cup; 5 T) granulated sugar
  • 1 tsp kosher salt (Morton’s)
  • 5 T unsalted butter, cut into 5 pieces, at room temperature

For the Cinnamon Filling:

  • 67 g (1/3 cup) granulated sugar
  • 52 g (1/4 cup) firmly packed light brown sugar
  • 1 T ground cinnamon
  • 4 T unsalted butter, at room temperature
  • 1/4 to 1/2 tsp Kosher salt
  • 1 tsp pure vanilla extract

For the Caramel Crunch:

  • 100 g (1/2 cup) granulated sugar
  • 1/2 tsp light corn syrup
  • 1/4 cup water

For the Cream Cheese Frosting & To Decorate:

  • 4 oz cream cheese, at room temperature
  • 511 g (4 1/2 cups) Confectioners’ sugar, sifted
  • 4 to 8 T whole milk or heavy cream (I used 6 T cream plus 1 T milk)
  • 1/4 tsp vanilla bean paste or vanilla extract
  • purple, green, and yellow sanding sugars, optional

To Make the Cake:

  1. In a large bowl, whisk together bread flour, all-purpose flour, and yeast.
  2. In the bowl of a stand mixer or in a large bowl using a handheld mixer, whisk eggs until smooth.
  3. Switch to dough hook or a large wooden spoon, and add milk, lard, and flour mixture. Mix on low speed until a dough starts to form, 3 to 4 minutes.
  4. Stop mixer and scrape down sides of bowl with a spatula. With mixer on low speed, add sugar and salt, then increase speed to medium, and mix for 3 minutes.
  5. Decrease speed to low and add butter, one tablespoon at a time, until fully incorporated.
  6. Increase speed to medium-high and beat dough for 5 to 7 minutes, until butter is fully incorporated and the dough is silky and shiny.
  7. Coat a large baking sheet with cooking spray.
  8. Transfer dough to baking sheet and press it with heel of your hand to about 3/4-inch thick and as close to a 6- by 10-inch rectangle as possible (it’s fine if it’s a little wider or longer).
  9. Cover baking sheet in plastic wrap and refrigerate overnight (about 12 hours). Dough can also be frozen, but will need to thaw overnight in the refrigerator before using.
  10. Make the cinnamon filling, directions below; set aside.
  11. Lightly coat a 10-inch-round cake ring or springform pan or cake pan with 2-inch-high sides (I used a fluted 10.5-inch pan with 2-inch sides) with cooking spray. (A cake ring or springform pan may be a better choice because it was difficult to maintain the shape when transferring out of the baking pan and onto the cooling rack.)
  12. Cut the cold dough into two 3-by-10-inch strips.
  13. On a pastry mat sprinkled with flour, use a lightly floured rolling pin to roll each piece evenly to approximately 6 by 12 inches, maintaining a rectangular shape.
  14. Sprinkle half of cinnamon filling into a thin, almost transparent layer on each strip of dough, making sure to leave a 1-inch border on the long bottom edge.
  15. Using a pastry brush, brush the bottom border of each piece of the dough with water until slightly wet; this will act as a sealant later.
  16. Starting at top edge, roll up dough like a cinnamon roll. (You want the edge you left bare to end up at the outside of the roll.) Once rolled, lightly press down to evenly seal dough; the water will help to fully seal.
  17. Using your hands, continue to roll log to double its length, about 22 inches. Make sure to keep width of the log consistent. Follow the same process for second strip of dough.
  18. Place a few chocolate chips (or a bean, Hershey’s kiss, or plastic baby) randomly inside one of the rolls.
  19. Twist together dough logs in a spiral. Once fully twisted, connect ends together to form a ring shape; pinch to seal if needed.
  20. Place dough in prepared pan and cover loosely with plastic wrap.
  21. Let dough proof at room temperature (ideally about 75°F) or in a proofing oven for about (check after 1 hour next time) 1 1/2 to 2 hours, until it has risen to about 1 1/2 times its original size and slightly springs back after you press it. (If it does not spring back at all, it has over-proofed and should be discarded.)
  22. Preheat oven to 350°F, preferably on convection.
  23. Before baking, spritz dough with water (or lightly sprinkle water over dough with your hands) to help prevent crust from hardening.
  24. Bake for 20 min on convection or 30 to 35 minutes in a standard oven, rotating the pan after 10 minutes on convection or 15 minutes in a standard oven, until golden brown.
  25. Let cake cool in pan for 5 to 10 minutes, then carefully remove king cake from pan and transfer it to wire rack placed inside a parchment paper-lined baking sheet. (My cake flattened a bit from inverting it after 5 minutes- maybe better to wait 10 minutes before removing or just use a springform pan next time.)
  26. Let cool completely, about 1 hour.

To Make the Cinnamon Filling: 

  1. Using a fork, mix granulated sugar, brown sugar, cinnamon, butter, salt, and vanilla until a uniform mixture forms. Set aside.
  2. Filling can be used right away or stored in an airtight container in the refrigerator for up to 3 days and brought to room temperature before using.

To Make the Caramel Crunch (optional):

  1. In a small non-reactive pot, combine sugar, corn syrup, and water.
  2. Bring to a boil over high heat, making sure sugar fully dissolves. *Do not stir* the mixture — stirring will cause sugar to crystalize. Alternatively, swirl the mixture by moving the pot.
  3. Continue cooking just until mixture becomes a medium amber color, intermittently swirling the pot, for about 4 to 5 minutes.
  4. Remove from heat and ladle caramel over cake, creating a thin, even coating over entire cake.
  5. Allow crunch to set for 15 to 20 minutes before icing cake.

To Make the Cream Cheese Frosting & To Finish the Cake:

  1. In the bowl of a stand mixer fitted with the paddle attachment or in a large bowl using a handheld mixer, mix cream cheese on medium speed until very smooth.
  2. Reduce speed to low and add powdered sugar in 3 portions, mixing well after each addition, until a smooth paste forms.
  3. Stop mixer and scrape down sides of bowl.
  4. With mixer on low speed, slowly stream in 4 T cream or milk and mix until frosting is well combined and smooth. Add more milk or cream until desired consistency is achieved. (I used 6 T cream plus 1 T milk.)
  5. Mix in vanilla bean paste.
  6. This frosting can be stored in an airtight container in refrigerator up to 4 days. Bring to room temperature before using.
  7. While cake is still cooling on the wire rack, spread the frosting over cake. (I used a 2 T scoop to evenly distribute the icing over the top of the cake and then spread it with an offset spatula.)
  8. If you’re sticking true to Mardi Gras tradition, sprinkle sanding sugar over top and allow cake to sit for at least 30 minutes before transferring it to a serving plate.

Note: You can keep the King Cake in an airtight container at room temperature for up to 3 days, but it truly is best on the day it is made. (I kept leftovers in the refrigerator because of the cream cheese frosting.)

Flourless Chocolate Meringue Cake

I planned to bake this beautiful cake for Valentine’s Day as soon as I saw a photo of it in Bon Appétit. So pretty! ❤ It was crunchy on top and rich and creamy in the center. We ate it with vanilla ice cream- which was essential– and the perfect compliment to the texture of the cake. It could also be served with whipped cream.

The recipe was adapted from What’s for Dessert: Simple Recipes for Dessert People by Claire Saffitz, via Bon Appétit. It is actually featured on the cover of the book. Saffitz said that “one of her favorite moments in baking is the swirl you get when folding meringue into a chocolate batter. Not only does it look beautiful on top of the cake, it bakes into a light and crispy shell that yields to the rich crumb.”

The magazine article described it as a “sophisticated-looking and -tasting masterpiece that doesn’t take much effort to achieve.” Rich and delicious.

Yield: Serves 10

  • vegetable oil (for pan)
  • 10 oz (283 g) semisweet chocolate (64%–70% cacao), coarsely chopped (I used 72% Belgian chocolate)
  • 6 T grapeseed, avocado, or other neutral oil
  • 1/4 cup strong brewed coffee
  • 1 1/2 tsp Diamond Crystal or 3/4 tsp Morton kosher salt, plus more
  • 5 large eggs, separated, at room temperature
  • 2 tsp pure vanilla extract
  • 1 cup (200 g) granulated sugar, divided
  • 3/4 cup (72 g) almond flour or almond meal
  • vanilla ice cream or whipped cream, for serving
  1. Place a rack in middle of oven; preheat to 350°. (I set my oven to true convection.)
  2. Brush pan with vegetable oil, making sure to coat sides all the way to the rim. Line bottom of pan with a parchment paper round; brush parchment with oil.
  3. Heat chopped chocolate, neutral oil, brewed coffee, and salt in a large heatproof (I used glass) bowl set over a medium saucepan of gently simmering water (bowl should not touch water), stirring occasionally with a heatproof rubber spatula, until chocolate is melted and mixture is smooth, about 5 minutes.
  4. Remove bowl from heat; add 5 large egg yolks, at room temperature, vanilla extract, and 1/4 cup (50 g) granulated sugar; vigorously whisk to combine.
  5. Add almond meal and mix well. (Don’t worry if it looks broken and separated.)
  6. Add 1/4 cup water and whisk vigorously until mixture comes back together and looks smooth and glossy. Set chocolate mixture aside.
  7. Using an electric mixer on medium-low speed, beat egg whites, at room temperature, and a pinch of salt in a large non-plastic bowl until frothy, about 20 seconds.
  8. Increase speed to medium-high and continue to beat until foamy and opaque, about 30 seconds.
  9. Beating constantly, gradually add remaining 3/4 cup (150 g) granulated sugar in a slow, steady stream. Increase speed to high and beat until stiff peaks form and meringue is dense and glossy. (Be careful not to overbeat or it will be dry and grainy and difficult to incorporate into the batter.)
  10. Scoop out a heaping cupful of meringue and set aside.
  11. Scrape about half of the remaining meringue into bowl with reserved chocolate mixture and fold gently with spatula until just a few streaks remain.
  12. Scrape in the rest of the meringue; fold just until evenly mixed and batter is light and airy.
  13. Scrape batter into prepared pan; smooth surface.
  14. Spoon dollops of reserved meringue over batter. Using a skewer or toothpick, swirl into batter—a little or a lot; it’s up to you.
  15. Bake cake until surface is risen and cracked, meringue is light golden, and a tester inserted into the center comes out shiny but clean, 60–70 minutes. (I baked the cake for 60 min but may check it around 55 min next time.)
  16. Transfer to a wire rack and run a small knife or offset spatula between very top of cake and pan to loosen anywhere it may be stuck (this will help the cake settle evenly as it cools). Let cake cool in pan.
  17. To serve, run knife around sides again to loosen cake, then unmold. Serve with vanilla ice cream or whipped cream, as desired.

Banana Bread Crumb Cake

I was planning to make banana bread but then told my husband about this cake. He did not hesitate before casting his vote. 😉 It was incredibly moist and delicious- and easy to make. I loved the crumb layer inside the cake.

This recipe was adapted from cookiesandcups.com. I weighed the ingredients, used unsalted butter, incorporated whole wheat pastry flour and cinnamon, omitted the glaze, and modified the baking time for a convection oven. We ate it for breakfast and dessert!

Yield: one 9×13-inch cake

For the Cake:

  • 120 g (1 cup) all-purpose flour
  • 120 g (1 cup) whole wheat pastry flour
  • 3 tsp baking powder
  • 1 tsp Morton kosher salt
  • 1/2 tsp ground cinnamon
  • 3 ripe medium-sized bananas, mashed
  • 8 T (1 stick, 1/2 cup) unsalted butter, room temperature
  • 400 g (2 cups) granulated sugar
  • 2 large eggs
  • 1 tsp pure vanilla extract
  • 1 cup milk (I used 2%)

For the Crumb Filling & Crumb Topping:

  • 16 T (2 sticks, 1 cup) cold unsalted butter, cubed
  • 432 g (2 cups) light brown sugar
  • 120 g (1 cup) all-purpose flour
  • 120 g (1 cup) whole wheat pastry flour
  • pinch coarse salt
  1. Preheat oven to 350°F. (I set my oven to true convection.)
  2. Coat a 9×13 metal baking dish with baking spray, line with parchment paper (overhang on long sides), lightly coat with baking spray; set aside.
  3. Make the Cake Batter: In a medium bowl whisk together flour, baking powder, salt, and cinnamon. Set aside.
  4. In a large bowl stir together the mashed bananas, butter, sugar, eggs and vanilla until mixed well.
  5. Add in the flour mixture and milk in alternating portions and stir until combined. Set batter aside while you make your crumb mixture.
  6. Make the Crumb Filling & Crumb Topping: In a large bowl combine the cold, cubed butter, light brown sugar, and flours using a pastry blender or fork until a coarse crumb forms.
  7. To Assemble: Pour 1/2 of the batter into the prepared pan. Top with 1/3 of the crumb mixture. Cover the filling with the remaining batter and then top with remaining crumb mixture.
  8. Bake for 40 minutes on convection or up to 50-55 minutes in a conventional oven, or until the center is set and a toothpick comes out clean.
  9. Serve warm or at room temperature. Store leftovers tightly wrapped at room temperature.

Mexican Sweet Corn Cake (Pan de Elote)

In Mexico, this simple cake is called panqué de elote, pan de elote or pastel de elote. It is often served for breakfast. We ate it for dessert after our family favorite Middle School Tacos on Cinco de Mayo this year and ate the leftovers for breakfast. Perfect. 🙂

This recipe was adapted from Milk Street. The original recipe accurately describes the texture as somewhere between cake and cornbread while hinting at custard. I used Greek yogurt and modified the method and the baking time for a convection oven. I served the cake with strawberries which was a lovely accompaniment.

Yield: 8 to 10 servings

  • 3 medium ears fresh corn, preferably yellow, husked (see Note)
  • 36 grams (1/4 cup) fine yellow cornmeal
  • 14 ounce can sweetened condensed milk
  • 57 grams (1/4 cup) plain whole-milk yogurt (I used whole-milk Greek yogurt)
  • 165 grams (1 1/4 cups plus 2 tablespoons) all-purpose flour
  • 2 T cornstarch
  • 2 tsp baking powder
  • 1/4 tsp table salt
  • 2 large eggs, plus 2 large egg yolks
  • 1/2 cup grapeseed or other neutral oil
  • Confectioners’ sugar, to serve
  • fresh strawberries, to serve
  1. Heat the oven to 350°F with a rack in the middle position. (I set my oven to the true convection setting.)
  2. Mist a 9-inch round cake pan with cooking spray.
  3. Hold an ear of corn upright in the center of a medium bowl. Using a chef’s knife, cut the kernels from the corn. Repeat with the additional two ears. Measure 250 grams (1 1/2 cups) of the freshly cut kernels and add to a blender; if you have extra corn, reserve it for another use.
  4. To the blender, add the cornmeal, condensed milk and yogurt, then puree until smooth, 15 to 20 seconds, scraping down the blender as needed. Let stand for 10 minutes. (I used a Vitamix.)
  5. Meanwhile, in a small bowl, whisk together the flour, cornstarch, baking powder and salt.
  6. To the blender, add the whole eggs and yolks, and the oil; blend on low until smooth, 5 to 10 seconds.
  7. Pour the puree into a large bowl.
  8. Add the flour mixture and whisk just until evenly moistened and no lumps of flour remain. It is important that you don’t whisk vigorously! Gentle mixing, just until no pockets of flour remain, will minimize gluten development so the finished cake is tender.
  9. Transfer to the prepared cake pan and bake until golden and a toothpick inserted into the center of the cake comes out clean, 30 to 35 minutes in a convection oven or 40 to 45 minutes in a standard oven.
  10. Cool in the pan on a wire rack for 30 minutes.
  11. Run a paring knife around the pan to loosen the cake, then invert directly onto the rack and lift off the pan. Re-invert the cake onto a serving platter and cool completely, about 1 hour.
  12. Serve dusted with Confectioners’ sugar with strawberry slices on the side.

Note: Don’t use frozen corn kernels—it results in a dense, gummy texture. Made with fresh corn, the cake’s crumb is much lighter and softer.

Mini Vanilla & Red Velvet Layer Cake

My daughter and I are obsessed with mini cakes. My mom gave me 6-inch cake pans for Christmas and we have been waiting for the perfect occasion to use them. Yay for Valentine’s Day! 🙂 ❤ I will admit that I’m not sure if a 3-layer cake is truly “mini”…. but it was really cute.

Some math is involved in order to adapt a recipe to make a mini cake. In this case, the vanilla cake recipe, originally for an 8-inch layer cake, was reduced to 57%. I made the red velvet cake, originally for 12 cupcakes, in its entirety in order to make additional cupcakes. The icing recipe makes enough to generously frost the layer cake as well as the cupcakes.

The vanilla cake recipe was adapted from The Vanilla Bean Baking Book: Recipes for Irresistible Everyday Favorites and Reinvented Classics by Sarah Kieffer. The red velvet cake and cream cheese frosting recipes were adapted from Martha Stewart Living.

For the Vanilla Cake Layers:

Yield: Two 6-inch cakes

  • 2 large eggs
  • 1 egg yolk
  • 1 3/4 tsp pure vanilla extract
  • 5 1/2 T sour cream
  • scant 2 T buttermilk
  • 162 g all-purpose flour
  • 169 g granulated sugar
  • 1/4 tsp plus generous 1/8 tsp baking powder
  • 1/4 tsp plus generous 1/8 tsp baking soda
  • 1/4 tsp plus generous 1/8 tsp fine sea salt
  • 9 T (129 g) unsalted butter, room temperature, cut into 1-inch pieces

For the Red Velvet Cake Layer:

Yield: One 6-inch cake and 5 standard cupcakes (Alternatively, 57% of the recipe can be made to just make a single cake layer, if desired.)

  • 148 g (1 1/4 cups) cake flour (not self-rising), sifted
  • 1 tablespoon unsweetened Dutch-process cocoa powder, sifted
  • 1 teaspoon coarse salt
  • 3/4 cup granulated sugar
  • 3/4 cup vegetable oil (I used canola)
  • 1 large egg, room temperature (can put in a bowl of warm water to quickly change the temperature)
  • 1/4 teaspoon red gel-paste food color
  • 1/2 teaspoon pure vanilla extract
  • 1/2 cup buttermilk
  • 3/4 teaspoons baking soda
  • 1 teaspoons distilled white vinegar

To Make the Vanilla Cake Layers:

  1. Adjust an oven rack to the middle position. Preheat the oven to 350 degrees, preferably on convection.
  2. Butter two 6-inch cake pans and then line them with parchment paper. Butter the parchment and then flour the pans. Set aside.
  3. In a medium bowl or liquid measuring cup, whisk the eggs, egg yolk, vanilla, sour cream, and buttermilk.
  4. In a bowl of a stand mixer fitted with a paddle, mix the flour, sugar, baking powder, baking soda, and salt on low until combined.
  5. With the mixer running on low, add the butter one piece at a time, beating until the mixture resembles coarse sand.
  6. With the mixer still running on low, slowly add half the wet ingredients. Increase the speed to medium and beat until incorporated, about 30 seconds.
  7. With the mixer running on low, add the rest of the wet ingredients, mixing until just combined.
  8. Increase the speed to medium and beat for 20 seconds. (The batter may still look a little bumpy.)
  9. Scrape down the sides and bottom of the bowl, and use a spatula to mix the batter a few more times.
  10. Divide the batter between the cake pans. Each well should be about halfway full. (I weigh them to make sure that the batter is evenly distributed. Each pan had about 360 g of batter.)
  11. Using an offset spatula, smooth the tops. Tap the pan gently on the counter 2 times to help get rid of any bubbles.
  12. Bake for 22 to 24 minutes, rotating the pan halfway through the baking time, or until a toothpick inserted into the center comes out clean.
  13. Let cool for 30 minutes in the pan. Then, remove from pan, remove the parchment paper, and let cool completely before frosting.

To Make the Red Velvet Cake Layer & Cupcakes:

  1. Preheat oven to 350 degrees, preferably on convection. Place 5 cupcake liners in a standard muffin pan. Butter one 6-inch cake pan and then line it with parchment paper. Butter the parchment and then flour the pan. Set aside.
  2. Sift together cake flour, and cocoa; add salt and whisk to combine.
  3. With an electric mixer on medium-high speed, whisk together sugar and oil until combined.
  4. Add the egg, beating until incorporated, scraping down sides of bowl as needed.
  5. Mix in food color and vanilla.
  6. Reduce speed to low. Add flour mixture in three batches, alternating with two additions of buttermilk, and whisking well after each.
  7. Stir together the baking soda and vinegar in a small bowl (it will foam); add mixture to the batter; mix on medium speed 10 seconds.
  8. Place 350 g to 360 g batter in the prepared cake pan, about halfway full. Divide the remaining batter evenly among lined cups, filling each about three-quarters full.
  9. Bake the cake pan, rotating halfway through, about 23 to 25 minutes, or until a cake tester inserted in centers comes out clean. Transfer to wire racks to cool for 30 minutes before removing from the pan to cool completely.
  10. Bake the cupcakes in the center of the oven for about 17 to 18 minutes, or until a cake tester inserted into the center comes out clean. Transfer to a wire rack to cool completely.

For the Cream Cheese Frosting:

Yield: 4 cups, enough to frost 1 6-inch cake and 5 cupcakes

  • 8 ounces (2 sticks) unsalted butter, room temperature
  • 12 ounces cream cheese, room temperature
  • 1 pound (4 cups) confectioners’ sugar, sifted
  • 1 teaspoon pure vanilla extract
  • gel food coloring, if desired
  • decorative sprinkles, if desired
  1. Beat butter and cream cheese with a mixer on medium-high speed until fluffy, 2 to 3 minutes. Reduce speed to low.
  2. Add sugar, 1 cup at a time, and then vanilla; mix until smooth. (I sifted 1 cup of sugar at a time prior to adding it to the butter-cream cheese mixture.)
  3. Tint the frosting with food coloring, if desired.
  4. Fill between the cake layers and the frost the top and sides of the cake. Using a pastry bag with a large fluted tip, pipe onto cupcakes in a circular motion, starting on the outer rim.
  5. Decorate with sprinkles, if desired.
  6. Refrigerate the cake (and cupcakes) prior to serving.

Vanilla Cupcakes with Brown Butter Buttercream

Sarah Kieffer is an absolute GENIUS. Incorporating brown butter in buttercream!?!? I’m upset that I have never thought of trying it.

These were quite possibly the best cupcakes I’ve ever made. The cake portion was delicious- moist and tender, but the icing really put the cupcakes over the top. It was incredibly light and flavorful. I may have to make them again for Valentine’s Day. ❤

The recipe was adapted from The Vanilla Bean Baking Book: Recipes for Irresistible Everyday Favorites and Reinvented Classics by Sarah Kieffer. I halved the recipe and made 12 cupcakes. (I now regret not making 24!) I also used fine sea salt. Amazing.

Yield: 12 frosted cupcakes (with about 2 cups buttercream)

For the Cupcakes:

  • 2 large eggs
  • 1 egg yolk
  • 1/2 T pure vanilla extract
  • 6 T sour cream
  • 2 T buttermilk
  • 1 cup (142g) all-purpose flour
  • 3/4 cup (149g) granulated sugar
  • 1/4 tsp plus 1/8 tsp baking powder
  • 1/4 tsp plus 1/8 tsp baking soda
  • 1/4 tsp plus 1/8 tsp fine sea salt
  • 1/4 pound (1 stick, 114g) unsalted butter, room temperature, cut into 1-inch pieces

Note: If doubling the recipe for 24 cupcakes or 2 8-inch round cakes, use 3 whole eggs, 2 egg yolks, 297g sugar, and 227g butter.

For the Brown Butter Buttercream:

  • 1/4 pound (1 stick, 114g) unsalted butter for browning
  • 1/4 pound (1 stick, 114g) unsalted butter, room temperature
  • 1 oz (27g) cream cheese, room temperature
  • 2 T heavy cream
  • 1 tsp pure vanilla extract
  • 1/4 tsp fine sea salt
  • 2 cups (226g) confectioners’ sugar, sifted

To Make the Cupcakes:

  1. Adjust an oven rack to the middle position. Preheat the oven to 350 degrees, preferably on convection.
  2. Line a standard cupcake/muffin pan with 12 liners. Set aside. (If making a round cake, butter and flour the pans and then line them with parchment paper.)
  3. In a medium bowl or liquid measuring cup, whisk the eggs, egg yolk, vanilla, sour cream, and buttermilk.
  4. In a bowl of a stand mixer fitted with a paddle, mix the flour, sugar, baking powder, baking soda, and salt on low until combined.
  5. With the mixer running on low, add the butter one piece at a time, beating until the mixture resembles coarse sand.
  6. With the mixer still running on low, slowly add half the wet ingredients. Increase the speed to medium and beat until incorporated, about 30 seconds.
  7. With the mixer running on low, add the rest of the wet ingredients, mixing until just combined.
  8. Increase the speed to medium and beat for 20 seconds. (The batter may still look a little bumpy.)
  9. Scrape down the sides and bottom of the bowl, and use a spatula to mix the batter a few more times.
  10. Using a large cookie scoop (mine is 3T), divide the batter between the cupcake wells. Each well should be a little more than halfway full.
  11. Using an offset spatula, smooth the tops. Tap the pan gently on the counter 2 times to help get rid of any bubbles.
  12. Bake for 16 to 20 minutes, rotating the pan halfway through the baking time, until a toothpick inserted into the center comes out clean. (I baked mine for 17 minutes on convection.) (If baking cake in an 8-inch pan, bake for 17 to 22 minutes.)
  13. Let cool for 5 minutes in the pan and then remove to a wire rack to cool completely before frosting. (If using a round cake pan, let cake cool in the pan set on a wire rack for 30 minutes. Then, remove to let cool completely.)

To Make the Brown Butter Buttercream:

  1. Have a small, heatproof, freezer-safe bowl set next to the range.
  2. Melt one stick of butter in a light-colored, heavy bottomed skillet or saucepan over medium-low heat. Swirl the butter around with a rubber spatula as it melts and starts to bubble.
  3. When it starts bubbling, increase the heat to medium and keep stirring the butter until it boils and begins to foam, about 3 minutes. It will smell nutty and you’ll start to see little brown bits on the bottom of the pan. *Keep stirring, making sure to gently scrape the bottom of the pan with the spatula as you do so. At this point, the butter will begin to quickly change from light brown to dark to burned, so keep a close eye on the pan.*
  4. Once the butter and browned bits are golden brown, remove from the heat, and immediately pour the brown butter and the toasted bits and flecks from the bottom of the pan into the reserved heatproof, freezer-safe bowl.
  5. Let the brown butter cool in the bowl for 10 to 15 minutes at room temperature. Then, place the bowl in the freezer and let chill until solid, about 30 minutes.
  6. When the butter is solid (but not frozen!), transfer it to the bowl of a stand mixer fitted with a paddle.
  7. Add the remaining 1/4 pound (1 stick) of room temperature butter to the brown butter in the mixer bowl and beat on medium until smooth.
  8. Add the cream cheese and beat on medium until smooth and creamy.
  9. Add the heavy cream, vanilla, and salt and mix on low to combine.
  10. With the mixer running on low, slowly add the confectioners’ sugar and beat until combined. (I turn the mixer off in between additions of sugar.)
  11. Increase the speed to medium-high and beat until light and fluffy, stopping to scrape down the sides of the bowl as necessary, 6 to 8 minutes.
  12. Using a cookie scoop (I used a 3 T scoop), place a heaping dollop of buttercream on top of each cupcake. (Alternatively, use an offset spatula to ration the icing.) Spread the buttercream over the top decoratively, as desired.

Note: Frosted cupcakes should be refrigerated if not serving right away. Bring to room temperature prior to serving.

French Apple Cake with Brown Butter

I almost made this custardy apple cake instead of an apple pie for our Thanksgiving feast. Then I realized that it was a better plan to make both! 😉 We enjoyed the cake on Thanksgiving Eve- perfect. I loved that this version incorporated browned butter.

This recipe was adapted from 177milkstreet.com, contributed by Erica Bruce. I modified the method and substituted apple cider for the brandy. I would recommend baking the cake the morning it will be served because it requires an extended cooling time prior to slicing and serving.

Yield: One 9-inch cake (about 8 to 10 servings)

  • 8 T (1 stick) salted butter, plus more for pan
  • 1/4 tsp ground allspice
  • 1 1/2 pounds (about 4 apples) Granny Smith apples, peeled, cored and cut into 1/4-inch slices
  • 1 pound (about 2 apples) Braeburn or Golden Delicious apples, peeled, cored and cut into 1/4-inch slices
  • 156 g (12 T) white sugar, divided
  • 1/4 teaspoon table salt
  • 2 T apple cider, brandy or Calvados
  • 86 grams (2/3 cup) all-purpose flour, plus more for pan
  • 1 tsp baking powder
  • 2 large eggs
  • 2 tsp pure vanilla extract
  • vanilla ice cream, for serving, optional
  1. Heat the oven to 375ºF, preferably on convection, with a rack in the middle position.
  2. Coat a 9-inch springform pan with butter, dust evenly with flour, then tap out the excess.
  3. In a 12-inch skillet over medium-high, melt the butter. Cook, swirling the pan frequently, until the milk solids at the bottom are golden brown and the butter has a nutty aroma, 1 to 3 minutes. (I used a 12-inch stainless steel all-in-one pan.)
  4. Pour into a small heatproof bowl without scraping out the skillet. The remaining butter in the pan is used to sauté the apples.
  5. Stir the allspice into the browned butter and set aside.
  6. Add all of the apples, 2 tablespoons of the sugar and the salt to the still-hot skillet and set over medium-high. Cook, stirring occasionally, until all moisture released by the apples has evaporated and the slices are beginning to brown, 12 to 15 minutes.
  7. Add the apple cider (or brandy) and cook until evaporated, 30 to 60 seconds.
  8. Transfer to a large plate, spread in an even layer and refrigerate uncovered until cool to the touch, 15 to 20 minutes.
  9. In a small bowl, whisk together the flour and baking powder.
  10. In a large bowl, whisk together the eggs, vanilla and 9 tablespoons of the remaining sugar.
  11. Gradually whisk in the browned butter.
  12. Add the flour mixture and stir with a rubber spatula until smooth; the batter will be very thick.
  13. Add the cooled apples and fold until evenly coated with batter.
  14. Transfer to the prepared springform pan, spread in an even layer and sprinkle with the remaining 1 tablespoon sugar. Place pan on a parchment paper-lined baking sheet.
  15. Bake until deeply browned, about 30 minutes on convection or up to 35 to 40 minutes in a standard oven.
  16. Let cool completely in the pan on a wire rack, about 2 hours. Run a knife around the inside of the pan and remove the sides before slicing.
  17. Serve with vanilla ice cream, if desired.

Note: Don’t slice the cake until it has fully cooled; if it is at all warm, the texture at the center will be too soft.

Enter your email address to follow this blog and receive notifications of new posts by email.

Join 1,459 other subscribers

Recipe Categories

my foodgawker gallery
my photos on tastespotting

Top Posts & Pages

Mexican Sweet Corn Cake (Pan de Elote)
Vietnamese-American Garlic Noodles
Banana Bread with Crunchy Sugar Topping
Churro Cupcakes with Cinnamon Cream Cheese Frosting
One-Pan Orzo with Spinach & Feta
One-Pot Crispy Gnocchi with Burst Tomatoes & Fresh Mozzarella
One-Pan Shrimp Scampi with Orzo
Samin Nosrat's Buttermilk-Brined Roast Chicken
Italian Sausage & Mushroom Ragu with Pappardelle
Ravneet Gill's Perfect Chocolate Chip Cookies
Foodista Food Blog of the Day Badge