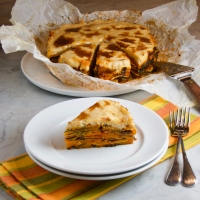
These polvorones are also known as Mexican wedding cookies (or cakes), Viennese crescents, or butterballs. I was inspired to make a classic version of these cookies after my daughter baked a few variations for Spanish Honor Society events at her high school.
I made them to share with family for Easter but they were truly a trial run for my Christmas cookie assortment. 😉 I used pecans but the original recipe also suggests using walnuts. The dough can be formed into a crescent or a ball prior to baking.
The recipe is from Baking Illustrated: The Practical Kitchen Companion for the Home Baker with 350 Recipes You Can Trust by the Editors of Cook’s Illustrated Magazine. I trust Cook’s Illustrated to have a foolproof recipe. 🙂 The cookies were tender and perfectly crumbly.
Yield: about 48 cookies
2 cups whole pecans or walnuts, chopped fine
10 oz (2 cups) unbleached all-purpose flour
3/4 tsp fine sea salt
2 sticks (16 T) unsalted butter, softened but still cool
5 T (1/3 cup or 2 1/2 oz) granulated sugar
1 1/2 tsp vanilla extract
3 oz (3/4 cup) confectioners’ sugar, for rolling cooled cookies, plus more if needed
Adjust the oven racks to the upper- and lower-middle positions. Preheat the oven to 325 degrees F. (I set my oven to true convection.)
Line 2 large rimmed baking sheets with parchment paper.
Mix 1 cup of the chopped nuts, the flour and salt in a medium bowl; set aside.
Place the remaining cup of chopped nuts in a food processor and process until they are the texture of coarse cornmeal, about 10 pulses, being careful not to overprocess.
Stir the rest of the nuts into the flour mixture and set aside.
Process the granulated sugar in the food processor for 30 seconds to create a superfine texture. (no need to clean after processing the nuts)
Using an electric or stand mixer, cream the butter and the granulated sugar until light and fluffy, about 90 seconds.
Beat in the vanilla until combined. Scrape the sides and bottom of the bowl.
Add the flour mixture and beat at low speed until the dough just begins to come together but still looks scrappy, about 15 seconds. Scrape the sides and the bottom of the bowl.
Beat at low speed again until the dough is cohesive, 10 to 15 seconds longer. Do not overbeat.
Working with about 1 tablespoon of dough at a time, ration the dough. (I used a cookie scoop.)
The dough can be rolled into balls or formed into crescents. As the shape is formed, place on the prepared cookie sheets. (I formed the dough into balls. To form into crescents, form a ball and then roll into a 3-inch long rope. Place the rope on the baking sheet and then turn the ends to form a crescent.)
Bake until the tops are pale golden and the bottoms are just beginning to brown, 17 minutes on convection or up to 19 minutes in a standard oven. Rotate the pans halfway through the baking time.
Cool the cookies on the baking sheets for 2 minutes; remove with a wide metal spatula to a wire rack and cool completely, about 30 minutes.
Working with 3 to 4 cookies at a time, roll the cookies in the confectioners’ sugar to coat them thoroughly. Gently shake off excess.
Cookies can be stored in an airtight container up to 5 days. Before serving, roll the cookies in the confectioners’ sugar a second time to ensure a thick coating. Tap off the excess.
I selected these wonderful cookies to share with family for Easter this year. I needed a dessert that would travel well and could be made in advance- perfect. They were reminiscent of Danish butter cookies. Everyone loved them!
This recipe is from Baking for the Holidays: 50+ Treats for a Festive Season by Sarah Kieffer. I modified the method and proportions. The recipe is similar to Dorie Greenspan’s version that I made several years ago. I used Greenspan’s technique to form the logs of dough.
I made one batch with unsalted butter and another with salted European butter. Both were delicous but we preferred the latter. Simple and classic.
Yield: about 30 cookies
1 cup (2 sticks or 227 g) unsalted butter or salted butter* (preferably European), at room temperature
2/3 cup (130 g) granulated sugar
1/3 cup (40 g) confectioners’ sugar
1 tsp fine salt (*if using salted butter reduce to 1/2 tsp salt)
2 large egg yolks (for dough) plus 1 large egg yolk (for the sugar coating)
1/2 cup (100 g) sanding sugar or other coarse sugar for sprinkling (I used turbinado)
In the bowl of a stand mixer fitted with a paddle, beat the butter on medium speed until creamy, about 1 minute.
Add the granulated and confectioners’ sugars, salt, and vanilla bean seeds and pod. Beat on medium speed until light and fluffy, 2 to 3 minutes.
Scrape down the bowl and add the egg yolks; mix on low speed until incorporated.
Add the flour and mix on low speed until just combined.
Discard the vanilla bean pod.
Lightly dust a work surface with flour. (I used a silicone pastry mat.)
Transfer the dough and divide into two equal parts.
Roll and form each half into a log about 1 1/2 inches in diameter and 7 to 7 1/2 inches long. (Alternatively, roll the entire batch into a 15 inch long log and then divide in half.)
Place each log on a large piece of plastic wrap, a few inches longer than the log. Wrap in the plastic wrap and refrigerate until firm, about 2 hours, or overnight. (I place the logs in a wrapping paper tube to maintain the shape.)
Preheat the oven to 350°F (180°C). (I set my oven to true convection.) Line two rimmed baking sheets with parchment paper.
Lightly beat the remaining egg yolk.
Spread the turbinado sugar in a 8 inch strip on a piece of plastic wrap.
Brush one log with the egg yolk and roll in the sugar. Slice into 1/2-inch-thick rounds, rotating the log between each cut. (Rotating the log keeps the slices more even.)
Transfer the rounds to the prepared baking sheets, spacing them about 2 inches apart. (I placed 8 to 10 cookies per sheet pan.)
Bake until the edges are light golden brown but the centers are still pale, 14 to 16 minutes, rotating halfway through the baking time. (I baked mine for 14 (one pan) to 15 minutes (two pans) on convection.)
Move the pan to a wire rack and let the cookies cool completely on the pan.
Repeat with the second log. (I used 2 additional sheet pans.)
Store cookies in an airtight container at room temperature for up to 3 days.
I am happy to report that my backyard rosemary survived the winter! The inclusion of rosemary drew me to this recipe. I must say that the rosemary and the oats made this soda bread uniquely delicious. I also loved the sheen from the egg white on top.
The recipe was adapted from Bon Appétit, contributed by Tori Ritchie. I modified the method and proportions. It was very tender and flavorful- perfect topped with salted butter. 🙂
Yield: Makes one 6-inch loaf
2 T unsalted butter
210 g (1 3/4 cups) all-purpose flour
1/4 cup old-fashioned oats
1/2 T granulated sugar
1/2 T chopped fresh rosemary
1 tsp baking powder
1/2 tsp baking soda
1/2 tsp Kosher salt
1/4 tsp freshly ground black pepper
3/4 cup plus 2 T buttermilk
1 egg white, beaten to blend
salted butter and/or preserves, for serving, as desired
Position rack in center of oven and preheat to 375°F, preferably on convection. Line a rimmed baking sheet with parchment paper.
Stir butter in heavy small saucepan over medium heat until melted and golden brown, about 3 minutes. Remove from heat.
Whisk flour, oats, sugar, rosemary, baking powder, baking soda, salt, and pepper in large bowl to blend.
Pour buttermilk and melted browned butter over flour mixture; stir with fork until flour mixture is moistened.
Turn dough out onto floured work surface; sprinkle the top with flour. (I used a silpat.)
Knead gently just until the dough comes together. (You’ll get the most tender soda bread by kneading the dough gently and briefly, so the gluten is minimally developed.)
Shape into a ball; flatten into a 6-inch round.
Place round on the prepared baking sheet.
Brush the top with beaten egg white.
Using the dough scraper or a small sharp knife, cut 1/2-inch-deep X in top of the dough round.
Bake until deep golden brown and a toothpick inserted into center comes out clean, about 30 minutes on convection or up to 45 minutes in a standard oven.
Cool on rack for at least 20 minutes. Serve warm or at room temperature.
Every Mardi Gras, I have made the same King Cake for as long as I can remember. It was a big deal for me to try a new version!
I was drawn to this recipe because I liked the idea of adding texture with the caramel crunch layer- and my family loves cream cheese frosting. It was delicious. The frosting was definitely a winner, but next time I would omit the caramel crunch- the cake didn’t need the extra sweetness. I still included it as an option in the recipe below.
The recipe was adapted from Food and Wine, adapted from The Good Book of Southern Bakingby Kelly Fields with Kate Heddings. I weighed the ingredients and modified the method. I used a cake pan but may opt for a cake ring or springform pan next time so that it would be easier to transfer the cake to a rack to decorate.
I decorated the cake with the traditional Mardi Gras sanding sugars. The recipe notes that the green, purple, and gold sugars represent faith, justice, and power, respectively, a nod to the “three kings.” Instead of placing a plastic baby inside, our family tradition is to place chocolate inside (a few dark chocolate chips this year). The person who receives the special slice with chocolate will have a lot of luck this year. 🙂
Yield: One 10-inch cake
For the Cake:
300 g (2 1/2 cups) bread flour
80 g (2/3 cup) all-purpose flour
2 tsp instant yeast
2 eggs, at room temperature
1 cup whole milk
28 g (2 T) lard (28g) (you can use vegetable shortening or butter, but it won’t be as delicious)
67 g (1/3 cup; 5 T) granulated sugar
1 tsp kosher salt (Morton’s)
5 T unsalted butter, cut into 5 pieces, at room temperature
For the Cinnamon Filling:
67 g (1/3 cup) granulated sugar
52 g (1/4 cup) firmly packed light brown sugar
1 T ground cinnamon
4 T unsalted butter, at room temperature
1/4 to 1/2 tsp Kosher salt
1 tsp pure vanilla extract
For the Caramel Crunch:
100 g (1/2 cup) granulated sugar
1/2 tsp light corn syrup
1/4 cup water
For the Cream Cheese Frosting & To Decorate:
4 oz cream cheese, at room temperature
511 g (4 1/2 cups) Confectioners’ sugar, sifted
4 to 8 T whole milk or heavy cream (I used 6 T cream plus 1 T milk)
1/4 tsp vanilla bean paste or vanilla extract
purple, green, and yellow sanding sugars, optional
To Make the Cake:
In a large bowl, whisk together bread flour, all-purpose flour, and yeast.
In the bowl of a stand mixer or in a large bowl using a handheld mixer, whisk eggs until smooth.
Switch to dough hook or a large wooden spoon, and add milk, lard, and flour mixture. Mix on low speed until a dough starts to form, 3 to 4 minutes.
Stop mixer and scrape down sides of bowl with a spatula. With mixer on low speed, add sugar and salt, then increase speed to medium, and mix for 3 minutes.
Decrease speed to low and add butter, one tablespoon at a time, until fully incorporated.
Increase speed to medium-high and beat dough for 5 to 7 minutes, until butter is fully incorporated and the dough is silky and shiny.
Coat a large baking sheet with cooking spray.
Transfer dough to baking sheet and press it with heel of your hand to about 3/4-inch thick and as close to a 6- by 10-inch rectangle as possible (it’s fine if it’s a little wider or longer).
Cover baking sheet in plastic wrap and refrigerate overnight (about 12 hours). Dough can also be frozen, but will need to thaw overnight in the refrigerator before using.
Make the cinnamon filling, directions below; set aside.
Lightly coat a 10-inch-round cake ring or springform pan or cake pan with 2-inch-high sides (I used a fluted 10.5-inch pan with 2-inch sides) with cooking spray. (A cake ring or springform pan may be a better choice because it was difficult to maintain the shape when transferring out of the baking pan and onto the cooling rack.)
Cut the cold dough into two 3-by-10-inch strips.
On a pastry mat sprinkled with flour, use a lightly floured rolling pin to roll each piece evenly to approximately 6 by 12 inches, maintaining a rectangular shape.
Sprinkle half of cinnamon filling into a thin, almost transparent layer on each strip of dough, making sure to leave a 1-inch border on the long bottom edge.
Using a pastry brush, brush the bottom border of each piece of the dough with water until slightly wet; this will act as a sealant later.
Starting at top edge, roll up dough like a cinnamon roll. (You want the edge you left bare to end up at the outside of the roll.) Once rolled, lightly press down to evenly seal dough; the water will help to fully seal.
Using your hands, continue to roll log to double its length, about 22 inches. Make sure to keep width of the log consistent. Follow the same process for second strip of dough.
Place a few chocolate chips (or a bean, Hershey’s kiss, or plastic baby) randomly inside one of the rolls.
Twist together dough logs in a spiral. Once fully twisted, connect ends together to form a ring shape; pinch to seal if needed.
Place dough in prepared pan and cover loosely with plastic wrap.
Let dough proof at room temperature (ideally about 75°F) or in a proofing oven for about (check after 1 hour next time) 1 1/2 to 2 hours, until it has risen to about 1 1/2 times its original size and slightly springs back after you press it. (If it does not spring back at all, it has over-proofed and should be discarded.)
Preheat oven to 350°F, preferably on convection.
Before baking, spritz dough with water (or lightly sprinkle water over dough with your hands) to help prevent crust from hardening.
Bake for 20 min on convection or 30 to 35 minutes in a standard oven, rotating the pan after 10 minutes on convection or 15 minutes in a standard oven, until golden brown.
Let cake cool in pan for 5 to 10 minutes, then carefully remove king cake from pan and transfer it to wire rack placed inside a parchment paper-lined baking sheet. (My cake flattened a bit from inverting it after 5 minutes- maybe better to wait 10 minutes before removing or just use a springform pan next time.)
Let cool completely, about 1 hour.
To Make the Cinnamon Filling:
Using a fork, mix granulated sugar, brown sugar, cinnamon, butter, salt, and vanilla until a uniform mixture forms. Set aside.
Filling can be used right away or stored in an airtight container in the refrigerator for up to 3 days and brought to room temperature before using.
To Make the Caramel Crunch (optional):
In a small non-reactive pot, combine sugar, corn syrup, and water.
Bring to a boil over high heat, making sure sugar fully dissolves. *Do not stir* the mixture — stirring will cause sugar to crystalize. Alternatively, swirl the mixture by moving the pot.
Continue cooking just until mixture becomes a medium amber color, intermittently swirling the pot, for about 4 to 5 minutes.
Remove from heat and ladle caramel over cake, creating a thin, even coating over entire cake.
Allow crunch to set for 15 to 20 minutes before icing cake.
To Make the Cream Cheese Frosting & To Finish the Cake:
In the bowl of a stand mixer fitted with the paddle attachment or in a large bowl using a handheld mixer, mix cream cheese on medium speed until very smooth.
Reduce speed to low and add powdered sugar in 3 portions, mixing well after each addition, until a smooth paste forms.
Stop mixer and scrape down sides of bowl.
With mixer on low speed, slowly stream in 4 T cream or milk and mix until frosting is well combined and smooth. Add more milk or cream until desired consistency is achieved. (I used 6 T cream plus 1 T milk.)
Mix in vanilla bean paste.
This frosting can be stored in an airtight container in refrigerator up to 4 days. Bring to room temperature before using.
While cake is still cooling on the wire rack, spread the frosting over cake. (I used a 2 T scoop to evenly distribute the icing over the top of the cake and then spread it with an offset spatula.)
If you’re sticking true to Mardi Gras tradition, sprinkle sanding sugar over top and allow cake to sit for at least 30 minutes before transferring it to a serving plate.
Note: You can keep the King Cake in an airtight container at room temperature for up to 3 days, but it truly is best on the day it is made. (I kept leftovers in the refrigerator because of the cream cheese frosting.)
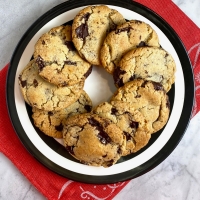
These are a shortcut version of jam-filled thumbprint cookies. Wonderful! I made them at the tail end of my holiday baking to bring to a cookie exchange. Perfect.
This recipe was adapted from Bon Appétit, contributed by Shilpa Uskokovic. The original recipe recommends using thick, concentrated jams or spreads in the filling. I used Bonne Maman apricot preserves without any issues.
I loved the lemon zest in the cookie and lemon juice in the glaze. Buttery, bright and tasty. 🙂
Yield: about 2 dozen
3/4 cup (1 1/2 sticks) unsalted butter, preferably cultured, at room temperature
1/2 cup (100 g) granulated sugar
finely grated lemon zest from 1 large lemon
1 tsp vanilla bean paste or vanilla extract
1 tsp Diamond Crystal or 1/2 tsp Morton kosher salt, plus more
1 large or extra-large egg yolk
2 cups (240 g) all-purpose flour; plus more for dusting (optional)
6 T raspberry or apricot jam (such as Bonne Maman Intense)
1/3 cup (37 g; or more) powdered sugar, sifted
2 tsp (or more) fresh lemon juice
Using a stand mixer on medium-high speed, beat unsalted butter, granulated sugar, lemon zest, vanilla bean paste and salt in a large bowl until light and fluffy, about 3 minutes.
Add 1 large egg yolk and beat until incorporated, about 1 minute.
Add flour and beat on low speed until no dry streaks remain (be careful not to overmix).
Turn dough out onto a surface and knead gently to bring together into a ball. Split dough in half (about 265 g each).
Using your hands, roll each into a 10×1½” log (dough should be easy to handle; dust surface very lightly with flour if dough feels sticky).
Place logs 3″ apart on a large parchment-lined baking sheet.
Run your index finger or the round handle of a large wooden spoon down the entire length of each log through the center to create a deep channel (you want to push dough down as far as possible without tearing).
Chill logs in freezer until firm, about 30 minutes.
Meanwhile, place a rack in middle of oven; preheat to 350°F, preferably on convection.
Remove logs from freezer, spoon about 3 tablespoons of jam along channel in each log.
Bake logs until dough is set and golden brown underneath, 18–20 minutes.
Let cool completely on baking sheet.
Using a small knife, slice logs crosswise on a deep diagonal into 1″-wide pieces.
Whisk powdered sugar, fresh lemon juice, and a large pinch of kosher salt in a small bowl until smooth. Glaze should be thick but pourable; adjust consistency with more powdered sugar or lemon juice if needed.
Drizzle glaze over logs; let sit until glaze is set, at least 30 minutes.
Do ahead: Cookies can be baked 2 days ahead. Store, loosely covered, at room temperature.
The apple filling in this pie has a special, subtle caramel undertone. The fresh fruit juice is cooked down with apple cider prior to baking in the crust, concentrating the apple flavor as well. Nice.
The recipe was adapted from Baking for the Holidays: 50+ Treats for a Festive Season by Sarah Kieffer. I modified the baking method. Next time, I would use a foil dome to cover the pie earlier in the baking process to prevent over-browning.
We ate the pie with vanilla ice cream or whipped cream. 🙂
For the All-Butter Pie Crust:
18 T [255 g or 2 1/4 sticks] unsalted butter cold, cut into 18 pieces
ice cold water
2 1/2 cups [355 g] all-purpose flour
2 T granulated sugar
1 tsp fine sea salt or table salt
For the Salted Caramel:
1 1/4 cups [250 g] granulated sugar
1/3 cup [80 g] water
2 T light corn syrup
1/2 teaspoon salt
1/2 cup [120 g] heavy cream
5 T [70 g] unsalted butter, cut into 5 pieces
1 T pure vanilla extract
1/2 tsp fleur de sel
For the Apple Filling:
2 1/2 lb [1.1 kg] Gala apples, or Cosmic Crisp apples, peeled, cored, and sliced into ¼ in [6 mm] pieces (5 large or 7 to 8 medium apples)
1/4 cup [50 g] light brown sugar
1 tsp fresh lemon juice
1/4 tsp fine sea salt or table salt
2 T cornstarch
1/2 tsp ground cinnamon
1/2 cup [120 g] hard cider or apple cider
3/4 cup [162 g] salted caramel, at room temperature
all-purpose flour, for dusting
All-Butter Pie Dough
egg wash
1 to 2 T turbinado or granulated sugar
For Serving:
vanilla ice cream or whipped cream, optional
To Make the All-Butter Pie Crust:
Put the butter pieces in a small bowl and place it in the freezer. Fill a medium measuring cup with water and add plenty of ice. Let both the butter and the ice water sit for 5 to 10 minutes.
In the bowl of a stand mixer fitted with the paddle or pastry attachment, mix the flour, sugar, and salt on low until combined.
Add half of the chilled butter and mix on low until the butter is just starting to break down, about 1 minute.
Add the rest of the butter and continue mixing until the butter is broken down and in various sizes (some butter will be incorporated into the dough, some will still be a bit large, but most should be about the size of small peas.)
Stop the mixer and use your hands to check for any large pieces of butter that didn’t get mixed or any dry patches of dough on the bottom of the bowl; break up the butter and incorporate the dry flour as best you can.
With the mixer running on low speed, slowly add about 1/4 cup [60 g] of the ice water and mix the until the dough starts to come together but is still quite shaggy (if the dough is not coming together, add more water, 1 tablespoon at a time, until it does). (I added an additional tablespoon.)
Transfer the dough out on a lightly floured work surface. (I used a lightly floured pastry mat.) Flatten it slightly into a square. Gather any loose/dry pieces that won’t stick to the dough and place them on top of the square.
Gently fold the dough over onto itself and flatten again. Repeat this process 3 or 4 more times, until all the loose pieces are worked into the dough, being careful not to overwork the dough.
Flatten the dough one last time into a rectangle and cut into 2 equal pieces (about 350 grams each).
Form the pieces into 6 in discs and wrap in plastic wrap and refrigerate 30 minutes (or up to 2 days) before using. (I made the dough one day in advance.)
To Make the Salted Caramel:
In a large, heavy-bottom saucepan (the caramel will bubble up quite a bit once it starts cooking, so it’s important to have a deep pan), combine the sugar, water, corn syrup, and salt, stirring very gently to combine while trying to avoid getting any sugar crystals on the sides of the pan. (I used a stainless 4 quart pot.)
Cover the pan and bring to a boil over medium-high heat until the sugar has melted and the mixture is clear, 3 to 5 minutes.
Uncover and cook until the mixture has turned a light golden color.
Turn the heat down to medium and cook until it turns a deep golden color and registers 340ºF [170ºC] on an instant-read thermometer.
Immediately remove the pan from the heat and add the heavy cream. The cream will foam considerably, so be careful pouring it in.
Add the butter next, followed by the vanilla and fleur de sel; stir to combine. Set aside to cool.
Caramel can be refrigerated in an airtight container for up to 2 weeks. ( I made it one day in advance.)
To Make the Apple Filling & To Finish the Pie:
In a large bowl, combine the apples, brown sugar, lemon juice, and salt. Let sit at room temperature for 1 to 2 hours, or covered in the refrigerator overnight.
Strain the sugary juice (you should have about ½ cup [120 g]) from the fruit into a medium saucepan and return the apples to the large bowl.
Add the cornstarch and cinnamon to the apples and toss to combine.
Add the cider to the saucepan with the juice and bring to a boil over medium heat. Turn the heat down to low and simmer until reduced to a scant 1/2 cup [120 g], 5 to 6 minutes. Remove from the heat and whisk in the (room temperature) caramel.
Pour the caramel mixture over the apples and toss to combine. Set aside while rolling out the pie dough.
Lightly flour a work surface and roll one piece of the dough into a 12 in [30.5 cm] circle a scant 1/4 inch [6 mm] thick and place it into a 9 in [23 cm] pie plate. (I used a 1/8-inch rolling pin and a ceramic deep dish pie plate.)
Transfer the plate to the refrigerator and let the dough chill while you roll out the second piece.
Lightly flour the work surface again and roll the second piece of dough in the same fashion.
Fill the prepared pie shell with the apple mixture and place the second crust on top. Create a lattice or other decorative pattern, as desired.
Trim the dough overhang to 1 in [2.5 cm] past the lip of the pie plate. Pinch the dough together and tuck it under itself so it’s resting on the edge of the pie plate. Crimp the edges of the dough and cut at least four vents in the center (if using a solid top crust), each about 2 in [5 cm] long.
Transfer the pie plate to the freezer to chill for about 20 minutes while the oven is preheating. The crust should be nice and firm before you bake it.
Adjust an oven rack to the lowest position (or 2nd lowest position) and preheat the oven to 425ºF [220ºC], preferably on convection. Place a parchment paper-lined, rimmed sheet pan on the oven rack (the preheated sheet pan helps crisp the bottom of the pie crust and also catches any leaks and drips).
When ready to bake, brush the top of the pie with the egg wash and sprinkle with sugar. Cover the edge of the pie to prevent over-browning. (Next time, at this point, I may cover the entire pie with a foil dome to prevent over-browning.)
Transfer the pie plate to the preheated sheet pan and bake for 25 minutes.
Turn the heat down to 375ºF [190ºC] and bake for 40 to 50 minutes, until the crust is deep golden brown and the juices bubble. (I covered the entire pie with a foil dome after 10 minutes but may cover the pie either at the start of this step or at 425ºF next time to prevent over-browning.)
Transfer the pie plate to a wire rack and let cool for at least 4 hours before serving.
Serve with ice cream or whipped cream, as desired. The pie is best eaten the same day it’s made. (I made it one day in advance.)
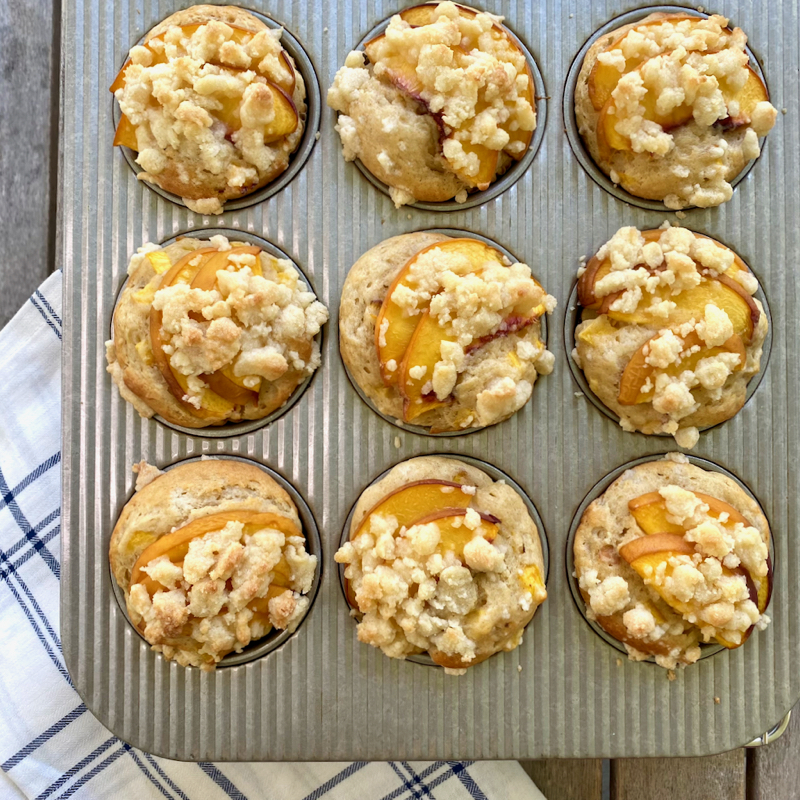
This is another wonderful peach recipe. The goal was to create coffee-shop/bakery muffins that were “tall, craggy, rich, and bronzed.” Success.
The recipe is from Deb Perelman’s book, Smitten Kitchen Keepers: New Classics for Your Forever Files. She recommends storing the leftover muffins in the pan- uncovered. I did this with some skepticism but will report that (as promised) the peaches kept the muffins moist and the room air kept the topping from becoming soggy.
The original recipe notes that other stone fruit can be substituted for the peaches. Ground cardamom (1/2 tsp) can also be incorporated, if desired.
Yield: 12 muffins
3 medium-large (1 to 1 1/2 pounds or 455 to 680 grams, total) ripe or very ripe yellow peaches
8 T (1/2 cup, 4 oz, or 115 grams) unsalted butter, melted
3/4 cup (150 grams) granulated sugar
1 tsp (3 grams) plus a pinch, kosher salt (I used Diamond Crystal), divided
2 1/4 cups (295 grams) all-purpose flour, divided
1 cup (230 grams) plain or vanilla yogurt
2 large or extra-large eggs
2 tsp baking powder
1/2 tsp baking soda
1/2 tsp ground cinnamon
1/2 tsp ground ginger
Heat the oven to 375 degrees F (190 C), preferably on convection.
Line 12 standard muffin cups with paper liners, or coat with nonstick spray.
Halve, pit, and thinly slice the peaches. Set 24 to 36 peache slices aside for decoration.
Chop the remaining peach slices into small pieces. You need 1 1/2 cups.
Mix the butter, sugar, a pinch of salt, and half of the flour (1 cup plus 2 T, or 145 grams) in a large bowl until it forms a clumpy mixture.
Remove 6 semi-packed tablespoons (about 115 grams) and set it aside; this will be the streusel topping.
Add the yogurt and eggs to the big bowl of crumbs; whisk to combine. (It’s okay if it is not smooth.)
Add the baking powder, baking soda, cinnamon, ginger, and remaining 1 tsp salt; whisk well.
Stir in the remaining flour and chopped peaches just until the flour disappears.
Using a cookie scoop or spoon, divide the batter among the prepared muffin cups. (They will be filled nearly to the top.)
Arrange 2 or 3 fanned slices of peach on top of each.
Divide the reserved streusel topping over the muffins. Nudge any that spills off back onto the cups of batter.
Bake for 20 to 22 minutes, or until a toothpick inserted under the peach slices comes out batter-free. (I baked mine for 22 minutes on convection.)
Let the muffins rest in the baking tin for 5 minutes before removing. Serve warm or at room temperature.
Note: Leftover muffins keep for 2 days at room temperature. Keep them in the baking pan but uncovered.