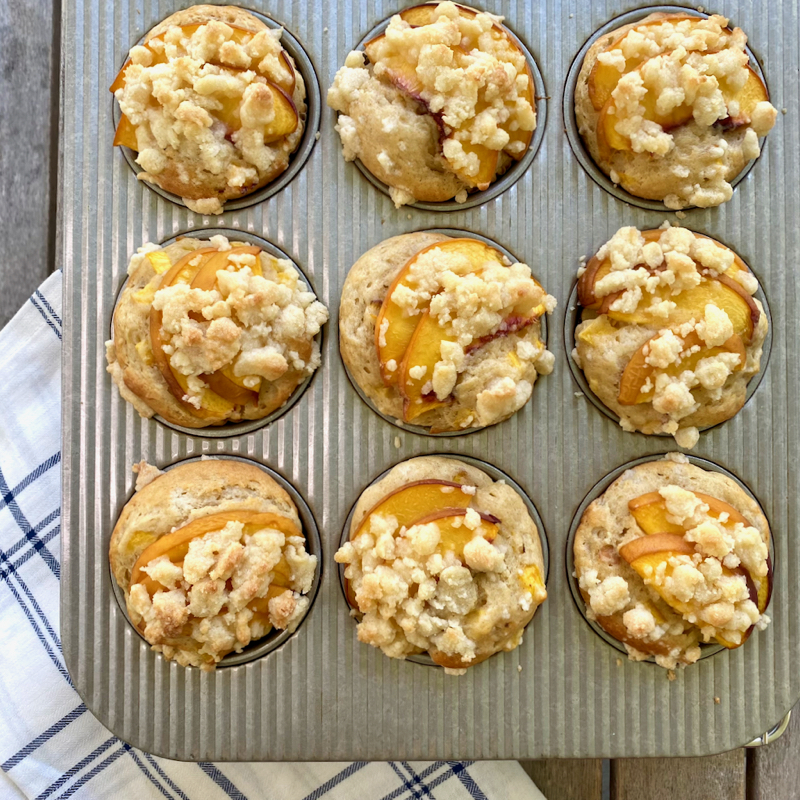
This is another wonderful peach recipe. The goal was to create coffee-shop/bakery muffins that were “tall, craggy, rich, and bronzed.” Success.
The recipe is from Deb Perelman’s book, Smitten Kitchen Keepers: New Classics for Your Forever Files. She recommends storing the leftover muffins in the pan- uncovered. I did this with some skepticism but will report that (as promised) the peaches kept the muffins moist and the room air kept the topping from becoming soggy.
The original recipe notes that other stone fruit can be substituted for the peaches. Ground cardamom (1/2 tsp) can also be incorporated, if desired.
Yield: 12 muffins
3 medium-large (1 to 1 1/2 pounds or 455 to 680 grams, total) ripe or very ripe yellow peaches
8 T (1/2 cup, 4 oz, or 115 grams) unsalted butter, melted
3/4 cup (150 grams) granulated sugar
1 tsp (3 grams) plus a pinch, kosher salt (I used Diamond Crystal), divided
2 1/4 cups (295 grams) all-purpose flour, divided
1 cup (230 grams) plain or vanilla yogurt
2 large or extra-large eggs
2 tsp baking powder
1/2 tsp baking soda
1/2 tsp ground cinnamon
1/2 tsp ground ginger
Heat the oven to 375 degrees F (190 C), preferably on convection.
Line 12 standard muffin cups with paper liners, or coat with nonstick spray.
Halve, pit, and thinly slice the peaches. Set 24 to 36 peache slices aside for decoration.
Chop the remaining peach slices into small pieces. You need 1 1/2 cups.
Mix the butter, sugar, a pinch of salt, and half of the flour (1 cup plus 2 T, or 145 grams) in a large bowl until it forms a clumpy mixture.
Remove 6 semi-packed tablespoons (about 115 grams) and set it aside; this will be the streusel topping.
Add the yogurt and eggs to the big bowl of crumbs; whisk to combine. (It’s okay if it is not smooth.)
Add the baking powder, baking soda, cinnamon, ginger, and remaining 1 tsp salt; whisk well.
Stir in the remaining flour and chopped peaches just until the flour disappears.
Using a cookie scoop or spoon, divide the batter among the prepared muffin cups. (They will be filled nearly to the top.)
Arrange 2 or 3 fanned slices of peach on top of each.
Divide the reserved streusel topping over the muffins. Nudge any that spills off back onto the cups of batter.
Bake for 20 to 22 minutes, or until a toothpick inserted under the peach slices comes out batter-free. (I baked mine for 22 minutes on convection.)
Let the muffins rest in the baking tin for 5 minutes before removing. Serve warm or at room temperature.
Note: Leftover muffins keep for 2 days at room temperature. Keep them in the baking pan but uncovered.
Before I share my fresh strawberry delights, I have to share these jewel-toned strawberry muffins that can be made year-round. I made them before picking our beloved Long Island strawberries. The crumb was very tender and tasty. I loved the subtle flavor from the coconut oil as well.
The recipe was adapted from Bon Appétit, contributed by Sarah Jampel. Even though I didn’t have difficulty with the jam leaking, next time, I would put more batter in the base of each muffin before filling so that it would be more centrally located. I would also reserve the freeze dried strawberry-sugar coating solely for the muffin tops. The jam-filled portion and the strawberry-sugar coated portion were two separate (and delicious) elements in the finished muffin. Both of these modifications are noted in the recipe below. I may also use my homemade jam in the filling. 🙂
The original recipe notes that this special strawberry-sugar could also be used to coat snickerdoodles. Great idea.
Yield: 12 muffins
For the Muffin Batter & Filling:
5 T refined coconut oil, room temperature
4 T unsalted butter, room temperature
100 g (1/2 cup) granulated sugar
67 g (1/3 cup, 5 T) light brown sugar
2 large eggs
1 1/2 tsp baking powder
1/4 tsp baking soda
1 1/2 tsp Diamond Crystal or 3/4 tsp Morton kosher salt
1 tsp pure vanilla extract
281 g (2 1/4 cups) all-purpose flour
240 g (1 cup) sour cream
1/2 cup thick strawberry or other berry jam (such as Bonne Maman Intense or Crofter’s)
For the Strawberry-Sugar Coating:
6 T unsalted butter
1/2 cup freeze-dried strawberries
6 T granulated sugar
pinch of kosher salt
Place a rack in middle of oven; preheat oven to 425°, preferably on convection.
Lightly coat the cups of a standard 12-cup muffin pan with nonstick spray.
Using a stand mixer or an electric mixer, beat oil, butter, granulated sugar, and brown sugar on medium-low speed until smooth, about 2 minutes.
Scrape down sides of bowl and beat again just to incorporate.
Add eggs, increase speed to medium, and beat until incorporated, about 1 minute (mixture might look a little curdled at this point and that’s okay).
Add baking powder, baking soda, salt, and vanilla and beat until combined and creamy.
Add flour in 3 additions, alternating with sour cream in 2 additions, beating on low speed after each addition until just combined. When last batch of flour is nearly incorporated, mix in any remaining dry bits by hand.
Scoop scant 2 tablespoons of batter into each muffin cup. (I used a cookie scoop.)
Using a damp finger, flatten each into a mostly even layer with a slight dip in the center.
Add 2 scant teaspoons jam to each center. (I used a 1/2 tablespoon cookie scoop.)
Divide remaining batter evenly among cups (about 2 tablespoons each). Take care to seal in jam as much as possible.
Using a damp finger, gently flatten surface.
Bake muffins until golden brown, 15 minutes on convection or up to 17–19 minutes in a standard oven.
Transfer to a wire rack and let cool 10 minutes in pan.
While the muffins are cooling, melt butter in the microwave in a glass dish or in a small saucepan over medium heat; set aside.
Finely grind strawberries in spice mill or with mortar and pestle. Transfer strawberry powder to a small bowl and mix in sugar and a pinch of salt. Transfer a small portion to a shallow bowl.
Gently remove muffins from pan; place on wire rack and set inside a rimmed baking sheet.
Generously brush each muffin top with melted butter and roll in strawberry sugar to coat, working over bowl to catch any excess. Repeat with remaining muffins, adding more strawberry sugar to bowl as needed.
Do ahead: Muffins can be made 3 days ahead. Store loosely covered at room temperature.
One more apple treat to share. 🙂 We ate these rolls as a special snack and re-warmed them for breakfast the next day as well.
The recipe for these miniature “monkey breads” was adapted from King Arthur Flour.com, but I was inspired to top them with apple cider glaze from davebakes.com.
The apple cider glaze gave them an unexpected tanginess. Tasty and fun.
Yield: 16 rolls
For the Dough:
1 cup (113g) white whole wheat flour
2 cups (240g) unbleached all-purpose flour
1 1/4 teaspoons (8g) fine sea salt
3 tablespoons (32g) potato flour
3 tablespoons (50g) light brown sugar or dark brown sugar, packed
1/2 teaspoon baking soda
2 1/4 teaspoons instant yeast
4 tablespoons (57g) butter, room temperature
1/2 cup (113g) lukewarm milk (I used 2 percent milk)
1/2 cup (113g) lukewarm water
For the Topping:
1/4 cup (4 T) granulated sugar
2 tsp cinnamon
1 heaping cup (128g) cored, chopped apple, peeled or unpeeled (I used Pink Lady apples)
raisins, optional (I omitted them)
For the Glaze:
2 cups apple cider, reduced, optional
2/3 cup (74g) confectioners’ sugar
pinch of fine sea salt
1 T (14g) milk (I used 2 percent milk)
1 T unsalted butter, melted
To Make the Dough:
Weigh your flour; or measure it by gently spooning it into a cup, then sweeping off any excess. Combine all of the dough ingredients, mixing and kneading to make a smooth, soft dough. It may seem dry at first, but as you knead it’ll soften up.
Place the dough in a greased bowl or greased 8-cup measure, cover it, and let it rise for 60 to 90 minutes, until it’s noticeably puffy (though not necessarily doubled in bulk). (I used a proofing oven.)
Lightly grease paper muffin cups, and use them to line 16 cups (8 cups in each) of two standard muffin tins.
Gently deflate the dough, and divide it into 16 pieces; each will be about 1 1/2 ounces (44g). Round each piece into a flattened ball.
Working with one piece at a time, use a bench knife (or regular knife) to cut the dough into 8 wedges. Don’t worry about being precise; pieces can vary in size.
To Make the Topping and Form the Rolls:
Ration the chopped apple into 16 piles, each pile should be about a generous tablespoon.
In a small bowl, combine the granulated sugar and cinnamon with a whisk.
Roll or shake four dough pieces in cinnamon sugar, and place them into a muffin cup.
Sprinkle with raisins, if using, and chopped apple.
Roll the remaining four dough pieces in cinnamon sugar; top the filling with these remaining four pieces of dough.
Repeat with the remaining balls of dough, raisins, and apple.
Sprinkle the top of each roll with an additional 1/4 tsp cinnamon sugar.
Cover them lightly with lightly greased plastic wrap, and let them rise for about 2 hours, until they’re noticeably puffy. (I used a proofing oven.)
Toward the end of the rising time, preheat the oven to 350°F, preferably on convection.
Uncover the risen rolls, and bake them for 14 minutes, on convection, or up to 17 minutes, until they’re a light golden brown. Don’t let them darken too much; they’ll be dry.
Let the rolls cool in the pan for 5 minutes before removing and placing on a wire rack.
To Make the Glaze & to Finish:
Place the cider in a pot over medium heat. Cook for 20-25 minutes, or until reduced to about 1/4 cup. Set aside. (If the cider cools, it must be rewarmed in order to add it to the glaze mixture.)
Combine the confectioners’ sugar, salt, milk, and butter. Add 2 to 4 tablespoons of reduced cider, to taste.
Adjust the consistency of the glaze by adding more milk or more reduced cider.
One more baked doughnut treat to share. This version can (dangerously) be made very easily with one overripe banana. 😉 More fun than banana bread!
The recipe was adapted from chiselandfork.com. I incorporated whole wheat pastry flour and modified the method. The fabulous brown butter glaze was essential.
Yield: 8 mini-doughnuts
For the Doughnuts:
1/2 cup all-purpose flour
1/2 cup whole wheat pastry flour
1/4 cup light brown sugar
1 tsp baking powder
1/2 tsp ground cinnamon
1/4 tsp ground nutmeg
1/4 tsp coarse salt
1/2 cup mashed banana (1 large banana)
1 large egg, beaten
2 T unsalted butter, melted
1 T milk (I used 1%)
1 tsp pure vanilla extract
For the Brown Butter Glaze:
4 T (1/4 cup) unsalted butter
4 to 5 T confectioner’s sugar, sifted
1 tsp vanilla extract
pinch of coarse salt
To Make the Doughnuts:
Preheat oven to 375°F, preferably on convection. Spray 8 wells of a mini-doughnut pan with non-stick cooking spray.
In a large bowl, combine the flours, sugar, baking powder, cinnamon, nutmeg and salt.
Add mashed banana, egg, melted butter, milk and vanilla extract and stir until just combined.
Using a small cookie scoop, distribute the batter into the prepared 8 wells of the pan, about 3 scoops of batter per well. Using an offset spatula spread evenly. (Alternatively, place batter in ziploc bag and squeeze out air. Cut corner of bag. Pipe the batter evenly in the pan.)
Bake for 7 to 9 minutes or until a toothpick inserted into the center comes clean.
Remove from oven and let rest on a rack in the pan for 5 minutes. Then remove from pan and let cool completely on a wire rack.
To Make the Brown Butter Glaze:
Heat the butter in a small saucepan over medium heat, stirring often, until it foams and has a nutty aroma, about 5-7 minutes. Immediately remove from heat and transfer to a heat-proof, shallow bowl to stop the cooking process.
Add the sifted confectioner’s sugar one tablespoon at a time, whisking after each addition. Add enough sugar to reach desired consistency.
Whisk in a pinch of salt and vanilla extract.
Dip each doughnut in the glaze and place back on cooling rack.
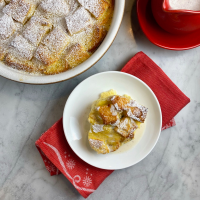
Apple cider doughnuts are one of my favorite autumn treats. A tasty baked version reduces the guilt- a little bit. 😉 This recipe was adapted from The New York Times, contributed by Erin Jeanne McDowell.
I made mini-doughnuts and madeleines. I must say that we were surprised by how much we enjoyed the apple cider madeleines which were absolutely amazing with crispy edges. The batter could also be baked in a muffin pan.
Yield: 12 mini-doughnuts and 8 madeleines (or 12 muffins)
For the Batter:
nonstick cooking spray
1 3/4 cup/225 grams all-purpose flour
1 1/4 tsp baking powder
3/4 tsp fine sea salt
1 tsp ground cinnamon
1/2 tsp freshly grated nutmeg
10 T (140 grams) unsalted butter, at room temperature
3/4 cup/165 grams light brown sugar
1/4 cup/50 grams granulated sugar
2 large eggs, at room temperature
1 tsp vanilla extract
1/2 cup/120 milliliters apple cider
For the Topping:
1/2 cup/100 grams granulated sugar
1 tsp ground cinnamon
6 T unsalted butter
To Make the Doughnuts & Madeleines: (or Muffins)
Heat oven to 350 degrees, preferably on convection.
Lightly grease 2 (6-cavity) doughnut pans and 8 wells of a madeleine pan (or a 12-cup muffin tin) with nonstick spray.
In a medium bowl, add flour, baking powder, salt, 1 teaspoon cinnamon and nutmeg and whisk to combine. Set aside.
In the bowl of a stand mixer fitted with the paddle attachment, cream 10 tablespoons/140 grams butter, brown sugar and 1/4 cup/50 grams granulated sugar on medium speed until light and fluffy, 3 to 4 minutes.
Add the eggs one at a time and mix until well incorporated after each addition, scraping the bowl as necessary.
Beat in the vanilla extract.
Add the flour mixture and mix on low speed until incorporated.
With the mixer running, add the apple cider in a slow, steady stream and mix to combine.
Scrape the bowl well to make sure the batter is homogeneous.
Spoon the batter into prepared doughnut pans, filling them about 2/3 of the way. (I use a small cookie scoop and fill each well with 3 scoops. You can also do this using a disposable piping bag or a resealable plastic bag with a 1/2-inch opening cut from one corner.) Spread evenly with an offset spatula.
Bake until evenly golden brown and a toothpick inserted into the center of the thickest portion comes out clean, about 7 to 9 minutes on convection. Rotate the pans halfway through baking. (If you are making muffins, divide batter evenly between the prepared cups and bake for 15 to 20 minutes, rotating halfway through.)
Reduce the temperature to 325 degrees, preferably on convection, if making madeleines. (I reduced the oven temperature because my pan has a dark finish.)
Using a small cookie scoop, fill each well with 3 scoops, or until 2/3 full. Spread evenly with an offset spatula.
Bake until evenly golden brown and a toothpick inserted into the center comes out clean, about 9 minutes on convection.
To Make the Topping:
While the doughnuts bake, whisk 1/2 cup/100 grams granulated sugar and 1 teaspoon cinnamon together in a small bowl to combine.
In a separate small bowl, melt the remaining 6 tablespoons butter in the microwave.
Let the doughnuts cool for 5 minutes after baking, then unmold them from the pans.
Brush with the melted butter and dredge them in the cinnamon sugar while they are still warm.
Serve immediately, or let cool to room temperature.
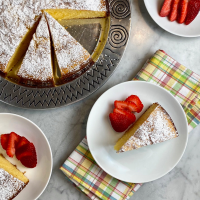
My daughter and I made these mini cakes as a birthday surprise for her friend. ❤ Sprinkles=Birthday over here. Using red, white, and blue sprinkles would make these cakes a fun and patriotic Fourth of July treat.
The recipe was adapted from thebittersideofsweet.com. They can be served for breakfast or dessert! 🙂
Yield: 4 mini cakes
For the Mini Bundt Cakes:
1 cup all-purpose flour
1/2 teaspoon baking powder
1/4 teaspoon baking soda
1/2 cup sugar
1/4 teaspoon coarse salt
1 large egg
1/4 cup plain Greek yogurt (I used whole milk Greek yogurt)
1 tablespoon milk (I used whole milk)
2 tablespoons unsalted butter, melted
1 teaspoon pure vanilla extract
1/3 cup rainbow sprinkles
For the Glaze:
1/2 cup Confectioners’ sugar
1 to 1 1/2 tablespoons milk (I used 1 1/2 T whole milk)
1/2 teaspoon pure vanilla extract
rainbow sprinkles
gel food coloring, optional
Preheat the oven to 325° F, preferably on convection. (My pan has a dark, non-stick interior finish. Set the oven to 350° F if using a pan with a light interior finish.)
Spray 4 wells of a mini bundt cake pan with non-stick cooking spray. Set aside.
In large bowl, whisk together flour, baking power, baking soda, salt, and sugar. Set aside.
In medium bowl, whisk together milk, yogurt, and eggs. Stir in melted butter and vanilla and whisk until combined.
Pour wet ingredients into dry ingredients. Slowly stir until just combined.
Fold in sprinkles. Avoid over stirring.
Using a cookie scoop, distribute the batter into the 4 prepared wells of a mini bundt pan.
Bake for 17 minutes in a convection oven, or for 20-25 minutes in a standard oven, or until edges are golden. A toothpick inserted in the center of the cake should come out clean or with a few moist crumbs.
Remove from oven, leave cakes to cool in pan for 5 minutes.
Remove cakes from pan and allow to completely cool on wire rack.
Once cool, make the glaze. In a medium bowl add milk, Confectioners’ sugar, and vanilla. Whisk until smooth. Tint with food coloring, if desired.
My entire family looks forward to my husband’s birthday feast. It typically involves a lot of comfort food like fried chicken and macaroni and cheese. 🙂 We always have his favorite Vanilla Bean Cheesecake as our celebratory dessert.
When my food blog friend Jess@Cooking is My Sport posted Cornmeal Sage Chicken Biscuits, I knew that my husband would absolutely love them. My first thought was to serve them on Valentine’s Day but then I realized that they would be perfect for his birthday dinner. Jess is an amazing cook and baker but most of all I must say that she is a complete master of biscuits. I learned many new techniques from her post in order to make biscuits thick enough to create a sandwich. Flaky and amazing! I also loved that she incorporated cornmeal in both the biscuits and the seasoned flour that is used to coat the fried chicken. This recipe also made all of us fans of Trader Joe’s 21 Seasoning Salute.
I served these fried chicken biscuits with classic macaroni and cheese and green salad dressed with Icebox Buttermilk Dressing. The chicken biscuit recipe was adapted from CookingisMySport.com. I used boneless, skinless chicken thighs, modified the proportions, cut the biscuits into squares, and omitted the topping. My daughter declared it was the best birthday feast ever. 🙂
Yield: Serves 12 to 14
For the Cornmeal & Sage Biscuits:
Yield: approximately 14 2-inch biscuits
5 cups all purpose flour
1 cup yellow cornmeal
2 tsp coarse salt
2 T baking powder
2 tsp ground sage
1 T savory spice mix (I used Trader Joe’s 21 Seasoning Salute)
1/2 cup granulated sugar
12 T (1 1/2 sticks) unsalted butter, frozen
1 cup sour cream
1 1/2 to 2 cups buttermilk, plus more if necessary
For the Fried Chicken Thighs:
Yield: about 16 to 18 pieces
2 cups all-purpose flour
1 1/2 cups yellow cornmeal
4 tsp baking powder
4 tsp cayenne pepper
4 heaping tsp savory spice mix (I used Trader Joe’s 21 Seasoning Salute)
2 tsp coarse salt
1 tsp freshly ground black pepper
3 cups buttermilk
8 to 9 boneless, skinless chicken thighs (about 2 1/2 to 3 pounds), trimmed, halved crosswise, patted dry
8 cups vegetable oil
hot sauce, for serving, optional (we used Chipotle Cholula)
bread and butter pickles, for serving, optional
To Make the Cornmeal & Sage Biscuits:
In a large bowl, whisk the flour, cornmeal, coarse salt, baking powder, sugar, ground sage and the seasoning mix.
Using the large holes on a box grater, grate the butter directly into the dry ingredients; stir with a fork.
Make a well in the center of the dry ingredients; add the sour cream. Using a fork, incorporated it into the dry ingredients until it forms thick clumps.
Make another well in the center of the dry ingredients; add the buttermilk. Use a large fork and a large rubber spatula to stir the mixture together. If it seems a little dry you may add the additional buttermilk, just until it forms a shaggy dough. (I added 1 3/4 cups of buttermilk.)
Sprinkle a pastry mat, wooden cutting board, or a clean, smooth countertop with flour. (I used a silpat baking mat.)
Turn the dough out onto the floured surface and pat a few times with your hands until it loosely holds together. (Don’t knead it too much or the warmth in your palms will melt the butter and cause the biscuits to be tough.)
Use a bench scraper (or a large sharp knife) to divide the dough in half. Roughly shape each half into a square.
Stack one of the halves on top of the other and use a rolling pin to roll it together into one mass. Repeat this process 4-5 more times before patting it into one final rectangle. (This is a process of layering so that the biscuits will bake flaky.) (I formed a 9×7-inch rectangle, about 2-inches thick.)
Tightly wrap the dough in plastic wrap and refrigerate for at least 2 hours and up to overnight.
Preheat oven to 425°. (I set my oven to convection.) Line a rimmed baking sheet with parchment paper. Place a shallow pan of water on the bottom rack of the oven.
Sprinkle your work surface with flour and unwrap the biscuit dough out onto it.
Using a bench scraper (or very sharp knife), trim the edges of the rectangle. (I trimmed it to form a 6×8-inch rectangle.)
Using a biscuit cutter or a knife, cut the dough into rounds or squares about 2″ each. You can recut the leftover dough into new biscuits, just try not to handle it too much. (I cut my dough into 12 2-inch squares and reformed the trimmed edges into 2 additional 2-inch squares.)
Place the cut biscuits on the parchment paper-lined, rimmed baking sheet, placing them close to each other (it will help them rise higher).
Place the tray into the freezer for about 15 minutes.
Spray the top of the biscuits with cooking spray.
Bake until golden brown, 15 to 22 minutes, covering them with foil if they brown too quickly. (I baked mine for 22 minutes total, covering them with foil after 20 minutes.)
To Make the Fried Chicken Thighs:
Line a rimmed baking sheet with wax paper, foil, or plastic wrap on the bottom; place a wire rack on top.
Line a second rimmed baking sheet with a double layer of paper towels; place a wire rack on top.
Whisk together flour, cornmeal, baking powder, cayenne, spice mix, salt, and black pepper in a bowl.
Pour buttermilk into a separate bowl.
Working with one piece at a time, toss chicken in flour mixture, dip in buttermilk, then toss again in flour mixture. Transfer to the wire rack over the wax paper/foil/plastic wrap-lined baking sheet to allow batter to set, about 2-3 minutes.
Repeat dipping process until all of the chicken is double-coated.
Meanwhile, heat the vegetable oil to 350 degrees. (I used a large stainless steel Dutch oven fitted with a thermometer. I found it much easier to control the temperature of the oil in this pot versus using a cast iron skillet as I have in the past.)
Working in batches of no more than 3 or 4 pieces at a time, use tongs to place the chicken in the hot oil. Using a slotted spoon, turn it occasionally and cook until each piece is golden brown on both sides, about 2-4 minutes per side. (I tried to cook pieces similar in size at the same time.)
Using a slotted spoon or clean tongs, remove chicken to the wire rack over the paper towel-lined sheet pan. At this point, use an instant read thermometer to confirm that the chicken is cooked, having an internal temperature of 165 degrees.
To assemble: Split a biscuit in half (it will have a natural breaking point) and assemble the sandwich with chicken topped with pickles, as desired. Serve with hot sauce to pass at the table, as desired.
Much to my husband’s displeasure, another birthday tradition is to document the many seasonal feathered visitors who arrive to celebrate with us. Like clockwork, the night heron arrived on his birthday morning while I was making pancakes. 🙂