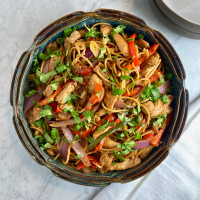
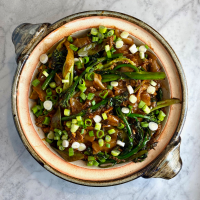
Roasted Chicken with Avocado-Cilantro Sauce over Cumin Rice with Caramelized Onions

Ha! Milk Street Magazine published these two flavor-packed dishes on the same page so I served them together. We ate the chicken and rice with roasted cauliflower. Delicious. 🙂

The avocado-cilantro sauce was amazing and would compliment any meat or chicken. It was inspired by a standard accompaniment to grilled meats in Venezuela called guasacaca. The recipe was adapted from Milk Street Magazine, contributed by Courtney Hill.

The rice was inspired by an everyday dish in Pakistan and India called jeera (or zeera) rice. The recipe was adapted from Made in India by Meera Sodha, via Milk Street Magazine, contributed by Dimitri Demopolous. The original recipe notes that it is ideal for pairing with any roasted or grilled vegetables or meat as well as with curries or dal.

To prepare these dishes together, I began by making the rice dish. While the rice cooked and rested, I prepared the chicken and the sauce.

For the Chicken & Avocado-Cilantro Sauce:

Yield: Serves 6

  • 2 1/2 pounds boneless, skinless chicken thighs (about 10) OR 3 pounds bone-in, skin-on chicken thighs OR breasts OR a combination, trimmed and patted dry
  • 4 T extra-virgin olive oil, divided
  • Kosher salt and ground black pepper
  • 2 ripe avocados, halved, pitted and peeled
  • 1 1/2 cups lightly packed cilantro OR flat-leaf parsley, plus extra chopped, to serve
  • 1 jalapeño chili, stemmed and seeded
  • 1/2 medium white or yellow onion, roughly chopped
  • 3 T white vinegar
  • optional garnish: Lime wedges OR crumbled queso fresco OR chopped pickled jalapeños OR a combination
  1. Heat the oven to 425°F with a rack in the middle position and another rack in the highest position. (I set my oven to convection roast.)
  2. On a foil or parchment paper-lined rimmed baking sheet, toss the chicken with 2 tablespoons of the oil, then season with salt and pepper. (Using foil is a better choice if broiling the skinless meat after roasting.)
  3. If using skinless meat, arrange thighs “skin side down” and roast about 10 minutes. Flip over and roast an additional 5 minutes. Remove pan from oven and adjust oven to the broil setting.
  4. Place pan on the top rack and broil to finish browning the meat, an additional 2 to 3 minutes. Meat should reach an internal temperature of 165. (Alternatively, if using skin-on, bone-in meat: Arrange skin side up and roast until the thickest part of the breast (if using) reaches about 160°F and the thickest part of the largest thigh (if using) reaches about 175°F, 30 to 40 minutes. Remove from the oven and let rest for 10 minutes.)
  5. Meanwhile, in a food processor, combine the avocados, cilantro, jalapeño, onion, vinegar, remaining 2 tablespoons oil and 1/4 teaspoon each salt and pepper. Process until smooth, 1 to 2 minutes. (I used a Vitamix which made the sauce incredibly creamy.)
  6. Transfer the chicken to a platter and pour over any accumulated juices. (If serving with cumin rice, plate chicken over the rice and pour over any accumulated juices.)
  7. Sprinkle with chopped cilantro (or other optional garnishes listed above) and serve with the sauce.

For the Cumin Rice with Caramelized Onions:

Yield: Serves 6

  • 3 T ghee OR salted butter, cut into 3 pieces, divided
  • 2 medium yellow onions, halved and thinly sliced
  • kosher salt and freshly ground black pepper
  • 2 teaspoons cumin seeds
  • 2 cardamom pods
  • 1 1/2 cups basmati rice, rinsed and drained
  • chopped fresh cilantro, to serve, optional
  1. In a large saucepan over medium-high, melt the ghee. (I used a 4-quart stainless steel pot.)
  2. Add the onions and 1/2 teaspoon salt. Cook, stirring occasionally to start and more often once browning begins, until the onions are deeply caramelized, 10 to 15 minutes; reduce the heat if the onions brown very unevenly or too quickly.
  3. Meanwhile, rinse the rice. Drain and set aside.
  4. Add the cumin seeds and cardamom pods to the browned onions; cook, stirring, until fragrant, about 1 minute.
  5. Stir in the rice, 2 cups water and 1 teaspoon salt. Bring to a simmer over medium-high, then reduce to low, cover and cook without stirring until the rice has absorbed the liquid, 15 to 18 minutes.
  6. Remove from the heat and let stand, covered, for 10 minutes.
  7. Using a fork, fluff the rice; remove and discard the cardamom. Taste and season with salt and pepper. If desired, serve sprinkled with cilantro.

Shortcut Creamed Spinach

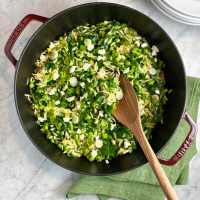
Oh my… this silky side can be prepared dangerously easily. We loved it too.

The recipe was adapted from Bon Appétit, contributed by Julia Langbein. I modified the proportions. Although it was fabulously creamy, I would incorporate less crème fraîche next time.

The original recipe notes that heavy cream and fresh lemon juice could be substituted for the crème fraîche for a similar flavor profile. I personally loved the tanginess from the crème fraîche.

Yield: about 6 servings

  • 3 T extra-virgin olive oil
  • 10 garlic cloves, thinly sliced
  • 1 pound (16 oz) spinach (mature or baby spinach)
  • kosher salt and freshly ground black pepper
  • freshly grated nutmeg, optional
  • 1/2 to 3/4 cup crème fraîche (I used 3/4 cup but would start with 1/2 cup next time)
  1. Heat olive oil in a large skillet over medium. (I used a stainless steel sauté pan.)
  2. Cook the garlic cloves, stirring occasionally, until golden around edges and very fragrant, about 3 minutes.
  3. Increase heat to medium-high and add spinach, by the handful, stirring and letting it wilt slightly after each addition. Season with kosher salt and freshly ground pepper. Add freshly grated nutmeg, to taste, if desired.
  4. Cook spinach, stirring often, until mostly wilted, about 1 minute. Remove from heat.
  5. Add 1/2 cup crème fraîche; stir until spinach is saucy and coated. Add more, as desired.
  6. Taste and season with more salt and pepper, if needed.

Curried Parsnips with Basil

I have one more root vegetable side dish to share. This dish was a flavor-packed way to enjoy the parsnips from my CSA share. The honey and coconut oil enhanced the natural sweetness of the parsnips.

The recipe was adapted from 177MilkStreet.com, contributed by Rose Hattabaugh. I omitted the coconut topping and modified the proportions. The original recipe advises not to use very large parsnips because they can taste bitter.

Yield: Serves 4 to 6

  • 3 tablespoons coconut oil, preferably unrefined
  • 1 tablespoon honey
  • 1 tablespoon yellow or brown mustard seeds
  • 1 1/2 teaspoons ground turmeric
  • 1 1/2 teaspoons curry powder
  • Kosher salt and freshly ground black pepper
  • 1 1/2 to 2 pounds parsnips, peeled and sliced 1/2 inch thick on a sharp diagonal (I used 8 medium parsnips)
  • 1/2 cup lightly packed fresh basil, torn or chiffonade
  • 3 tablespoons unsweetened wide-flake coconut, toasted, optional (see note)
  • Lime wedges, to serve, optional
  1. In a large Dutch oven over medium, combine the oil, honey, mustard seeds, turmeric and curry powder. Cook, stirring, until the mixture is fragrant, about 1 minute.
  2. Add 1 1/4 cups water and 1/2 teaspoon each salt and pepper, then bring to a simmer.
  3. Stir in the parsnips and return to a simmer. Cover and cook, stirring once or twice, until the parsnips are almost tender, 5 to 7 minutes. (*Don’t stir more than once or twice while the parsnips are simmering in the covered pot. Lifting the lid allows heat and steam to escape, which slows the cooking and may cause the pot to run dry.)
  4. Uncover and cook, stirring occasionally, until most of the water has evaporated, the parsnips begin to sizzle and a skewer inserted into the largest piece meets no resistance, another 3 to 5 minutes. Taste and season with salt and pepper.
  5. Transfer to a serving dish and spoon on any liquid remaining in the pot. Sprinkle with the basil and coconut, if using; serve with lime wedges, if desired.

Note: To toast the coconut, spread in an even layer on a rimmed baking sheet and bake at 350°F until light golden brown, 3 to 5 minutes.

Roasted Rutabaga & Pears with Browned Butter, Honey & Rosemary

I considered making this side dish as part of our Thanksgiving feast but was unsure if the bag of root vegetables I received in my CSA share contained rutabagas or turnips! I didn’t want to take the risk. 😉

The interior of a rutabaga is a creamy yellowish-orange versus a turnip which is very white inside. Rutabagas are also much more mild and sweet in flavor compared to a turnip which can be spicy like a radish.

This recipe was adapted from 177MilkStreet.com, contributed by Rose Hattabaugh. I modified the method and proportions. I loved the combination of the starchy caramelized roasted rutabagas with the sweet pears and browned butter. Very nice.

Yield: Serves 8

  • 6 T salted butter, divided
  • 1 1/2 T minced fresh rosemary, divided
  • Kosher salt and freshly ground black pepper
  • 2 1/4 pounds rutabaga, peeled and cut into 1-inch cubes
  • 3 ripe but firm Bosc pears (about 1 pound), unpeeled, quartered, cored and cut into 1-inch pieces
  • 1 1/2 T honey
  • 2 tsp sherry vinegar OR cider vinegar OR white wine vinegar
  1. Heat the oven to 450°F with a rack in the middle position. (I set my oven to convection roast.) Line a rimmed baking sheet with parchment paper.
  2. In a small saucepan over medium, melt the butter; remove from the heat and set aside.
  3. In a large bowl, stir together 1 tablespoon of rosemary, 3/4 teaspoon each salt and pepper and 3 tablespoons of melted butter.
  4. Add the rutabaga and toss to coat, then distribute in an even layer on the prepared baking sheet; reserve the bowl.
  5. Roast the rutabaga for 15 minutes on convection or up to 20 minutes in a standard oven.
  6. Meanwhile, in the same bowl, toss the pears with 1 tablespoon of the remaining melted butter; set aside.
  7. Set the pan with the remaining 2 tablespoons melted butter over medium and cook the butter, occasionally swirling the pan, until the milk solids at the bottom are golden brown and the butter has a nutty aroma, about 1 minute.
  8. Off heat, whisk in the remaining 1/2 tablespoon chopped rosemary, the honey, vinegar and generous 1/4 teaspoon each salt and pepper; transfer to a heat proof bowl, cover and set aside.
  9. When the rutabaga has roasted for 20 minutes, add the pears to the baking sheet and toss to combine with the rutabaga. Roast until a skewer inserted into the rutabaga and pears meets no resistance and the rutabaga is well browned, 10 to 12 minutes; stir once about halfway through.
  10. Remove the baking sheet from the oven, immediately drizzle the rutabaga and pears with the browned butter mixture and toss to coat.
  11. Taste and season with salt and pepper, then transfer to a serving dish. (I sprinkled fine sea salt over the top of the dish.)

Roasted Brussels Sprouts With Maple-Gochujang Brown Butter

I need to have guests present to serve Brussels sprouts in my house because there are not many fans in my immediate family. They are always part of my Thanksgiving meal! I served them with roasted rainbow carrots and roasted cauliflower and chickpeas with mustard viniagrette.

This recipe was adapted from Bon Appétit, contributed by Peter Som. I modified the method and proportions. The sauce was amazing!

The original recipe notes that if you can’t find gochujang, Sriracha can be substituted, to taste.

Yield: 4 to 6 Servings

  • 1 1/2 lbs Brussels sprouts (from 1 stalk), trimmed, halved if large
  • 1 T extra-virgin olive oil
  • Kosher salt and freshly ground pepper
  • 1/4 cup coarsely chopped walnuts (optional) (I omitted them)
  • 3 T unsalted butter
  • 2 T gochujang (Korean hot pepper paste)
  • 1 T pure maple syrup
  • 2 scallions, thinly sliced, divided
  • zest of half a lemon
  • Flaky sea salt
  1. Set a rimmed baking sheet in the center of the oven; preheat oven to 500°. I set my oven to convection roast.
  2. Toss brussels sprouts with oil in a large bowl to coat; season with kosher salt and pepper. Carefully (baking sheet will be hot!) spread out in a single layer; reserve bowl.
  3. Roast until brussels sprouts are charred in spots and tender, 12 minutes in a convection oven or up to 16–18 minutes in a standard oven.
  4. Meanwhile, if using walnuts, toast in a dry medium skillet over medium heat, tossing often, until fragrant and slightly darkened, about 4 minutes. Transfer to a small bowl and let cool.
  5. Cook butter in a small saucepan over medium-low heat, swirling occasionally, until milk solids are a deep amber color and butter smells very nutty, 5–8 minutes. Remove from heat and stir in gochujang and maple syrup. Season with kosher salt and pepper.
  6. Combine Brussels sprouts, half of walnuts (if using), and half of scallions in reserved bowl; add brown butter mixture and toss to coat.
  7. Transfer to a platter or serving bowl and scatter (remaining walnuts) and scallions over the top.
  8. Finely grate lemon zest on top; sprinkle with sea salt. (I used Fleur de Sel.)

Raw Zucchini & Chickpea Salad with Tahini Yogurt

I loved everything about this beautiful salad. We ate it with Turkish Grilled Chicken– such a wonderful meal. It was one of the best zucchini dishes I’ve ever made.

This recipe was adapted from Milk Street, contributed by Elizabeth Mindreau. It was re-created from a salad served at Coal Office, a modern Middle Eastern restaurant in London.

Yield: Serves 4 to 6

  • about 3/4 to 1 cup plain whole-milk Greek yogurt
  • 2 T tahini
  • zest from 1 large lemon, plus 1 tablespoon freshly squeezed lemon juice
  • 1 1/2 tsp plus 2 T extra-virgin olive oil, divided, plus more to serve
  • Kosher salt and ground black pepper
  • 15 1/2 ounce can chickpeas, rinsed and drained
  • 1 small shallot, halved and thinly sliced
  • 2 T red wine vinegar
  • 2 tsp za’atar
  • 2 small/medium zucchini (12 to 16 ounces total), quartered lengthwise and thinly sliced on a steep diagonal
  • 1/4 cup lightly packed fresh mint, finely chopped
  • 1/4 cup lightly packed fresh dill, finely chopped
  • 1/4 cup lightly packed fresh cilantro
  • ground sumac, to serve, optional
  1. In a medium bowl, whisk together the yogurt, tahini, lemon zest and juice, 1 1/2 teaspoons oil, 1/2 teaspoon salt and 1/4 teaspoon pepper; set aside.
  2. In a large microwave-safe bowl, stir together the chickpeas, shallot, vinegar and za’atar. Cover and microwave until the shallot is wilted, 1 1/2 to 2 minutes. Uncover and cool to room temperature, stirring occasionally. (see Tip)
  3. When the chickpeas have cooled, stir in the remaining 2 tablespoons oil, the zucchini, mint, dill and cilantro. Taste and season with salt and pepper.
  4. Transfer the chickpea-zucchini mixture to a platter, spooning it around the edge.
  5. Scoop the yogurt mixture into a mound in the center of the chickpea-zucchini mixture.
  6. Drizzle with additional oil and sprinkle with sumac, if using.

Tip: Don’t forget to cover the bowl containing the chickpeas and shallots when microwaving. Covering traps steam that helps wilt the shallots and soften the chickpeas. And remember to occasionally stir the chickpea-shallot mixture as it cools. This helps ensure the chickpeas evenly absorb the seasonings pooled at the bottom of the bowl while also hastening the cooling.

Cowboy Caviar

My daughter was absolutely obsessed with making cowboy caviar this summer. This recipe made a large volume. The leftovers were perfect to have available to eat as a side, a dip, or over salad greens. Everyone loved it.

This version was adapted from The New York Times, contributed by Margaux Laskey. We ate it with tortilla chips and grilled chicken sausages for dinner. 🙂 I served the diced mango as an additional topping on the side to please everyone in my crowd.

Yield: 8 cups

  • 5 T olive oil
  • 4 T freshly squeezed lime juice or red wine vinegar
  • 3 to 4 garlic cloves, minced
  • 1 tsp granulated sugar
  • Kosher salt and freshly ground black pepper
  • 1/2 beefsteak tomato, seeded, cored, and diced plus 1/2 cup cherry tomatoes, halved (or any combination of tomatoes resulting about 1 cup diced)
  • 1/2 red onion, finely diced
  • 1 (15-ounce) can black beans, drained and rinsed
  • 1 (15-ounce) can pinto beans or black-eyed peas, drained and rinsed
  • 1 1/2 cups fresh corn kernels (from about 2 to 4 cobs) or thawed, drained frozen sweet corn (about 8 ounces)(I used kernels from 3 ears of corn)
  • 1 red, orange, or yellow bell pepper, seeded and finely diced
  • 1 jalapeño, seeded and finely diced
  • 1/2 cup chopped cilantro leaves and tender stems, plus more for garnish, if desired
  • 1 avocado, diced, optional
  • 4 oz feta cheese, crumbled, optional
  • 1 mango, diced, optional
  • 1-2 scallions, white and green parts, chopped, for garnish, optional
  • tortilla chips, for serving
  1. Make the dressing: In a medium bowl, whisk the olive oil, vinegar, garlic, sugar, 1/2 teaspoon salt and 1/2 teaspoon pepper to combine.
  2. Cut the corn kernels off the cob directly into the bowl with the dressing.
  3. Add the tomatoes, red onion, black beans, pinto/black-eyed peas, bell pepper, jalapeño and cilantro. Toss to combine and season with salt and pepper to taste.
  4. Cover with plastic wrap and refrigerate for 2 hours before serving.
  5. To serve, toss well and season to taste. Add the diced avocado, crumbled feta, and diced mango, if using.
  6. Transfer to a serving dish. Sprinkle with scallions and serve with tortilla chips. (Alternatively, the avocado can also be served over the top.)

Enter your email address to follow this blog and receive notifications of new posts by email.

Join 1,420 other subscribers

Recipe Categories

my foodgawker gallery
my photos on tastespotting

Top Posts & Pages

Sourdough English Muffins
Ravneet Gill's Perfect Chocolate Chip Cookies
Chicken Stew with Biscuits
Ina Garten's Caramelized Onion, Tomato & Goat Cheese Tarts
Vietnamese-American Garlic Noodles
Chez Panisse's Blueberry Cobbler
One-Pan Orzo with Spinach & Feta
Grilled Corn & Avocado Salad with Creamy Feta Dressing
Banana Bread with Crunchy Sugar Topping
Spicy Coconut Grilled Chicken Thighs
Foodista Food Blog of the Day Badge
%d bloggers like this: