Mexican-Style Chipotle-Lime Pork Cutlets

I chose these flavor-packed pork tenderloin cutlets to serve with Mexican-style roasted broccoli and cauliflower steaks. The dishes complemented each other very nicely.

The dish was based on a Mexican dish called cecina enchilada, thinly sliced pork marinated in a chili sauce. This recipe was adapted from Milk Street, contributed by Diane Unger. I modified the proportions. Serving rice on the side was essential to soak up every drop of the wonderful sauce. Simple and delicious.

The grilled pork could also be sliced and used as a taco filling with chopped white onion and fresh cilantro. Rice and refried beans would make this a complete meal as well. Next time!

Yield: Serves 8

  • 2/3 cup extra-virgin olive oil
  • 2 T ground cumin
  • 2 T sweet paprika
  • 4 tsp ground coriander
  • 4 tsp packed brown sugar
  • 8 medium to large garlic cloves, thinly sliced
  • 2 pork tenderloins, about 1 1/4 pound each, trimmed of silver skin
  • Kosher salt and freshly ground black pepper
  • 2 chipotle chilies in adobo, chopped, plus 2 tablespoons adobo sauce (can use more, to taste)
  • 2/3 cup lime juice
  • 1/2 cup finely chopped fresh cilantro
  1. In a microwave-safe bowl, combine the oil, cumin, paprika, coriander, sugar and garlic. Microwave on high until the garlic is softened, about 1 minute.
  2. Measure out 6 tablespoons of the seasoned oil, including some of the solids, into a large baking dish.
  3. Cut each tenderloin in half crosswise, then cut each piece in half lengthwise.
  4. Between sheets of plastic wrap, use a meat pounder to pound each piece to an even 1/8-inch thickness.
  5. Place the meat in the baking dish, turning to coat on all sides with the oil mixture. Cover and refrigerate while you make the sauce and prepare the grill.
  6. Into the remaining oil mixture, whisk 1 1/2 teaspoons salt, 1 teaspoon pepper, the chipotle chilies, adobo sauce, lime juice and cilantro. Set aside.
  7. Prepare a charcoal or gas grill. For a charcoal grill, ignite a large chimney of coals, let burn until lightly ashed over, then distribute evenly over one side of the grill bed; open the bottom grill vents. For a gas grill, turn all burners to high. Cover and heat the grill for 5 to 10 minutes for charcoal or about 15 minutes for gas, then clean and oil the cooking grate. (I used a gas grill.)
  8. Place the pork in a single layer on the grill (on the hot side if using charcoal) and cook until well browned, about 2 minutes.
  9. Using tongs, flip each piece and cook for 1 minute. Transfer browned side up to a platter. (See Tip)
  10. Stir the sauce to recombine, then drizzle 1 tablespoon over each cutlet. Tent with foil and let rest for 5 minutes. Serve with the remaining sauce on the side.

Tip: Don’t grill the second sides of the cutlets for more than about 1 minute or they will overcook. Aim to get charring on only the first sides, then serve the pork charred side up.

Orange-Guajillo Pulled Chicken Tacos

Tacos are always a welcome dinner in my house. New varieties are even more welcome. 🙂

These chicken tacos were a mildly sweet from the fresh orange juice. Because the seeds are removed from the chilies, the finished dish was not spicy at all. They were really delicious with all of the assorted toppings.

This recipe was adapted from 177milkstreet.com. We ate the tacos with refried beans, brown Basmati rice, and street corn on the side. Fresh and fabulous.

Yield: Serves 4 to 6

  • 1 ounce guajillo chilies (5 medium), stemmed, seeded and torn or cut into 1-inch pieces
  • 1 1/2 cups freshly squeezed orange juice (I used 4 large oranges)
  • 5 large garlic cloves, peeled
  • 2 T white vinegar
  • 2 tsp ground coriander
  • 2 tsp honey
  • 1 teaspoon dried oregano or Mexican oregano
  • Kosher salt and freshly ground black pepper
  • 2 pounds boneless, skinless chicken thighs, trimmed (I used 9 thighs, about 2 1/2 pounds)
  • warm tortillas, for serving (I used Trader Joe’s corn-wheat tortillas)
  • diced white onion, for serving
  • sliced radishes, for serving
  • cilantro leaves, for serving
  • crumbled queso fresco, feta, or shredded Mexican cheese blend, for serving
  • sour cream, for serving
  • rice and refried beans, for serving, optional
  1. Squeeze the orange juice into a liquid measuring cup.
  2. In a 12-inch skillet over medium-high, toast the chile pieces, pressing with a wide metal spatula and flipping halfway through, until fragrant, about 1 to 2 minutes total. (I used a 12-inch stainless steel all-in-one pan.)
  3. Transfer to a small bowl and pour in the juice; press on the chilies to submerge. Let stand until the chilies have softened, about 10 minutes. Set the skillet aside. (I placed the chilies in the liquid measuring cup with the freshly squeezed orange juice.)
  4. In a blender, combine the chilies and juice, garlic, vinegar, coriander, honey, oregano and 1 teaspoon salt. Puree until smooth, about 30 seconds. (I used a Vitamix.)
  5. Pour the puree into the reserved skillet and bring to a boil over medium-high.
  6. Trim the chicken thighs of any excess fat to prevent the finished dish from becoming greasy.
  7. Nestle the chicken into the sauce, cover and cook over medium-low, stirring and flipping the chicken halfway through, until tender and opaque when cut into with a paring knife, about 20 minutes. 
  8. Using tongs, transfer the chicken to a large plate and set aside until cool enough to handle, 10 to 15 minutes. Using 2 forks, shred into bite-size pieces.
  9. While the chicken cools, bring the sauce to a simmer over medium-high and cook, stirring, until thickened and reduced to 1 cup, about 10 minutes.
  10. Stir the shredded chicken into the sauce, then taste and season with salt and pepper.
  11. Warm the tortillas. (I microwave them in a tortilla warmer with a damp towel for about 1 minute.)
  12. Serve the shredded chicken with warm tortillas and assorted toppings, as desired.

One-Skillet Hot Sausage and Napa Cabbage Stir-Fry

This was a crowd-pleasing dish to make with my beautiful CSA Napa cabbage. As suggested in the original recipe, we ate it in flour tortillas but it would also be delicious served over rice. It was reminiscent of one of our family favorites, Thai One-Pot.

This recipe was adapted from Bon Appétit, contributed by Claire Saffitz. I modified the proportions, used scallions instead of chives, and wilted all of the Napa cabbage.

Yield: Serves 4 to 6

  • 1 1-inch piece ginger, peeled, finely grated
  • 6 garlic cloves, finely grated
  • 16 to 18 ounces hot Italian sausages, casings removed (I used 6 sausages)
  • 2 tablespoons (or more) vegetable oil
  • 8 ounces shiitake mushrooms, thinly sliced
  • 6 to 10 cups very thinly sliced Napa cabbage, divided (I used 1/2 of a large head)
  • 2 to 3 tablespoons seasoned rice vinegar
  • 2 to 3 tablespoons soy sauce
  • 1/3 cup thinly sliced scallions or chives
  • 1 teaspoon toasted sesame oil
  • 2 teaspoons sesame seeds
  • 8 large flour tortillas or mu-shu wraps, warmed (I used Trader Joe’s handmade flour tortillas)
  • hoisin sauce and Sriracha, for serving, as desired
  1. Using your hands or a wooden spoon, work ginger and garlic into sausage in a medium bowl.
  2. Heat 2 tablespoons vegetable oil in a large skillet, preferably cast iron (I used a 14″ stainless skillet), over medium-high and cook sausage mixture, breaking up with a wooden spoon, until browned, crisp, and cooked through, 6–8 minutes. Using a slotted spoon, transfer sausage mixture to a clean bowl.
  3. Increase heat to high and cook mushrooms in the fat in the skillet, tossing often, until browned and starting to release their juices, about 4 minutes (if skillet looks dry at any point, add a bit more oil).
  4. Add half of cabbage and cook, tossing often, until cabbage is wilted and tender, about 4 minutes. (I incorporated all of the cabbage, a handful at a time.)
  5. Drizzle in vinegar and soy sauce and cook, tossing, until liquid is mostly reduced and skillet is dry in spots, about 2 minutes.
  6. Remove skillet from heat and incorporate sausage and remaining cabbage (if reserved) into stir-fry.
  7. Drizzle with sesame oil and sprinkle with scallions/chives and sesame seeds.
  8. Serve stir-fry with tortillas, hoisin sauce, and Sriracha for making individual wraps.

Duck Tacos with Refried Black Beans

I usually think of duck meat as being too fatty to agree with me. 😉 After seeing Sara Moulton make these tacos, she convinced me to give it another chance. In this dish, the fatty skin is removed and the shredded duck meat was very moist and flavorful.

I often see the vacuum-sealed, cooked rotisserie duck at Costco. On my last visit, when most the fresh poultry was out of stock and the rotisserie chicken was limited to one per visit, there was plenty of rotisserie duck available. 🙂 These tacos could also be made with rotisserie chicken, of course, but this was a nice change. My son thought that they were “next-level.”

This recipe was adapted from Sara’s Weeknight Meals, via SaraMolton.com. I doubled the original recipe to use the entire rotisserie duck and added additional toppings. The leftover filling was just as delicious reheated and served with fresh toppings and taco shells. The healthy and quick refried black beans were fabulous too.

Yield: Serves 4 to 6

For the Spice Blend:

  • 1/2 tsp garlic powder
  • 1/2 tsp onion powder
  • 1/2 tsp dried oregano, crumbled
  • 1/2 tsp chili powder
  • 1/4 tsp coarse salt
  • 1/8 tsp cayenne pepper

For the Filling & Toppings:

  • 1 half of a cooked rotisserie duck
  • 1 T vegetable oil (I used canola oil)
  • 3 T water
  • 12 ready-to-eat regular-size taco shells, warmed according to package directions
  • chopped or shredded iceberg lettuce or finely-shredded cabbage, for serving
  • chopped tomatoes (I used chopped grape tomatoes)m for serving
  • shredded Monterey Jack or cheddar cheese or a Mexican cheese blend, to taste, for serving
  • prepared salsa, for serving
  • light sour cream, for serving
  • cilantro, for serving
  • diced avocado, for serving
  • canned diced chilies, for serving
  • hot sauce, for serving (I used Chipotle Cholula)
  • rice, for serving, optional
  • Refried beans, recipe below

To Make the Spice Blend:

  1. Add the ingredients to a bowl and stir well to combine.

To Make the Fillings, Toppings, & To Serve:

  1. Remove the skin from the duck meat. Shred enough meat from one half of a rotisserie cooked duck to yield 2 1/2 cups.
  2. Heat the oil in a nonstick skillet over medium heat.
  3. Add the shredded duck and spice blend and stir to combine.
  4. Stir in the water and cook, covered, for 3 minutes, stirring frequently.
  5. Divide the filling among the taco shells.
  6. Top with the lettuce and tomatoes, and sprinkle with cheese.  Top with cilantro, avocado, diced chiles, and hot sauce, as desired. Spoon on the salsa and sour cream, if using.
  7. Serve immediately with refried beans on the side. (The refried beans can be used as an additional taco filling, if desired.)

For the Refried Beans:

  • 2 T vegetable oil (I used canola oil)
  • 1 small yellow onion, finely chopped (I used 1 large yellow onion when I doubled the recipe)
  • 3 garlic cloves, minced
  • 1/2 tsp ground cumin
  • 1/2 tsp chili powder
  • 1 1/2 cups thoroughly cooked black beans or one 15.5 oz can black beans, rinsed and drained
  • 1/2 cup chicken stock or water
  • coarse salt and freshly ground black pepper, to taste
  • chopped cilantro, for garnish
  1. Heat the oil in a large skillet over medium heat.
  2. Add the onion and cook, stirring often, until softened, about 5 minutes.
  3. Add the garlic and cook for 1 minute longer.
  4. Stir in the cumin and chili powder and cook for 1 minute.
  5. Add the beans and chicken stock, cover, and cook until the beans are very soft and the flavors are well blended, about 5 minutes.
  6. Use a fork or potato masher to coarsely mash the beans.
  7. Season with salt and pepper, to taste. Garnish with chopped cilantro and serve.

Note: Cooked, rotisserie duck can be purchased online @Maple Leaf Farms.com.

Cilantro-Lime Chicken Thighs

This is another Mexican-inspired chicken dish. I coarsely hand-shredded this juicy chicken to serve as a taco filling with loads of toppings. It would also be wonderful in a burrito bowl or simply on it’s own with street corn, refried beans and rice. Yum.

The recipe was adapted from DamnDelicious.com. I marinated the chicken for 6 hours and it was very flavorful. I broiled the chicken instead of pan frying it as well. It would also be perfect grilled.

Yield: Serves 4

  • 1/4 cup chopped fresh cilantro leaves, plus more for garnish
  • 2 T extra virgin olive oil
  • 2 T freshly squeezed lime juice, plus wedges for serving
  • 1 T lime zest
  • 2 tsp chili powder
  • 1 tsp ground cumin
  • 1 tsp kosher salt
  • 1 tsp freshly ground black pepper
  • 2 pounds boneless, skinless chicken thighs (I used 4 large thighs)
  • cooked rice and refried beans, for serving, as desired
  • guacamole or avocado slices, for serving, as desired
  • corn, red onion, shredded cheese, tomatoes, and salsa, for serving, as desired
  • hot sauce and sour cream, for serving, as desired
  • flour or corn tortillas for serving as a burrito or tacos, optional
  1. In a medium bowl, combine 1/4 cup chopped cilantro, olive oil, lime juice, lime zest, chili powder, cumin, salt and pepper.
  2. In a gallon size Ziploc bag or large bowl, combine chicken and cilantro mixture; marinate for at least 2 hours to overnight, turning the bag occasionally. (I marinated the chicken for 6 hours.)
  3. Preheat broiler or grill.
  4. Remove the chicken from the marinade and place on a rimmed baking sheet, if broiling.
  5. Cook the chicken until golden brown and cooked through, reaching an internal temperature of 165 degrees F, about 4-5 minutes per side.
  6. Let rest and cool slightly to coarsely hand-shred (to use as a taco or burrito filling).
  7. Serve with rice and refried beans and assorted toppings, as desired.

Kofta Sandwiches with Tomatoes & Cucumber-Yogurt Sauce

These sandwiches are a great weeknight dinner. Using ground turkey or chicken instead of beef, lamb or pork makes them a little bit lighter as well.

After seeing sandwiches served in taco racks at NYC’s Chelsea Market, I used taco racks to assemble these messy sandwiches. Genius! 😉

This recipe was adapted from Martha Stewart’s Everyday Food. I used ground turkey instead of ground chicken and added lemon juice, garlic, and herbs to the sauce.

Yield: Serves 4

  • 1.25 pounds ground turkey or chicken
  • 1/2 white onion, diced small
  • 1/3 cup chopped fresh parsley and cilantro
  • 1/2 tsp ground cumin
  • 1/2 tsp red pepper flakes
  • coarse salt and freshly ground black pepper
  • 1/2 cucumber, diced large (about 1 1/3 cups)
  • 1/2 cup plain Greek yogurt
  • freshly squeezed lemon juice, from 1/2 a lemon, more to taste
  • 1 large clove garlic, minced
  • 2 to 4 T minced fresh dill
  • 2 T vegetable oil
  • 2 handfuls of grape tomatoes, sliced lengthwise or 2 medium tomatoes, cut into 1/4-inch thick slices
  • 4 small naan or pitas, warmed
  • 1/2 cup fresh mint or cilantro, for serving
  • sliced or chopped red onion, for serving, optional
  1. In a large bowl, combine ground meat, diced onion, chopped parsley/cilantro, cumin and red pepper flakes. Season with salt and pepper. Mix until well combined.
  2. Using your hands, form mixture into 8 oval patties.
  3. In a medium bowl, toss together cucumber, yogurt, lemon juice, garlic, and dill; season with salt and pepper. Add additional lemon juice, if desired.
  4. In a large skillet, heat oil over medium to medium-high. Cook patties until browned on all sides and cooked through, 8 to 12 minutes. (I cooked the meatballs until the internal temperature reached 165 degrees.)
  5. Divide patties and tomatoes among warm naan or pitas. (I assembled the sandwiches in taco racks.)
  6. Top with cucumber-yogurt sauce and mint or cilantro. Top with red onion, if desired.
  7. Fold to enclose (if not using taco racks) and serve.

Mushroom Tacos with Avocado-Tomatillo Sauce

More tacos to share! I served these full-flavored vegetarian tacos for our Cinco de Mayo celebration this year- with margaritas, chips, and guacamole, of course.

The recipe was adapted from The Essential Mexican Instant Pot Cookbook: Authentic Flavors and Modern Recipes for your Electric Pressure Cooker by Deborah Schneider. I used a stove top pressure cooker instead of an instant pot, but this filling could be prepared just as easily without using a pressure cooker at all. The creamy avocado sauce was amazing!

The original recipe is for “quesotacos” which the author describes as black-belt street cooking, made by browning a layer of cheese right on a griddle, scooping it up with a tortilla, and using that to wrap the filling. I opted to serve the filling over the shredded cheese in a traditional taco form. This wonderful filling is also used in enchiladas in this book. Yum!

Yield: Serves 4 to 6, with about 1 cup of Avocado-Tomatillo sauce

For the Avocado-Tomatillo Sauce:

  • 1 ripe avocado, halved, pitted, and peeled
  • 2 tomatillos, husked and roughly chopped
  • 1/4 cup diced white onion
  • 1/2 serrano chile, stemmed (and seeded, if desired)
  • 1 T water
  • 1/2 tsp kosher salt
  • leaves from 2 sprigs cilantro, chopped (about 1 T)

For the Mushroom Tacos:

  • 3 T olive oil
  • 1 large white onion, cut into 1-inch dice (2 cups) (I reserved 1/4 cup of the onion for the sauce)
  • 9 garlic cloves, minced (3 T)
  • 1/2 cup water
  • 2 tsp kosher salt
  • 2 large portobello mushrooms, cut into 1-inch pieces
  • 8 to 10 oz cremini mushroom, sliced or cut into quarters
  • 8 to 10 oz white button mushrooms, sliced or cut into quarters
  • 1/4 cup chopped fresh cilantro leaves or shredded fresh epazote
  • 1/2 tsp freshly ground black pepper
  • 1/8 tsp red pepper flakes
  • 2 poblano chiles, roasted, seeded, peeled, and cut into 1/2-inch pieces
  • 12 corn or corn-wheat tortillas
  • 1 1/4 cups shredded Monterey Jack cheese
  • 3/4 cup crumbled feta cheese or grated Cojita cheese
  • Avocado-Tomatillo sauce, for serving
  • chopped fresh cilantro, for serving

To Make the Sauce:

  1. In a food processor, combine the avocado, tomatillos, onion, Serrano Chile, water, and salt.
  2. Pulse until fairly smooth, about 10 pulses, scraping down the bowl as needed.
  3. Add the cilantro and pulse a couple of times to combine.
  4. Transfer to a bowl, then taste and adjust seasoning with salt if needed.

Note: The Sauce will keep well for 24 hours, covered and refrigerated.

To Make the Filling:

  1. Place poblano chiles on a foil-lined baking sheet.
  2. Broil the poblano chiles in the oven, rotating every 5 to 7 minutes, until charred and blistered on all sides. (I set my oven to Broil Max at 450F.)
  3. Wrap the chiles in the foil lining, to loosen the charred skin with steam.
  4. When cool enough to handle, peel, seed and dice the roasted chiles.
  5. Heat the oil in a pressure cooker, instant pot, or dutch oven.
  6. Sauté the onions, stirring occasionally, for about 5 minutes, until golden brown.
  7. Add the garlic and cook, stirring, for about 1 minute.
  8. Add the water, salt, portobello mushrooms, cremini mushrooms, and white mushrooms, then stir in the cilantro/epazote.
  9. If using a pressure cooker or instant pot, secure the lip and cook on high for 1 minute. (Alternatively, cook the mixture in a Dutch oven until mushrooms have released a significant amount of moisture and are lightly browned.)
  10. Use the quick pressure release. (I rotate the valve into a perpendicular position on the top of my pressure cooker.)
  11. Set a colander in a bowl. Pour the mushroom mixture into the colander, reserving the liquid in the bowl.
  12. Set the colander aside and return the liquid to the pot.
  13. Bring the liquid to a boil, and cook for 10 to 15 minutes, until syrupy and very thick.
  14. Return the mushroom mixture to the pot and stir in the black pepper, pepper flakes, and roasted and diced poblano chiles.
  15. Cook, stirring occasionally, for about 3 minutes, until heated through.
  16. Taste and adjust seasoning with salt and pepper, as desired.
  17. Serve the mushroom filling in warm tortillas over shredded Monterey Jack and crumbled feta. Top with sauce, minced cilantro, and extra cheese, as desired.

For “Quesotacos”:  Heat a cast iron skillet over medium-high heat. Lightly oil, place a tortilla in the pan and toast for about 3 minutes, until golden brown. Turn the tortilla and top with 2 T of Jack cheese and 1 T of feta/Cojita. Continue toasting until cheese is melted, about 3 minutes more. Top with mushroom mixture, sauce, sprinkle of cheese, and pinch of cilantro. Serve immediately.

For a Grilled Corn & Mushroom Variation: Add kernels from 2 ears of grilled corn to the pot after adding the roasted poblano chiles.

Enter your email address to follow this blog and receive notifications of new posts by email.

Join 1,459 other subscribers

Recipe Categories

my foodgawker gallery
my photos on tastespotting

Top Posts & Pages

Mexican Sweet Corn Cake (Pan de Elote)
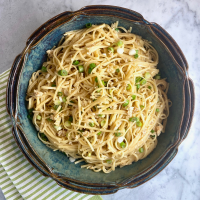
Vietnamese-American Garlic Noodles
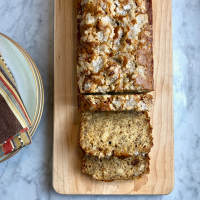
Banana Bread with Crunchy Sugar Topping
Churro Cupcakes with Cinnamon Cream Cheese Frosting
One-Pan Orzo with Spinach & Feta
One-Pot Crispy Gnocchi with Burst Tomatoes & Fresh Mozzarella
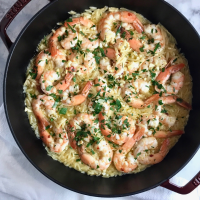
One-Pan Shrimp Scampi with Orzo
Ethiopian Chickpea Stew (Shiro Wat) & Stewed Collard Greens (Gomen Wat)
Samin Nosrat's Buttermilk-Brined Roast Chicken
Ottolenghi's Butternut Squash Lasagna Pie
Foodista Food Blog of the Day Badge