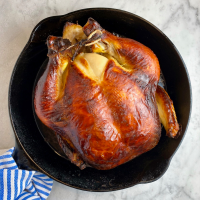
Skillet Chicken Meatballs with Mustard-Wine Sauce

I have a few meatball recipes to share. They are always a crowd-pleaser in my house and are a wonderful weeknight meal.

My husband and I are huge fans of mustard chicken so I was thrilled to see a mustard chicken meatball recipe! 😉 The recipe was adapted from Tieghan Gerard’s halfbakedharvest.com via The New York Times, contributed by Julia Moskin.

We ate the dish with a green salad and crusty bread to mop up the indulgent sauce. Amazing.

Yield: Serves 4 (15 to 20 meatballs)

  • 1 pound ground chicken (I used 92% lean)
  • 1 large egg, beaten
  • 5 T panko bread crumbs
  • coarse salt and freshly ground black pepper
  • 1 T extra-virgin olive oil, plus more for your hands
  • 2 slices thick-cut bacon, chopped
  • 8 ounces shiitake (tough stems removed) or 10 oz cremini mushrooms, sliced (about 3 packed cups)
  • 2 T salted butter
  • 2 shallots, chopped
  • 1 T fresh thyme leaves, plus more for serving
  • 1 pinch crushed red pepper flakes
  • 5 garlic cloves, finely chopped or grated
  • 1 1/2 cups dry white wine, such as pinot grigio or sauvignon blanc
  • 3/4 cup heavy cream (or milk of your choice)
  • 1 T Dijon mustard
  • crusty bread, for serving, optional
  1. In a medium bowl, combine the ground chicken, egg, panko and a pinch each of salt and pepper.
  2. Using a cookie scoop, ration the mixture into 1-inch portions, making 15 to 20 meatballs.
  3. Coat your hands with a bit of olive oil, then roll each scoop into a 1-inch ball, placing them on a plate.
  4. Place the bacon in a large skillet over medium heat. (I used a 12-inch cast iron skillet with a silicone frywall insert to contain spatters.) Cook, stirring occasionally, until the bacon is crispy and the fat has rendered, about 5 minutes.
  5. Using a slotted spoon, transfer the bacon to a large plate, reserving the fat in the skillet.
  6. Add the meatballs to the same skillet over medium heat. Cook, turning every couple of minutes, until browned and crisp, about 5 minutes. Transfer the meatballs to the plate with the bacon.
  7. Add the 1 tablespoon olive oil to the same skillet over medium heat. When the oil shimmers, add the mushrooms and cook, stirring occasionally, until slightly softened, about 3 minutes.
  8. Add the butter, shallots, thyme and a pinch each of salt, black pepper and crushed red pepper. Cook, stirring occasionally, until the mushrooms are golden brown and the shallots have softened, 3 to 5 minutes.
  9. Add the garlic and stir until fragrant, 1 minute more. Transfer the mushroom mixture to the plate with the bacon and meatballs.
  10. Pour the wine and 1/2 cup of water into the skillet. Cook, scraping up any browned bits from the bottom, until reduced slightly, about 8 to 10 minutes.
  11. Whisk in the cream and mustard.
  12. Return the bacon, meatballs and mushroom mixture to the skillet and simmer over medium, stirring occasionally, until the sauce is slightly thickened and the meatballs are cooked through, 8 to 10 minutes, adding a few tablespoons of water if needed to keep the liquid saucy.
  13. Garnish with additional thyme.
  14. Serve from the skillet- placing the meatballs on plates and spooning the sauce over them.

Dulce de Leche Swirl Ice Cream

After seeing authentic dulce de leche in the store, I felt compelled to make a caramel swirl ice cream using my new favorite vanilla ice cream base, from the French-Style Roasted Strawberry-Vanilla Ice Cream that I made earlier this season.

The vanilla ice cream recipe used in the base was adapted from Food and Wine, contributed by Fany Gerson. Dulce de leche is an ice cream flavor that everyone in my house enjoys. 🙂

For the Vanilla Ice Cream Base:

  • 2 cups heavy cream 
  • 1 cup whole milk 
  • 1 vanilla bean pod 
  • 6 large egg yolks 
  • 5 T (1/3 cup) granulated sugar  
  • 1/4 tsp kosher salt

For the Swirl:

  • about 7 oz canned Dulce de Leche (I used Nestle La Lachera), or more, as needed
  1. Stir together cream and milk in a medium saucepan.
  2. Split vanilla bean pod lengthwise; scrape seeds. Add scraped seeds and vanilla pod halves to mixture in saucepan. Cook over medium-low, undisturbed, until mixture just comes to a simmer.
  3. Remove from heat. Cover and let steep 45 minutes to 1 hour.
  4. Return steeped cream mixture to heat over medium-low; cook, undisturbed, until mixture just comes to a simmer.
  5. Meanwhile, whisk together egg yolks, sugar, and salt in a medium-size heatproof bowl.
  6. Gradually whisk warm cream mixture into yolk mixture in bowl. (It’s important to slowly add the hot cream mixture to the egg mixture, whisking constantly and never bringing to a boil, to ensure the eggs don’t scramble.)
  7. Transfer cream-yolk mixture to saucepan. Cook over medium-low, stirring constantly, until mixture thickens and coats the back of a spoon, 6 to 10 minutes, making sure it doesn’t bubble. (I cooked mine for 7 minutes.)
  8. Remove from heat. Pour through a fine wire-mesh strainer into a medium-size heatproof bowl; discard solids.
  9. Place bowl in a large bowl filled with ice water. Let stand, stirring often, until mixture reaches room temperature, about 8 minutes. (I kept mine in the ice bath until the ice melted.) Remove.
  10. Cover bowl with plastic wrap or transfer base to a sealable container; seal and refrigerate until cold, at least 6 hours or up to 12 hours.
  11. Pour base into frozen freezer bowl of an ice cream maker; proceed according to manufacturer’s instructions. (I churned mine for 25 minutes.)
  12. Transfer a few scoops of the vanilla ice cream into a shallow container, such as a glass loaf pan, and spread into an even layer.
  13. Top with some of the dulce de leche; spread into an even layer. Repeat the layers, finishing with ice cream on top, until all of the ice cream base has been transferred.
  14. Cover, and freeze until firm, at least 2 hours. (I press a sheet of plastic wrap directly on the surface of the ice cream and then top the container with an additional sheet of plastic wrap.)
  15. Store in an airtight container in freezer up to 3 weeks.

French-Style Roasted Strawberry-Vanilla Ice Cream

This is the most amazing strawberry ice cream I’ve ever experienced. The original recipe states that “the key to French-style ice cream is making a base so good you could eat it without freezing it.” The base was incredibly creamy and rich. The roasted strawberries had concentrated flavor and a perfectly tender texture. Wow.

This recipe was adapted from Food and Wine, contributed by Fany Gerson. I loved that the vanilla bean steeped in the cream for an hour before being removed. My finished ice cream had a bit of a custard swirl because I didn’t fully mix the roasted berries into the custard before churning- still delicious but I would correct this next time.

To celebrate my birthday, my daughter made pizzelle bowls for serving the ice cream. It was a very special celebratory dessert and perfect way to use our freshly picked strawberries this season.

Yield: Serves 8

For the Roasted Strawberries:

  • 1 pound fresh strawberries, stemmed and halved if small or quartered if large (about 3 1/2 cups) 
  • 2 T granulated sugar  
  • 2 T light corn syrup or golden syrup 
  • 1/8 tsp kosher salt 

For the Vanilla Ice Cream Base:

  • 2 cups heavy cream 
  • 1 cup whole milk 
  • 1 vanilla bean pod 
  • 6 large egg yolks 
  • 5 T (1/3 cup) granulated sugar  
  • 1/4 tsp kosher salt 

To Make the Roasted Strawberries:

  1. Preheat oven to 300°F, preferably on convection roast.
  2. Toss together strawberries, sugar, corn syrup, and salt in a 13×9-inch baking dish. (I used a glass pyrex baking dish.)
  3. Roast in preheated oven, stirring occasionally, until strawberries are soft and darker in color and juice is thickened, 30 to 40 minutes. 
  4. Using a potato masher, lightly crush strawberries in baking dish, making sure you have a chunky mixture.
  5. Let cool completely, about 1 hour. Transfer to a resealable container, and refrigerate until ready to churn or up to 2 days.

To Make the Vanilla Ice Cream Base & To Finish:

  1. Stir together cream and milk in a medium saucepan.
  2. Split vanilla bean pod lengthwise; scrape seeds. Add scraped seeds and vanilla pod halves to mixture in saucepan. Cook over medium-low, undisturbed, until mixture just comes to a simmer.
  3. Remove from heat. Cover and let steep 45 minutes to 1 hour.
  4. Return steeped cream mixture to heat over medium-low; cook, undisturbed, until mixture just comes to a simmer.
  5. Meanwhile, whisk together egg yolks, sugar, and salt in a medium-size heatproof bowl.
  6. Gradually whisk warm cream mixture into yolk mixture in bowl. (It’s important to slowly add the hot cream mixture to the egg mixture, whisking constantly and never bringing to a boil, to ensure the eggs don’t scramble.)
  7. Transfer cream-yolk mixture to saucepan. Cook over medium-low, stirring constantly, until mixture thickens and coats the back of a spoon, 6 to 10 minutes, making sure it doesn’t bubble. (I cooked mine for 7 minutes.)
  8. Remove from heat. Pour through a fine wire-mesh strainer into a medium-size heatproof bowl; discard solids.
  9. Place bowl in a large bowl filled with ice water. Let stand, stirring often, until mixture reaches room temperature, about 8 minutes. (I kept mine in the ice bath until the ice melted.) Remove.
  10. Cover bowl with plastic wrap or transfer base to a sealable container; seal and refrigerate until cold, at least 6 hours or up to 12 hours.
  11. Stir together strawberry mixture and ice cream base in a bowl.
  12. Pour mixture into frozen freezer bowl of an ice cream maker; proceed according to manufacturer’s instructions. (I churned mine for 25 minutes.)
  13. Transfer to a shallow container, such as a glass loaf pan, cover, and freeze until firm, at least 2 hours. (I press a sheet of plastic wrap directly on the surface of the ice cream and then top the container with an additional sheet of plastic wrap.)
  14. Store in an airtight container in freezer up to 3 weeks.

French Apple Cake with Brown Butter

I almost made this custardy apple cake instead of an apple pie for our Thanksgiving feast. Then I realized that it was a better plan to make both! 😉 We enjoyed the cake on Thanksgiving Eve- perfect. I loved that this version incorporated browned butter.

This recipe was adapted from 177milkstreet.com, contributed by Erica Bruce. I modified the method and substituted apple cider for the brandy. I would recommend baking the cake the morning it will be served because it requires an extended cooling time prior to slicing and serving.

Yield: One 9-inch cake (about 8 to 10 servings)

  • 8 T (1 stick) salted butter, plus more for pan
  • 1/4 tsp ground allspice
  • 1 1/2 pounds (about 4 apples) Granny Smith apples, peeled, cored and cut into 1/4-inch slices
  • 1 pound (about 2 apples) Braeburn or Golden Delicious apples, peeled, cored and cut into 1/4-inch slices
  • 156 g (12 T) white sugar, divided
  • 1/4 teaspoon table salt
  • 2 T apple cider, brandy or Calvados
  • 86 grams (2/3 cup) all-purpose flour, plus more for pan
  • 1 tsp baking powder
  • 2 large eggs
  • 2 tsp pure vanilla extract
  • vanilla ice cream, for serving, optional
  1. Heat the oven to 375ºF, preferably on convection, with a rack in the middle position.
  2. Coat a 9-inch springform pan with butter, dust evenly with flour, then tap out the excess.
  3. In a 12-inch skillet over medium-high, melt the butter. Cook, swirling the pan frequently, until the milk solids at the bottom are golden brown and the butter has a nutty aroma, 1 to 3 minutes. (I used a 12-inch stainless steel all-in-one pan.)
  4. Pour into a small heatproof bowl without scraping out the skillet. The remaining butter in the pan is used to sauté the apples.
  5. Stir the allspice into the browned butter and set aside.
  6. Add all of the apples, 2 tablespoons of the sugar and the salt to the still-hot skillet and set over medium-high. Cook, stirring occasionally, until all moisture released by the apples has evaporated and the slices are beginning to brown, 12 to 15 minutes.
  7. Add the apple cider (or brandy) and cook until evaporated, 30 to 60 seconds.
  8. Transfer to a large plate, spread in an even layer and refrigerate uncovered until cool to the touch, 15 to 20 minutes.
  9. In a small bowl, whisk together the flour and baking powder.
  10. In a large bowl, whisk together the eggs, vanilla and 9 tablespoons of the remaining sugar.
  11. Gradually whisk in the browned butter.
  12. Add the flour mixture and stir with a rubber spatula until smooth; the batter will be very thick.
  13. Add the cooled apples and fold until evenly coated with batter.
  14. Transfer to the prepared springform pan, spread in an even layer and sprinkle with the remaining 1 tablespoon sugar. Place pan on a parchment paper-lined baking sheet.
  15. Bake until deeply browned, about 30 minutes on convection or up to 35 to 40 minutes in a standard oven.
  16. Let cool completely in the pan on a wire rack, about 2 hours. Run a knife around the inside of the pan and remove the sides before slicing.
  17. Serve with vanilla ice cream, if desired.

Note: Don’t slice the cake until it has fully cooled; if it is at all warm, the texture at the center will be too soft.

Parisian Corn Sablés

These simple shortbread-style cookies were minimally sweet with a perfectly crumbly texture. We enjoyed them plain and sandwiched with jam.

This recipe is from Apollonia Poilâne via The New York Times, contributed by Dorie Greenspan. They are included in the book “Poilâne, The Secrets of the World-Famous Bread Bakery,” by Apollonia Poilâne, who heads the legendary Parisian boulangerie. According to the article, the desserts made in the shop are bread-bakers pastries, described as as “less sweet, less fussy and less fussed over.” I chilled the dough in logs rather than rolling and cutting as a shortcut.

Yield: about 60 cookies

  • 125 grams (1/2 cup plus 2 T) granulated sugar
  • 1 large egg plus 1 large egg yolk, at room temperature
  • 250 grams unsalted butter (2 1/4 sticks, 1 cup plus 2 tablespoons) cut into cubes, softened until creamy
  • 240 grams (2 cups) corn flour
  • 240 grams (1 3/4 cups plus 2 tablespoons) all-purpose flour
  • jam, for sandwiching the cookies, optional (I used Bonne Maman Four Fruits Preserves)
  1. In a large bowl, working with a mixer on medium speed, beat the sugar, egg and egg yolk until pale and creamy, about 2 minutes.
  2. Add the butter, and beat until well blended, about 2 minutes.
  3. Add the corn flour and all-purpose flour to a medium bowl, and whisk until combined.
  4. Reduce the mixer speed to low, add the flour mixture and mix until just incorporated.
  5. Turn the dough out onto a sheet of plastic wrap. Divide the dough in half, and using parchment paper, shape into 2 logs, about 1 1/4-inches in diameter.
  6. Wrap the logs tightly in plastic, and refrigerate for 30 minutes. I place the logs in wrapping paper cardboard to maintain the shape. (I refrigerated the dough overnight- and even longer for a second batch.)(The dough can be frozen for up to 3 months.)
  7. To bake, line two baking sheets with parchment paper. Position the racks in the upper and lower thirds of the oven and preheat to 350 degrees, preferably on convection.
  8. Working with 1 log of dough at a time, slice the dough into 1/4-inch thick rounds, rotating the log between slices to make more even slices.
  9. Place the rounds 1/2-inch apart on the baking sheets. (I placed 12 cookies per sheet.)
  10. Bake the cookies until the centers are set and the edges are very lightly browned, 12 minutes on convection. Rotate the pans from top to bottom and front to back halfway through the baking time.
  11. Immediately transfer the cookies to a wire rack, and let cool completely.
  12. Serve plain or sandwiched with jam. Store the cookies in an airtight container for up to 1 week.

I shared these cookies with a friend and she shared this beautiful photo of them with me. ❤

Buttery Apple Crêpes with Cinnamon Custard & Salted Caramel Sauces

Crêpes have always been special to my family because my dad made them for breakfast on Sundays when I was growing up. We always make sure to have them at least once a year- on Christmas morning. We typically eat them simply sprinkled with sugar and occasionally with jam or fresh fruit as well.

I made these fancy crêpes for our celebratory Valentine’s Day dessert from a crêpe cookbook that my sister gave me for my birthday. ❤ I loved the browned butter in the crêpe batter. As a sauce fan, I also loved that these crêpes were served with two wonderful sauces.

This recipe was adapted from Crêpes: 50 Savory and Sweet Recipes by Martha Holmberg. I made the sauces and crêpe batter a day in advance. Delicious!

Yield: Makes 6 to 8 filled crêpes plus extra crêpes and sauce

For the Salted Caramel Sauce:

Yield: 3/4 cup (180 ml)

  • 100 g (1/2 cup) granulated sugar
  • 2 tsp light corn syrup
  • 6 T heavy cream or crème fraîche
  • 1 T unsalted butter
  • 1/8 tsp pure vanilla extract
  • 1/4 tsp coarse salt or coarse sea salt
  1. Put the granulated sugar, corn syrup, and 2 tablespoons of water in a small, heavy-bottomed saucepan over medium-high heat. Bring to a boil, stirring just until the sugar is beginning to dissolve.
  2. Let the mixture boil without stirring, occasionally swirling the pan, until it is a deep amber, very fragrant, and you can see tiny wisps of smoke, 4 to 12 minutes. Watch carefully!
  3. Remove the saucepan from the heat and carefully pour in a small amount of the cream; it will bubble up furiously. Whisk in remaining cream a little at a time so it doesn’t bubble over.
  4. Whisk in the butter, vanilla, and salt until the caramel is very smooth.
  5. Transfer to a serving bowl and let it cool to room temperature; it will thicken as it cools.
  6. Serve warm or at room temperature. (I made it a day in advance and refrigerated it overnight. I brought it to room temperature prior to serving.)

Note: Stored in an airtight container, the finished sauce will keep in the refrigerator for 1 month or in the freezer for 3 months.

For the Cinnamon Custard Sauce (Crème Anglaise):

Yield: 1 cup (240 ml)

  • 1/2 cup (120 ml) whole milk
  • 1/2 cup (120 ml) heavy cream
  • 2 large egg yolks
  • 50 g (1/4 cup) lightly packed light or dark brown sugar
  • 1/2 tsp ground cinnamon
  • pinch of coarse salt or sea salt flakes
  1. Heat the milk and cream in a medium saucepan over medium heat until it’s just beginning to steam. Watch carefully! Don’t let it boil- it will change the flavor.
  2. Meanwhile, in a medium bowl with a spout, whisk together the egg yolks, brown sugar, cinnamon, and salt until well blended but not foamy.
  3. Slowly pour half of the hot milk-cream mixture into the bowl with the egg mixture, whisking constantly and quickly.
  4. Return the pan with the remaining milk and cream to the heat and whisk the yolk-cream mixture into the pan.
  5. Switch the whisk to a heat-proof rubber spatula or a wooden spoon, and gently cook the sauce, scraping the bottom and sides of the pan, until the custard thickens and registers 175 to 180 F (80 to 82 C) on a candy or instant-read thermometer.
  6. Transfer to a serving bowl and let cool to room temperature. Chill in the refrigerator until cold, about 2 hours.

Notes: Half & Half can be substituted for the combination of whole milk and heavy cream. The finished sauce will keep for 3 days in the refrigerator.

For the Sautéed Apple Filling:

  • 4 T (55 g) unsalted butter
  • 4 firm, tart apples (800g / 1.75 lbs) such as Braeburns, peeled, cored, and cut into 1/2-inch (12mm) dice (I used 4 large (840g) Ruby Frost apples)
  • 75 g (6 T) granulated sugar
  • 1 tsp ground cinnamon
  • pinch of coarse salt
  1. Melt the butter in a large skillet over medium heat.
  2. When the butter is foamy, add the apples and cook, stirring occasionally, until they’re almost tender, 5 to 8 minutes.
  3. Sprinkle the apples with the granulated sugar, cinnamon, and salt and cook, stirring often, until the apples are tender when pricked with a fork, 3 to 4 minutes more.
  4. Remove the pan from the heat and let the apples cool slightly.

For the Brown Butter Crêpes:

Yield: 15 to 18 8-inch crêpes

  • 1 3/4 cups (420 ml) whole milk (can add up to a total of 2 1/4 cups (540 ml) to adjust consistency)
  • 4 large eggs
  • 1/2 tsp coarse salt
  • 190 g (1 1/2 cups) all-purpose flour
  • 6 T (85 g) unsalted butter
  • butter or vegetable oil, for the pan
  1. In a small pan over medium heat, melt the butter. Continue to cook until the butter turns golden brown and smells nutty and delicious. Pour melted butter and browned milk solids into a glass measuring cup with a spout to cool before using.
  2. Put 1 3/4 cups milk (420 ml), the eggs, and salt into a blender. (I used a Vitamix.) Process for a few seconds to blend.
  3. Remove the lid and add the flour. Cover and blend until very smooth, about 20 seconds.
  4. Remove the lid, pour in the browned butter- including the toasty brown milk solids, cover, and process until combined, about 10 seconds more.
  5. Transfer the batter to a large glass measuring cup with a spout.
  6. Let the batter rest at least 5 minutes and up to 24 hours. (If resting for more than 30 minutes, store in the refrigerator.)
  7. Before making the crêpes, test the batter’s consistency: it should be as thick as heavy cream but not as thick as pancake batter. If it’s too thick, whisk in up to 1/2 cup (120 ml) of the remaining milk.
  8. Heat an 8-inch (20 cm) crêpe pan over medium-low to medium heat until it’s hot enough to make a drop of water sizzle upon contact. (I always check to make sure the base of the handle is hot.)
  9. Using a heat-proof brush, coat the pan with oil. (Alternatively, use a folded paper towel to coat the pan with 1/2 teaspoon of butter. The butter should sizzle but not turn brown. Adjust the heat of the pan, if necessary.)
  10. Using a ladle, pour about 1/4 cup (60 ml) of the batter into the center of the pan, and at the same time lift the pan from the heat, tilting and turning it in all directions sos the batter spreads evenly across the bottom of the pan in a thin circle. (If the crêpe has any holes in it, quickly add a few drops of batter to fill them in. If there is excessive batter, immediately pour the excess back into the bowl of batter.)
  11. Cook the crêpe until the edges begin to dry and lift from the sides of the pan and the bottom is nicely browned, about 1 minute.
  12. Use a table knife, slim spatula or your fingers to lift the crêpe and quickly flip it over. Smooth out any folded edges or pleats and then cook unit the center is firm and the second side is browned, about 20 seconds more. (The first side is almost always prettier and more evenly browned so it is noted as the presentation side.)
  13. Slide the crêpe from the pan onto a large plate.
  14. Repeat with the remaining batter, adjusting the heat and wiping the pan with more oil or butter as you cook.
  15. The finished crepes can be stacked on each other as they are done.

Note: Leftover crêpes can be wrapped tightly and stored in the refrigerator for up to 3 days. If storing them in the freezer, lay pieces of waxed or parchment paper between them so that they don’t stick together. They will keep in the freezer for 2 to 3 months. To thaw, let the stack sit at room temperature until the crêpes are pliable, about an hour.

To Finish the Dish:

  1. Position a rack in the center of the oven and preheat to 425 F(220 C).
  2. Butter the bottom of a baking dish. (or use cooking oil spray) (I only baked 4 filled-crêpes at a time, so I used a small baking dish. If baking all at once, use a 9×13-inch baking dish. The crêpes should be tightly packed.
  3. Lay the crêpes presentation-side down on a clean work surface.
  4. Divide the apples equally among the crêpes, spooning them onto the bottom third of each one.
  5. To fold the crêpes, pull the bottom edge of each crêpe up and over the apples, then roll it up a half turn. Tuck in each side, and finish rolling up from the bottom.
  6. Arrange the crêpes seam-side down in a single layer in the prepared baking dish.
  7. Bake until heated through, 4 to 10 minutes.
  8. Spoon a thick ribbon of cinnamon custard on a dessert plate.
  9. Lay a crêpe over the custard sauce and drizzle the salted caramel sauce over the top. Serve immediately.

Everyday Soft French Bread

Recently, my friend’s husband made this wonderful bread. It was so delicious, she ran over to give us a few slices to sample. Lucky me! 🙂 She also shared the recipe, of course. This bread is completely different from a classic crusty baguette. It is soft, tender, and quite dense. The dough is more manageable and it can also be made from start to finish in a single day.

The recipe was adapted from The French Kitchen: Tales and Traditions of Everyday Home Cooking in France by Susan Herrmann Loomis. The texture and flavor of this loaf are reminiscent of my husband’s favorite sourdough sandwich bread, which also includes milk and butter in the dough. Both this loaf and the sourdough sandwich bread seem to be resistant to becoming stale- if they’re not eaten right away. 😉

Yield: One 18 by 3-inch (45 by 7.5 cm) loaf

For the Bread:

  • 250 ml (1 cup) whole milk
  • 1 tsp active dry yeast or instant yeast
  • 2 T granulated sugar
  • 1 tsp fine sea salt
  • 325 g to 360 g (2 1/4 to 2 1/2 cups) all-purpose flour (I used King Arthur), plus more for dusting
  • 2 T unsalted butter, melted and cooled

For the Glaze:

  • 2 tsp unsalted butter, melted
  • 1 tsp whole milk
  1. Scald the milk in a small saucepan over medium heat, just until it has tiny bubbles around the edge of the pot.
  2. Remove from heat and transfer to the bowl of a stand mixer fitted with the paddle attachment or to a large bowl.
  3. When the milk is slightly cooled (and no longer feels hot), sprinkle in the yeast and sugar. Let sit until some of the yeast has bubbled up to the top of the milk, about 5 minutes.
  4. Add the salt, stir, and slowly add half of the flour.
  5. Add the melted butter.
  6. Add up to 1 1/4 cups (187 g) of the remaining flour to form a fairly thick dough. If the dough is still soft and very sticky, add additional flour, 1 tablespoon at a time, until you get a dough that is firm, but not stiff. (I started with 325 g flour and incorporated an additional 20 g to achieve the desired consistency.)
  7. If using a stand mixer, knead the dough with the paddle attachment on low-speed for 5 minutes. Alternatively, turn the dough out onto a lightly floured work surface and knead by hand for 5 minutes.
  8. Form the dough into a ball, place in a lightly greased bowl, cover with a tea towel or plastic wrap, and let it rise in a warm spot until doubled in bulk, about 1 1/2 hours. (I used a proofing oven.)
  9. Preheat the oven to 375 degrees F (190 C) and position a rack in the center.
  10. Gently punch down the dough down. Pull to form it into a baguette shape measuring 18-inches by 3-inches (45 cm by 7.5 cm). (I formed mine into a 16-inch long shape because of the length of my baguette pan.) Crimp the ends.
  11. Let it rise until it is about one-third larger, about 30 minutes. (I placed it on a baguette pan in a proofing oven.)
  12. To make the glaze, melt the butter and the milk together, whisk to combine. Keep warm until ready to use.
  13. Brush the loaf with the glaze. (I used about 2/3 of the glaze.) Score the top of the loaf 4 or 5 times using a sharp knife, lame, or kitchen shears.
  14. Bake until the loaf is golden and baked though, about 25 minutes.
  15. Remove from the oven, brush the loaf with any residual glaze, and let cool before slicing.

Enter your email address to follow this blog and receive notifications of new posts by email.

Join 1,459 other subscribers

Recipe Categories

my foodgawker gallery
my photos on tastespotting

Top Posts & Pages

Mexican Sweet Corn Cake (Pan de Elote)
Vietnamese-American Garlic Noodles
Banana Bread with Crunchy Sugar Topping
Churro Cupcakes with Cinnamon Cream Cheese Frosting
One-Pan Orzo with Spinach & Feta
One-Pot Crispy Gnocchi with Burst Tomatoes & Fresh Mozzarella
One-Pan Shrimp Scampi with Orzo
Samin Nosrat's Buttermilk-Brined Roast Chicken
Ethiopian Chickpea Stew (Shiro Wat) & Stewed Collard Greens (Gomen Wat)
Italian Sausage & Mushroom Ragu with Pappardelle
Foodista Food Blog of the Day Badge