Veggie-Loaded Pad See Ew

I cannot resist trying a new version of my husband’s favorite Thai takeout dish. I loved that this one seemed a little bit healthier. 🙂

I incorporated broccolini and baby cauliflower, trimming the large stalks, as well as snow peas. The original recipe also suggests using a combination of Chinese broccoli, bell peppers, and carrots.

This recipe was adapted from Half Baked Harvest Super Simple: More than 125 Recipes for Instant, Overnight, Meal-Prepped, and Easy Comfort Foods by Tieghan Gerard. I used wide rice noodles and modified the proportions and method. It was fabulous.

Yield: Serves 4 to 6

  • 24 oz fresh wide rice noodles
  • 5 T dark soy sauce
  • 5 T light soy sauce
  • 2 T fish sauce
  • 2 T oyster sauce
  • 2 T honey
  • 4 T canola or vegetable oil, divided
  • 6 garlic cloves
  • 8 to 10 cups mixed vegetables, trimmed into similar sizes (I used 8 oz broccolini, 12 oz baby cauliflower, and a large handful of snow peas)
  • 1-2 jalapeño chilies, seeded and chopped
  • 4 large eggs, beaten
  • 4 chopped scallions or 2 T chopped cilantro, for garnish
  1. Rinse the rice noodles under cold water to separate. Break into 4 to 6-inch pieces and set aside.
  2. Combine the soy sauces, fish sauce, oyster sauce, honey, and 1/2 cup water in a small bowl.
  3. Heat 3 T of the oil in a large skillet over medium-high heat. (I used a 14-inch stainless steel skillet.)
  4. When the oil shimmers, add the garlic, vegetables, and jalapeño; cook until the vegetables are tender, about 5 minutes.
  5. Push the vegetables to one side of the pan.
  6. Add the remaining 1 T of oil to the empty side of the pan and then add the eggs. Cook, gently scrambling, until just cooked through, about 2 minutes.
  7. Add the noodles and soy sauce mixture to the skillet and gently toss to combine all of the ingredients.
  8. Simmer for several minutes or until the sauce coats the noodles.
  9. Top with chopped scallions or cilantro and serve immediately.

Beer Cheese

We enjoyed this delicious beer cheese before our St. Patrick’s Day shepherd’s pie and soda bread. Beer cheese is good. It may have been more Irish if I had incorporated an Irish beer but I used a Negra Modelo instead. 😉

This recipe was adapted from Bon Appétit, contributed by Amelia Rampe. I halved the recipe and modified the method and proportions. We used a small spreader to put the beer cheese on crackers and pretzels and dipped in celery and carrot sticks. Pita chips, water crackers, radishes, and/or cucumbers would also be great additions. It is very important that the dip is at room temperature prior to serving.

Yield: Serves 6

  • 4 oz mild cheddar, coarsely grated, at room temperature (about 1 cup)
  • 4 oz extra sharp cheddar, coarsely grated, room temperature (about 1 cup)
  • 2 garlic cloves, finely grated or pushed through a garlic press
  • 1 T Worcestershire sauce
  • 1/2 tsp Colman’s mustard powder (I used dry mustard)
  • 1/2 tsp hot sauce (I used Chipotle Cholula)
  • pinch of cayenne pepper
  • pinch of kosher salt
  • 6 to 7 T (3 oz)(about 3/8 cup) flat brown ale, at room temperature (see Note)(I used Negra Modelo), or more, to adjust consistency
  • finely chopped chives, for garnish
  • assorted crudités, such as carrots, radishes, cucumbers and/or celery, cut into 3-inch pieces
  • assorted crackers, such as Club crackers, saltines, rye crackers, and/or water crackers, for serving (I used pretzels too)
  1. Pulse grated cheese and garlic in a food processor until finely chopped.
  2. Add Worcestershire, mustard powder, hot sauce, cayenne, and salt and pulse until well combined (mixture will clump together).
  3. With motor running, slowly add beer and pulse until mixture is smooth but still grainy, about 2 minutes. (additional beer can be added to adjust the consistency)
  4. Transfer to a serving bowl and stir with a rubber spatula to combine.
  5. Top with chives.
  6. Serve with crudités and crackers.

Note: To bring the beer to room temperature faster and make it flat, you can whisk it on the stovetop over low heat or heat in a microwave in short increments, stirring in between. (I left the bottle open in the refrigerator overnight to make it flat. I brought it to room temperature on the counter with the cheeses.)

Do Ahead: Beer cheese can be made 2 days ahead; transfer to an airtight container and chill. Bring to room temperature before serving.

One-Pot Parmesan Roast Chicken with Egg Noodles

This is another easy, one-pot, comfort food, Dutch oven recipe. This dish takes much longer to cook, about 2 hours, but it is mostly unattended.

The chicken is stuffed with Parmesan rind prior to roasting- amazing. The flavor was really infused into the meat. A halved lemon would also be a nice addition. An entire head of garlic is simultaneously roasted in the pot as well. Delicious!

The recipe was adapted from The New York Times, contributed by Clare de Boer. I modified the method and proportions.

The original recipe notes that any short, quick-cooking pasta could be substituted for the egg noodles. Sautéed mushrooms, spinach or herbs could also be incorporated at the end. I served roasted asparagus on the side.

Yield: 4 to 6 servings

  • 1 whole chicken (I used a 5 1/2 pound chicken)
  • 2 T unsalted butter, softened
  • coarse salt and freshly ground black pepper
  • 1 or 2 Parmesan rinds, plus grated Parmesan for serving
  • 1 large head of garlic, cloves segmented, paper skin removed but kept in their sheaths
  • 1 pound wide egg noodles
  • 2 sprigs rosemary
  • 3 T sour cream or crème fraîche
  1. Heat the oven to 475 degrees F on convection roast or 500 degrees F in a standard oven.
  2. Remove the chicken and the butter from the refrigerator to lose their chill while the oven heats.
  3. Pat the chicken dry inside and out.
  4. Separate the skin from the breast meat. Dot and smear the butter under the skin.
  5. Generously sprinkle salt into the cavity and all over the skin, then follow with pepper.
  6. Stuff the Parmesan rinds into the cavity of the chicken and place the chicken in a large Dutch oven. (I used a large enameled cast iron pot.)
  7. Scatter the garlic cloves around the chicken.
  8. Roast, uncovered, for 30 minutes.
  9. When the chicken is golden and a chestnut-colored caramel has formed around the base of the bird, transfer the pot to the stovetop.
  10. Using tongs, remove the garlic cloves from the pot. Squash each clove with the tines of a fork to squeeze out their roasted flesh; return garlic to the pot. Discard the sheaths.
  11. Pour in enough water to come up mid-thigh around the bird (5 to 8 cups), avoiding the crisp breast skin. Bring the water to a simmer over high heat.
  12. Lower the oven temperature to 400 degrees F and return the pot, uncovered, to the oven. Cook for another 60 minutes, or until the breast meat is 165 degrees F.
  13. When the chicken looks like it’s giving up the will to hold itself together, remove the pot from the oven and place it on a burner over a high flame. Taste the liquid and season with salt.
  14. Press the noodles into the broth and poke them down as they soften to make sure they’re all submerged. Add another 2 to 4 cups of water if necessary to keep the noodles just covered.
  15. Boil over high heat for 4 to 5 minutes, stirring the noodles occasionally, until they’re cooked through.
  16. Turn off the flame and bury the rosemary sprigs among the noodles. Let sit for 5 minutes for the rosemary to infuse and for the broth to thicken.
  17. Stir in the sour cream, taste and adjust seasonings. Finish with a generous grind of black pepper.
  18. Remove chicken from pot and slice the meat. Scoop noodles and broth into shallow bowls and top with chicken meat. Alternatively, take the pot to the table and pull apart the chicken, serving it with a tangle of noodles. Either way, garnish with lots of grated Parmesan on top.

Buttery Jam Diagonals

These are a shortcut version of jam-filled thumbprint cookies. Wonderful! I made them at the tail end of my holiday baking to bring to a cookie exchange. Perfect.

This recipe was adapted from Bon Appétit, contributed by Shilpa Uskokovic. The original recipe recommends using thick, concentrated jams or spreads in the filling. I used Bonne Maman apricot preserves without any issues.

I loved the lemon zest in the cookie and lemon juice in the glaze. Buttery, bright and tasty. 🙂

Yield: about 2 dozen

  • 3/4 cup (1 1/2 sticks) unsalted butter, preferably cultured, at room temperature
  • 1/2 cup (100 g) granulated sugar
  • finely grated lemon zest from 1 large lemon
  • 1 tsp vanilla bean paste or vanilla extract
  • 1 tsp Diamond Crystal or 1/2 tsp Morton kosher salt, plus more
  • 1 large or extra-large egg yolk
  • 2 cups (240 g) all-purpose flour; plus more for dusting (optional)
  • 6 T raspberry or apricot jam (such as Bonne Maman Intense)
  • 1/3 cup (37 g; or more) powdered sugar, sifted
  • 2 tsp (or more) fresh lemon juice
  1. Using a stand mixer on medium-high speed, beat unsalted butter, granulated sugar, lemon zest, vanilla bean paste and salt in a large bowl until light and fluffy, about 3 minutes.
  2. Add 1 large egg yolk and beat until incorporated, about 1 minute.
  3. Add flour and beat on low speed until no dry streaks remain (be careful not to overmix).
  4. Turn dough out onto a surface and knead gently to bring together into a ball. Split dough in half (about 265 g each).
  5. Using your hands, roll each into a 10×1½” log (dough should be easy to handle; dust surface very lightly with flour if dough feels sticky).
  6. Place logs 3″ apart on a large parchment-lined baking sheet.
  7. Run your index finger or the round handle of a large wooden spoon down the entire length of each log through the center to create a deep channel (you want to push dough down as far as possible without tearing).
  8. Chill logs in freezer until firm, about 30 minutes.
  9. Meanwhile, place a rack in middle of oven; preheat to 350°F, preferably on convection.
  10. Remove logs from freezer, spoon about 3 tablespoons of jam along channel in each log.
  11. Bake logs until dough is set and golden brown underneath, 18–20 minutes.
  12. Let cool completely on baking sheet.
  13. Using a small knife, slice logs crosswise on a deep diagonal into 1″-wide pieces.
  14. Whisk powdered sugar, fresh lemon juice, and a large pinch of kosher salt in a small bowl until smooth. Glaze should be thick but pourable; adjust consistency with more powdered sugar or lemon juice if needed.
  15. Drizzle glaze over logs; let sit until glaze is set, at least 30 minutes.

Do ahead: Cookies can be baked 2 days ahead. Store, loosely covered, at room temperature.

Milk-Simmered Mashed Potatoes

Milk Street came up with the genius idea of cooking potatoes in milk to create rich and delicious mashed potatoes without adding cream. Don’t worry- there was still plenty of butter. 🙂

This recipe was adapted from Milk Street, contributed by Diane Unger. I modified the proportions and cooking time. Fabulous.

The original recipe notes that it is important to use whole milk because low-fat milk could break during the simmering process. Also, the potatoes should not be rinsed or soaked in water once cut. Doing so will wash off the starch, which is crucial for their creamy texture.

Yield: 8 servings

  • 4 pounds Yukon Gold potatoes, peeled and cut into 1/2-inch chunks
  • 5 cups whole milk, plus more as needed
  • Kosher salt and freshly ground black pepper
  • 8 tablespoons salted butter (one stick), cut into 8 pieces
  1. In a large saucepan, combine the potatoes, milk and 2 teaspoons of salt. (I used a Dutch oven.)
  2. Bring to a simmer over medium, then reduce to low and cook, uncovered and stirring often, until the potatoes are beginning to fall apart and most of the milk has been absorbed, 40 to 50 minutes.
  3. Remove the pan from the heat. Add the butter and, using a potato masher, mash the potatoes into an almost-smooth puree.
  4. If desired, thin with additional milk. Taste and season with salt and pepper.

Ina Garten’s Summer Garden Pasta

Please make this simple dish with your summer tomatoes and backyard basil! Easy to prepare and absolutely delicious. It is essentially classic bruschetta over pasta.

The recipe was adapted from Ina Garten’s Barefoot Contessa at Home, via barefootcontessa.com. I have made dishes like this in the past but used fresh mozzarella instead of Parmesan. I loved this variation. 🙂

We ate the dish with sliced sourdough baguette and green salad- garlicky and perfect.

Yield: Serves 6

  • 4 pints (8 cups) grape or cherry tomatoes, halved
  • extra-virgin olive oil
  • 6 to 12 cloves garlic, minced
  • 18 large basil leaves, julienned, plus extra for serving
  • 1/2 teaspoon crushed red pepper flakes
  • Kosher salt (I used Diamond Crystal)
  • 1/2 tsp freshly ground black pepper
  • 1 pound capellini or angel hair pasta
  • 1 1/2 cups freshly grated Parmesan cheese, plus extra for serving (I used Parmigiano-Reggiano)
  1. Combine the halved tomatoes, 1/2 cup (8 T) olive oil, minced garlic, julienned basil leaves, red pepper flakes, 1 teaspoon Kosher salt, and the pepper in a large bowl.  Cover with plastic wrap, and set aside at room temperature for about 4 hours.
  2. Just before you’re ready to serve, bring a large pot of water to a boil; add salt.
  3. Add the pasta and cook al dente according to the directions on the package (be careful – it only takes 2 to 3 minutes!).
  4. Drain the pasta- reserving about 1 cup of pasta water. Add pasta to the bowl with the cherry tomatoes.
  5. Add the cheese and some additional fresh basil leaves and toss well. (I julienned the basil leaves.) Add pasta water to adjust the consistency, if necessary. (I also use the pasta water before reheating leftovers.)
  6. Transfer to a serving dish in layers- ensuring that ample amounts of basil and tomatoes are placed between layers of cheesy pasta.
  7. Garnish with extra cheese and basil, as desired. Serve immediately.

Parmesan Roasted Zucchini

I made this quick side dish with a beautiful zucchini from a neighbor. We ate it like garlic bread!

The recipe was adapted from Ina Garten’s book Cooking for Jeffrey, via foodnetwork.com. I modified the method and proportions. A great way to use the bounty of summer zucchini.

Yield: Serves 2 to 4

  • 2 medium or 1 large zucchini
  • extra-virgin olive oil
  • Kosher salt and freshly ground black pepper
  • 1 large plus 1 medium clove garlic, minced
  • 1 T julienned fresh basil leaves
  • 3 T grated Parmigiano-Reggiano cheese
  • 3 T panko
  1. Preheat the oven to 425 degrees F. (I set my oven to convection roast.)
  2. Trim the stem end of the zucchini, cut in half lengthwise, and scoop out a small channel of seeds with a regular teaspoon or melon baller.
  3. Place the zucchini in one layer on a parchment paper-lined sheet pan. (I used a quarter sheet pan.)
  4. Brush generously all over with olive oil, and turn the zucchini cut side down.
  5. Sprinkle with salt and roast for 10 minutes on convection roast, or up to 12 to 15 minutes in a standard oven, until just tender but still firm when tested with the tip of a small paring knife.
  6. Meanwhile, make the bread crumbs. In a medium bowl, combine the garlic, basil, Parmesan, pinch of salt, and a few grinds of black pepper.
  7. Add the panko and 1 tablespoon of olive oil; mix well.
  8. Turn the zucchini cut side up and spoon a heaping tablespoon of the panko mixture evenly on each zucchini.
  9. Bake for another 8 to 10 minutes, until the panko is crispy.
  10. Serve hot, warm, or at room temperature.

Enter your email address to follow this blog and receive notifications of new posts by email.

Join 1,459 other subscribers

Recipe Categories

my foodgawker gallery
my photos on tastespotting

Top Posts & Pages

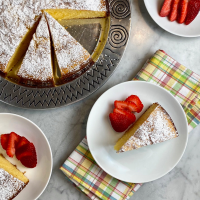
Mexican Sweet Corn Cake (Pan de Elote)
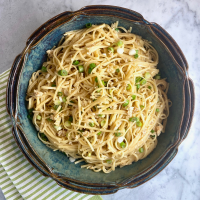
Vietnamese-American Garlic Noodles
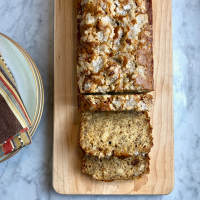
Banana Bread with Crunchy Sugar Topping
Churro Cupcakes with Cinnamon Cream Cheese Frosting
One-Pan Orzo with Spinach & Feta
One-Pot Crispy Gnocchi with Burst Tomatoes & Fresh Mozzarella
Samin Nosrat's Buttermilk-Brined Roast Chicken
One-Pan Shrimp Scampi with Orzo
Ethiopian Chickpea Stew (Shiro Wat) & Stewed Collard Greens (Gomen Wat)
Italian Sausage & Mushroom Ragu with Pappardelle
Foodista Food Blog of the Day Badge