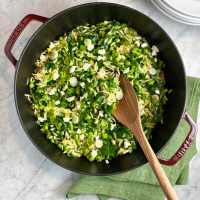
Shortcut Creamed Spinach

Oh my… this silky side can be prepared dangerously easily. We loved it too.

The recipe was adapted from Bon Appétit, contributed by Julia Langbein. I modified the proportions. Although it was fabulously creamy, I would incorporate less crème fraîche next time.

The original recipe notes that heavy cream and fresh lemon juice could be substituted for the crème fraîche for a similar flavor profile. I personally loved the tanginess from the crème fraîche.

Yield: about 6 servings

  • 3 T extra-virgin olive oil
  • 10 garlic cloves, thinly sliced
  • 1 pound (16 oz) spinach (mature or baby spinach)
  • kosher salt and freshly ground black pepper
  • freshly grated nutmeg, optional
  • 1/2 to 3/4 cup crème fraîche (I used 3/4 cup but would start with 1/2 cup next time)
  1. Heat olive oil in a large skillet over medium. (I used a stainless steel sauté pan.)
  2. Cook the garlic cloves, stirring occasionally, until golden around edges and very fragrant, about 3 minutes.
  3. Increase heat to medium-high and add spinach, by the handful, stirring and letting it wilt slightly after each addition. Season with kosher salt and freshly ground pepper. Add freshly grated nutmeg, to taste, if desired.
  4. Cook spinach, stirring often, until mostly wilted, about 1 minute. Remove from heat.
  5. Add 1/2 cup crème fraîche; stir until spinach is saucy and coated. Add more, as desired.
  6. Taste and season with more salt and pepper, if needed.

Gnocchi Scampi

This is a quick and delicious- lemony and garlicky- one-pan dish. I now realize that I prefer pan-seared gnocchi over boiled. It was crispy on the outside and tender on the inside. Great.

This recipe was adapted from The New York Times, contributed by Melissa Clark. I used a 12-inch cast iron skillet, modified the method, and doubled the garlic. It was a perfect meal served with a big green salad. We didn’t have any leftovers!

Yield: Serves 3 to 4

  • 3 T extra-virgin olive oil, divided, plus more for serving
  • 1 pound gnocchi (fresh, frozen or shelf-stable) (I used Trader Joe’s shelf-stable)
  • 2 T unsalted butter
  • 4 to 8 garlic cloves, finely grated or minced
  • 1/2 cup cup dry white wine, clam juice, or stock (I used chicken stock)
  • Kosher salt and freshly ground black pepper
  • 1/8 tsp red-pepper flakes, plus more for serving
  • 1 pound large or extra-large shrimp, shelled (I used tail-on 21-25 count)
  • 1 lemon
  • 1 cup flat-leaf parsley, chopped (about 1/2 cup chopped)
  1. In a large, preferably nonstick skillet, heat 2 tablespoons oil over medium-high. (I used a 12-inch cast iron skillet.)
  2. Add gnocchi to the pan, breaking up any that are stuck together. Cook for 8 to 12 minutes, tossing every 1 to 2 minutes, so they get golden and crispy all over. Transfer to a bowl or plate. (I reduced the heat to medium half-way through this step.)
  3. In the same skillet over medium-high, add remaining 1 tablespoon oil and all of the butter, letting it melt for a few seconds.
  4. Add the minced garlic and sauté until fragrant, 30 seconds to 1 minute.
  5. Add wine/stock/clam juice, 1/2 teaspoon salt, 1/4 teaspoon black pepper and all of the red-pepper flakes. Bring to a simmer, and let the liquid reduce by half, about 2 minutes.
  6. Add shrimp and sauté until they just start to turn pink, 2 to 3 minutes, depending on their size.
  7. Return gnocchi to the pan and add another 1/4 teaspoon salt. Using a Microplane or other fine grater, quickly grate the zest from the lemon into the pan.
  8. Add chopped parsley, tossing well. If your pan looks dry, add a splash of water, 1 tablespoon at a time, tossing to combine, then remove pan from the heat. (I didn’t have to add any additional liquid.)
  9. Cut the zested lemon in half and squeeze in the juice from one half, gently tossing to combine. Taste and add more salt if you like. Cut the remaining lemon half into wedges for serving.
  10. Drizzle with more olive oil and more red-pepper flakes, if desired, and serve with lemon wedges on the side.

Creamy Chimichurri Roast Chicken

I love an amazing sauce. In this dish, the creamy and velvety yogurt-herb sauce is used as both the marinade and the condiment served with the finished meal. Yogurt-based marinades always result in such tender meat- delicious!

This recipe was adapted from the Bon Appétit “healthyish” issue, contributed by Shilpa Uskokovic. The original recipe also suggests serving the sauce with meatballs, zucchini fritters, roasted mushrooms, or turkey burgers.

I served the chicken with roasted potatoes and broccoli- which were also both delicious drizzled with the creamy chimichurri sauce.

Yield: Serves 4 to 6

For the Marinade & Sauce:

  • 9 large garlic cloves
  • 2 1/2 cups (packed) cilantro leaves with tender stems
  • 2 cups (packed) parsley leaves with tender stems
  • 4 T red wine vinegar
  • 1 T plus 1 tsp Diamond Crystal or 2 1/4 tsp Morton kosher salt
  • 1 T plus 1 tsp dried oregano
  • 2 tsp crushed red pepper flakes
  • 3/4 cup extra-virgin olive oil, divided
  • 8 oz (1 cup) plain whole-milk Greek yogurt

For the Chicken & To Assemble:

  • 1 4-pound whole chicken, backbone removed, patted dry
  • 2 tsp Diamond Crystal or 1 1/4 tsp Morton kosher salt
  • roasted broccoli and potatoes, for serving, optional

To Make the Sauce:

  1. Pulse garlic cloves, cilantro, parsley, red wine vinegar, salt, dried oregano, red pepper flakes, and 1/4 cup (4 tablespoons) extra-virgin olive oil in a food processor until combined and herbs are very finely chopped but not puréed.
  2. Transfer mixture to a medium bowl and add the Greek yogurt and remaining 1/2 cup extra-virgin olive oil. Whisk vigorously until emulsified (makes about 2 1/2 cups).

Do ahead: Sauce can be made 3 days ahead. Cover and chill. Whisk just before using.

To Make the Chicken & To Assemble:

  1. Place the chicken, backbone removed, patted dry, breast side up, on a cutting board; open up against surface as much as possible. Using your palms, press firmly on breastbone to flatten breast (you may hear a crack).
  2. Transfer chicken to a large bowl and rub all over with salt and 3/4 cup yogurt-herb sauce.
  3. Cover and chill at least 2 hours and, preferably, up to 12 hours (no need to bring to room temperature before roasting).
  4. Place a rack in middle of oven; preheat to 375°. (I set my oven to convection roast.)
  5. Transfer chicken to a wire rack set inside a large parchment paper-lined, rimmed baking sheet; spread any marinade left in large bowl over skin.
  6. Roast chicken, rotating baking sheet halfway through, until skin is deep golden brown and an instant-read thermometer inserted into thickest part of a thigh registers 165°, 50–60 minutes. (I used the oven probe and then confirmed the internal temperature with a separate thermometer.) (I roasted the potatoes in the same oven.)
  7. Let rest 10 minutes. (This is a good time to roast additional vegetables.) Cut into pieces and transfer chicken to a platter.
  8. If it has separated, whisk remaining sauce in medium bowl; drizzle chicken with sauce and serve remaining sauce at the table.

One-Pot Sticky Coconut Chicken & Rice

I have a couple more chicken and rice dishes to share. 🙂

This wonderful one-pot dish was included in The New York Times’ Best Recipes of 2022. I was surprised that I missed it when it was first published!

The recipe was adapted from The New York Times, contributed by Kay Chun. I modified the proportions. I cooked it in a large enameled cast iron Dutch oven. Although it cooked perfectly, I may use a shallow and wide pan next time to be able to serve it directly from the pan at the table. We ate it with roasted cauliflower on the side.

Flavorful and fabulous comfort food! Easy to prepare too. The hot sauce garnish balances the richness of the finished dish.

Yield: Serves 6

  • 2 1/2 pounds boneless, skinless chicken thighs, each thigh cut into 2 equal-size pieces, patted dry
  • 5 T neutral oil, such as safflower or canola, divided
  • 3 tsp Diamond Crystal kosher salt (or 1 1/2 tsp Morton kosher salt)
  • 3/4 tsp freshly ground black pepper
  • 2 T minced fresh ginger
  • 7 large cloves garlic, minced
  • 1 1/2 cups arborio rice (or other short-grain white rice), rinsed until water runs clear
  • 1 3/4 cups chicken stock
  • 1 (13.5-ounce) can full-fat coconut milk
  • 1 yellow bell pepper, cored, seeded and chopped into 1/2-inch pieces
  • 1/2 cup roasted cashews
  • 4 scallions, green and white parts, thinly sliced
  • 3 T coarsely chopped cilantro
  • hot sauce, for serving, optional
  1. Heat oven to 375 degrees. (I set my oven to true convection.)
  2. Rub chicken with 2 tablespoons of oil, and season with 1 1/2 teaspoons of salt and 1/2 teaspoon of pepper.
  3. In a large Dutch oven, heat 2 tablespoons of the oil over medium. Working in two batches, brown chicken, turning halfway, until no longer pink, around 5 minutes on the first side and an additional 3 minutes after flipping. Transfer to a plate.
  4. Add the remaining 1 tablespoon oil, the ginger and the garlic to the empty pot, and stir until fragrant, 30 seconds.
  5. Add rinsed rice and stir until evenly coated in the oil.
  6. Add stock, coconut milk, bell pepper, cashews, scallions and the remaining 1 1/2 teaspoons salt and 1/4 teaspoon pepper. Stir to lift up any browned bits on the bottom of the pot. (I had a lot of browned bits!)
  7. Arrange chicken on top, add any accumulated juices from the plate and bring to a boil over high.
  8. Cover and bake until all of the liquid is absorbed, rice is tender and chicken is cooked through, 25 minutes.
  9. Scatter cilantro over the chicken and rice, then divide among bowls. Serve with hot sauce, as desired.

Citrus Roasted Broccoli & Cauliflower with Queso Cotija Dressing

As soon as I saw Mexican chef Pati Jinich prepare this dish on her PBS show, I had to make it. 🙂 I bought beautiful purple cauliflower and purple broccoli at the farm stand to make it extra special. We ate it with Mexican-Style Chipotle-Lime Pork Cutlets.

The salty, cheesy sauce was absolutely incredible. I loved how the vegetables were sliced into steaks instead of florets as well. I trimmed the tough outer portion of each stem but would remove even more next time to make that portion more tender.

This recipe was adapted from Pati’s Mexican Table and patijinich.com, via kcet.org. It was on an episode featuring dishes inspired by Isla Mujeres. I substituted creme fraiche for the Mexican crema. I also modified the method and proportions. Amazing!

Yield: Serves 6

For the Vegetables:

  • 1/2 cup freshly squeezed lime juice (I used 2 limes)
  • 1/2 cup freshly squeezed orange juice (I used 1 large naval orange)
  • 3 chopped chiles de arbol or 1/2 to 1 tsp red pepper flakes
  • 1/2 cup olive oil, plus more for brushing/drizzling
  • 1 tsp kosher salt
  • 1/4 tsp freshly ground black pepper
  • 2 pounds broccoli, cut into 1/4″ vertical slices, including thick part of stem (I used 2 large heads)
  • 2 pounds cauliflower, cut into 1/4″ vertical slices, including thick part of stem (I used 1 large head)

For the Queso Cojita Dressing:

  • 1/2 cup crumbled queso cotija
  • 2/3 cup Mexican crema or creme fraîche
  • 1/2 cup vegetable oil (I used Canola oil)
  • 2 tsp sherry vinegar
  • 2 T water
  • 2 medium garlic cloves
  • 1/2 teaspoon kosher salt, or to taste

To Prepare the Vegetables:

  1. Preheat oven to 475 degrees F. ( I set my oven to convection roast.)
  2. Line 2 rimmed baking sheets with parchment paper.
  3. In a glass measuring cup with a spout, mix the lime juice, orange juice, olive oil, red pepper flakes (or chile de arbol), 1 teaspoon salt and 1/4 teaspoon freshly ground black pepper.
  4. Place the cauliflower and broccoli steaks on the prepared baking sheets in a single layer, making sure that they are not crowded.
  5. Evenly pour the orange juice mixture all over the vegetables.
  6. Place in the oven and roast for 25 to 30 minutes, flipping halfway through, until well roasted and considerably charred. Remove from the oven and set aside.

To Make the Dressing & To Serve:

  1. While the vegetables are roasting, combine the queso cotija, Mexican crema (or creme fraîche), vegetable oil, sherry vinegar, water, garlic, and 1/2 teaspoon salt in the jar of a blender or mixer. Puree until smooth. (I used a Vitamix.)
  2. Serve the broccoli and cauliflower on a large platter and ladle the queso cotija right on top, or let your guests spoon sauce onto their plates and dip their vegetables in the sauce to their liking. (I served the sauce in a bowl on the side.)

Vietnamese-American Garlic Noodles

I’m a garlic girl but even I was worried that this dish was going to be so garlicky it may be overpowering. Nope. Twenty cloves!

This recipe was adapted from the cookbook “The Wok” by J. Kenji López-Alt, based on the noodle dish originally created and served by Helene An at San Francisco’s Thanh Long restaurant, via The New York Times.

Lopez-Alt uses the genius technique of cooking the pasta in a minimal amount of liquid which expedites the cooking process. The starch-concentrated pasta water is then used in the sauce. This dish was crazy quick to prepare and was absolutely packed with flavor. We ate it with roasted asparagus on the side.

Yield: Serves 4

  • 4 tablespoons unsalted butter
  • 20 medium garlic cloves, minced or smashed in a mortar and pestle
  • 4 teaspoons oyster sauce
  • 2 teaspoons light soy sauce or shoyu
  • 2 teaspoons fish sauce
  • 1 pound dry spaghetti or linguine fini
  • 1 ounce grated Parmesan or Pecorino Romano (heaping 1/4 cup)(I used Parmigiano-Reggiano)
  •  small handful of thinly sliced scallions (I used 4 scallions)
  1. Use a food processor to mince the garlic cloves, if desired. (I used a mini food processor.)
  2. Melt the butter in a wok or saucepan over medium heat. (I used a stainless all-in-one pan.)
  3. Add the garlic and cook, stirring, until fragrant but not browned, about 2 minutes.
  4. Add the oyster sauce, soy sauce and fish sauce, and stir to combine. Remove from the heat.
  5. Meanwhile, bring 1 1/2 inches of water to a boil in a 12-​inch skillet or sauté pan over high heat. (Alternatively, heat up just enough water to cover the spaghetti in a large Dutch oven or saucepan.)
  6. Add the pasta, stir a few times to make sure it’s not clumping, and cook, stirring occasionally, until just shy of al dente (about 2 minutes short of the recommended cook time on the package). (I used linguine fini and cooked it for a total of 4 minutes.)
  7. Using tongs, transfer the cooked pasta to the garlic sauce, along with whatever water clings to it. Reserve the pasta water in the skillet; set aside.
  8. Increase the heat to high, add the cheese to the pasta and sauce, and stir with a wooden spatula or spoon, tossing vigorously until the sauce is creamy and emulsified, about 30 seconds. If the sauce looks too watery, let it keep reducing. If it looks greasy, splash some more pasta cooking water and let it re-​emulsify.
  9. Stir in the scallions and serve immediately.

Simple Sunday Soups

This first soup, Italian Bean Soup with Pappardelle, was hearty and delicious. It was inspired by a soup from Trattoria dai Mugnai in Monteveglio, a village outside of Bologna. The second soup, Spanish Garlic Soup, was inspired by an “end of the month” meal, a “meal to make quickly with whatever is on hand and money is tight,” from José Andrés.

The recipes for these simple soups were adapted from Milk Street, the Italian bean and pasta soup from Milk Street Magazine, contributed by Rebecca Richmond, and the Spanish garlic soup from Milk Street TV, contributed by Christopher Kimball and Matthew Card.

Italian Bean Soup with Pappardelle

Yield: Serves 4

  • 2 T extra-virgin olive oil, plus more to serve
  • 1 medium yellow onion, chopped
  • Kosher salt and freshly ground black pepper
  • 2 T tomato paste
  • 2 to 4 medium garlic cloves, smashed and peeled
  • 2 15.5 oz cans Roman (borlotti), cranberry, or pinto beans, rinsed and drained
  • 2 tsp chopped fresh rosemary or sage
  • 1 piece Parmesan rind, plus finely grated Parmesan, to serve
  • 8 to 9 oz fresh or dried pappardelle, tagliatelle, or fettucine, cut or broken into 2-inch lengths (see Note)
  • freshly squeezed juice of 1/2 to 1 lemon (I used a Meyer lemon)
  1. In a large saucepan over medium, heat the oil until shimmering. Add the onion and 1/4 teaspoon salt, then cook, stirring occasionally, until translucent, about 4 minutes.
  2. Add the tomato paste and garlic. Cook, stirring often, until the tomato paste darkens slightly and begins to stick to the pan, about 3 minutes.
  3. Add the beans, rosemary, Parmesan rind (use if you have it!), 5 cups water, 3/4 teaspoon salt and 1/2 teaspoon pepper. Bring to a simmer over medium-high, then reduce to medium-low and cook, uncovered and stirring occasionally, until the beans are soft enough to be easily mashed with a fork, about 10 minutes.
  4. Off heat, remove and discard the Parmesan rind. Using an immersion blender, pulse the bean mixture until creamy but not completely smooth. (see Note) (Alternatively, if transferring to a blender, let cool for 10 minutes and purée in 2 batches before returning to the pot.)
  5. Bring to a simmer over medium. Add the pasta and cook uncovered, stirring occasionally, until the pasta is al dente (refer to the package for cooking times, but begin checking for doneness a minute or two sooner than the directions indicate). (I used dried pappardelle, broken into 2-inch lengths, and cooked it for 6 to 7 minutes.)
  6. Taste and season with salt and pepper. Stir in freshly squeezed lemon juice, to taste.
  7. Ladle the soup into bowls, drizzle with oil and top with grated Parmesan and additional pepper, as desired.

Notes:

  • If you can find sheets of fresh pasta, they work nicely, too—simply cut them into rough 2-inch squares.
  • Don’t puree the beans until completely smooth; leave them with some texture.

Spanish Garlic Soup (Sopa de Ajo)

Yield: Serves 4

  • 6 scallions, trimmed and thinly sliced, whites and greens separated
  • 6 large garlic cloves, thinly sliced
  • 6 T extra-virgin olive oil, divided, plus extra
  • 4 tsp sweet paprika
  • 1 1/2 tsp smoked paprika
  • 6 oz sourdough or other rustic bread, cut into 1/2-inch cubes (about 4 cups), divided
  • 6 cups water
  • 2 T chicken bouillion (I used Better Than Boullion)
  • Kosher salt and freshly ground black pepper
  • 4 large egg yolks
  • 2 T sherry vinegar
  1. In a medium saucepan over medium-low, combine the scallion whites, garlic and 3 tablespoons of the oil. Cook, stirring occasionally, until beginning to color, 8 to 10 minutes.
  2. Add both paprikas and cook, stirring, until fragrant and darkened, 30 seconds.
  3. Add 1 cup of the bread cubes and stir well.
  4. Whisk in the water and bouillon, increase heat to medium-high and bring to a simmer. Reduce heat to medium-low and simmer, whisking occasionally to break up bread, for 15 minutes. Whisk vigorously to ensure bread is thoroughly broken up.
  5. Meanwhile, in a 12-inch skillet over medium, combine the remaining 3 tablespoons oil, the remaining 3 cups bread, the scallion greens, and ½ teaspoon each salt and pepper. Cook, stirring occasionally, until browned and crisp, 8 to 10 minutes.
  6. In a medium bowl, whisk the egg yolks. Slowly whisk in 1 cup of the hot broth. (It is important to do this step to prevent the yolks from curdling when added to the pot.)
  7. Remove the soup from the heat. Off heat, vigorously whisk the egg yolks into the soup, then whisk in the vinegar.
  8. Taste and season with salt and pepper.
  9. To serve, fill individual bowls with the crouton mixture, then ladle the soup over them. Drizzle with additional oil, if desired.

Enter your email address to follow this blog and receive notifications of new posts by email.

Join 1,420 other subscribers

Recipe Categories

my foodgawker gallery
my photos on tastespotting

Top Posts & Pages

Sourdough English Muffins
Ravneet Gill's Perfect Chocolate Chip Cookies
Chicken Stew with Biscuits
Ina Garten's Caramelized Onion, Tomato & Goat Cheese Tarts
Vietnamese-American Garlic Noodles
Chez Panisse's Blueberry Cobbler
One-Pan Orzo with Spinach & Feta
Grilled Corn & Avocado Salad with Creamy Feta Dressing
Banana Bread with Crunchy Sugar Topping
Spicy Coconut Grilled Chicken Thighs
Foodista Food Blog of the Day Badge
%d bloggers like this: