Beer-Battered Cod with Crispy Potato Chips

I served this heaping platter of fried deliciousness for our celebratory St. Patrick’s Day dinner. It was extremely well received. 🙂

I used Irish Harp beer in the fish batter, of course. As I was cooking the fish and chips, my husband realized that we hadn’t included the essential tartar sauce in our menu. He was thankfully able to make sauce with a few adaptations.

The beer-battered fish recipe was adapted from Donal Skehan via today.com; I modified the cooking method. The potato chip recipe was adapted from Bon AppĂ©tit. I used gold potatoes, olive oil, and seasoned the chips with sea salt. The tartar sauce recipe was loosely adapted from inspiredtaste.net. It was a treat. We’re planning to eat the leftover fish in tacos!

For the Crispy Potato Chips:

  • 2 pounds gold, russet, or purple potatoes
  • 1/2 cup distilled white vinegar
  • vegetable oil, for frying (I used 10 cups of canola oil with 3-4 cups olive oil)
  • sea salt

For the Beer-Battered Fish:

  • 4 skinless and boneless white fish fillets, patted dry and cut into thick strips (I used Alaskan Cod)
  • 1 cup all-purpose flour, plus more to coat the fish
  • 1 cup cold beer (I used Harp)
  • coarse salt, sea salt, and freshly ground black pepper
  • canola oil and olive oil, to fry (see above)
  • lemon wedges, to serve

For the Tartar Sauce:

  • 1/2 cup mayonnaise
  • 1 small dill pickle, chopped very small (3 tablespoons)(I substituted 1 tsp white wine vinegar)
  • 1 tablespoon fresh lemon juice, plus more to taste (I used the juice of 1/2 a lemon)
  • 1 tablespoon capers, drained and chopped
  • 1 tablespoon chopped fresh dill or 1 teaspoon dried dill (I substituted fresh basil)
  • 1/2 to 1 teaspoon Worcestershire sauce
  • 1/2 teaspoon Dijon mustard
  • coarse salt and freshly ground black pepper

To Make the Crispy Potato Chips:

  1. Using a mandoline, slice potatoes about 1/8-inch thick.
  2. Place slices in a large bowl, add cold water to cover, and stir to release starch; drain. Repeat until water runs clear.
  3. Return potatoes to bowl; cover with 1/2 cup distilled white vinegar and about 6 cups water. Let sit at least 30 minutes or up to 2 hours. (the vinegar helps make the chips more crispy)
  4. Drain potatoes and pat dry prior to cooking.
  5. Fit a large heavy pot with a deep-fry thermometer; pour in oil to measure 3 to 4”. (I used a very deep “pasta pot” to reduce splattering.)
  6. Heat over medium-high until thermometer registers 300°. (frying the potatoes at a lower temperature helps to remove moisture)
  7. Working in 4 to 6 batches and returning oil to 300° between batches, fry potatoes, turning occasionally to cook evenly, until golden brown and crisp (oil will have quit bubbling), about 5 to 7 minutes per batch.
  8. Using a spider or slotted spoon, transfer to a paper towel–lined rimmed sheet pan fitted with a wire rack. While hot, season with salt.
  9. Reserve the cooking oil to fry the fish.

Note: Potatoes can be fried 6 hours ahead. Keep at room temperature. (I kept the chips in a warming drawer while I cooked the fish.)

To Make the Beer-Battered Fish:

  1. Top the pot with more oil, if needed, and bring it back to temperature, 300° to 340°, over a medium-high heat.
  2. Coat the fish strips with flour, shake off the excess and set aside in a single layer on a plate.
  3. Place 1 cup of flour in a large mixing bowl, make a well in the middle of it and pour in a little beer and whisk. Keep adding the beer and mixing until you have a smooth batter.
  4. Season generously with coarse salt and freshly ground black pepper.
  5. Working beside the pan, dip the fish strips in the batter one at a time and then into the hot oil. Make sure not to overcrowd the pan. (I used tongs and cooked the fish in 3 batches.)
  6. Cook for about 4 to 5 minutes until golden-brown, turning halfway through the cooking time.
  7. Remove the fish from the pot using a spider or slotted spoon and transfer to a paper towel–lined rimmed sheet pan fitted with a wire rack. While hot, season with salt.
  8. Serve with some lemon wedges, crispy chips, and tartar sauce, as desired.

To Make the Tartar Sauce:

  1. Combine the mayonnaise, pickles (or vinegar), lemon juice, capers, dill, Worcestershire sauce, and mustard in a small bowl and stir until well blended and creamy.
  2. Season with a pinch of salt and pepper. Taste then adjust with additional lemon juice, salt, and pepper.

Note: For the best flavor, cover and store in the refrigerator for at least 30 minutes. Keep, tightly covered, in the refrigerator for up to one week.

Ukrainian Winter Borscht with Vushka

We missed celebrating Christmas with our extended family this year. 😩

Traditionally, my Mother-in-Law makes all of us the meatless 12-dish Ukrainian Christmas Eve feast as part of our celebration. It is a beautiful dinner, but a major undertaking. I didn’t attempt to make the complete meal, but I did make a couple of the courses for our celebration at home. 🙂

Our meal began with a (mini) shot of vodka and a bite-sized piece of challah with honey. We ate this Winter Borscht with Vushka (mushroom-onion dumplings) followed by sauerkraut and potato-cheese pierogies, which my husband purchased from a local Polish store, as our main courses. I made my Mother-in-Law’s apple strudel for dessert, post to follow.

This recipe was adapted from Tom Birchard and Natalie Danford of NYC’s East Village restaurant Veselka, via The New York Times, contributed by Julia Moskin. (I gave my husband the Veselka cookbook for Christmas!) I incorporated some of the beets, purĂ©ed, into the finished soup. I used dumplings wrappers instead of making the dough for the dumplings. I also modified the Vushka proportions and technique.

I used beets from my CSA share for the soup, made it in advance and stored it in the freezer. I made the Vushka a day in advance and stored them in the refrigerator. The recipe states that the dumplings are optional; in my house they are essential! The soup had a spicy kick which may have been from the fresh garlic, which is incorporated at the end. I enjoyed it but may consider omitting the garlic next time.

Yield: 6 to 8 servings

For the Borscht:

  • 2 pounds beets, trimmed and scrubbed (do not peel)
  • 3/4 cup white vinegar
  • 1 carrot, peeled and diced
  • 1 stalk celery, diced
  • 1 small onion, diced
  • 4 cups chicken or vegetable stock
  • 2 bay leaves
  • 5 whole allspice berries
  • 1 tablespoon sugar, more to taste
  • 1 garlic clove, minced
  • 1 Âœ teaspoons freshly ground black pepper
  • coarse salt
  • mushroom and onion dumplings (Vushka)
  • chopped dill, for garnish, optional
  1. Coarsely chop beets, preferably in a food processor.
  2. In a medium pot, combine beets, 4 cups water and vinegar; bring to a boil. Reduce heat and simmer, uncovered, until beets are soft, about 45 minutes. Strain and set juice aside. (Beets can be used for another purpose, like salad.)(I puréed half of the strained beets in a Vitamix and incorporated them in the finished soup.)
  3. Meanwhile, in a deep pot, combine carrot, celery, onion, stock, bay leaves and allspice; bring to a boil. Reduce heat and simmer, uncovered, 45 minutes. Strain and discard aromatics and vegetables.
  4. Combine strained stock and beet juice and simmer 5 minutes.
  5. Add sugar, garlic (if using), and black pepper. Season to taste with sugar and salt.
  6. Add half of the reserved beets, puréed, into the finished soup, as desired.
  7. Serve with dumplings and sprinkle with dill, as desired.

For the Vushka (Ukrainian Mushroom & Onion Dumplings):

Yield: 80 to 100 dumplings

For the Filling:

  • 2 tablespoons dried porcini mushrooms
  • 1 1/2 tablespoons vegetable oil
  • 1/2 large yellow onion, minced
  • 2 cups chopped button mushrooms
  • coarse salt
  • freshly ground black pepper

For the Dough: (I used Shanghai-style dumpling wrappers instead)

  • 1 large egg yolk
  • 1 tablespoon vegetable oil
  • 3 ÂŒ cups all-purpose flour, more as needed

To Make the Filling:

  1. Place dried mushrooms in a small bowl and add 2 tablespoons of boiling water. Let soften, about 10 minutes. Strain, reserving liquid and mushrooms separately.
  2. In a large skillet, heat oil over medium heat. Add onion and cook, stirring often, until golden but not brown, about 5 minutes.
  3. Add button mushrooms and cook, stirring, until mushrooms have released their liquid, about 10 minutes. Sprinkle with salt and pepper and drain liquid.
  4. In a food processor, combine both kinds of mushrooms.
  5. Spoon in porcini liquid, leaving behind any silt in bottom of bowl.
  6. Pulse together until finely ground but not pasty: about 3 or 4 pulses. Add salt and pepper to taste and set aside.

To Make the Dough: (I used dumpling wrappers and continued at Step 8)

  1. In a small bowl, combine egg yolk, oil and 1 1/2 cups lukewarm water and whisk 1 minute.
  2. Place flour in a large bowl and make a well in center. Add a third of the egg mixture and lightly mix in with fingers or a fork. Repeat 2 more times.
  3. Using hands, fold dough together until soft: if crumbly, gently work in more water; if sticky, add flour.
  4. Transfer to a lightly floured board and knead 3 minutes.
  5. Form into a ball, transfer to a bowl and refrigerate 45 minutes.
  6. Lightly flour a work surface and a pan or board for the finished dumplings. Divide dough into 3 sections.
  7. Using a well-floured rolling pin, roll each section out until very thin and in a rough rectangle.
  8. Use tip of a sharp knife to cut dough into 1 1/2-inch squares. (I used a 1 1/2-inch square cookie cutter as a guide. Each dumpling wrapper yielded 2 squares. If using square dumpling wrappers, each one may be able to make 4 squares. Next time!)
  9. Cover the cut dough with plastic wrap so that it doesn’t dry out.
  10. Drain any excess liquid from filling. Place 1/4 teaspoon filling in center of each square. (I found it helpful to pre-scoop the filling and place it on a cutting board because it dried it out slightly.)
  11. Wet the edges of the dough and fold squares in half to form triangles, sealing filling inside.
  12. Pinch the 2 opposing corners together to seal tightly, use water if necessary.
  13. Place on a rimmed baking sheet lined with plastic wrap or a floured surface: do not stack.
  14. Repeat with remaining dough and filling.
  15. In a large pot of salted boiling water, cook dumplings until they float, 2 to 4 minutes. (If cooking frozen dumplings, cook until they rise to the surface and add 2 minutes.)
  16. Drain and serve in hot borscht, about 10 per serving, or just with sour cream.

Vinegar Chicken with Crisp Roasted Mushrooms

It’s all about the sauce for me, and it’s all about the sauce in this dish. I try to adapt most skin-on chicken recipes to use my go-to protein, boneless, skinless, chicken thighs, but the skin is essential in this preparation.

This recipe was adapted from the New York Times, contributed by Alison Roman. I used red wine vinegar and stock in the sauce and also added garlic. We ate it with a giant green salad instead of the lemon-dressed lettuce in the original recipe but I included the gem lettuce option below.

I served this tangy chicken and roasted mushrooms with crusty sourdough baguette (to soak up the sauce), roasted potatoes, and a dollop of Greek yogurt. Amazing!

Yield: 6 servings

For the Chicken:

  • 3 1/2 to 4 pounds bone-in, skin-on chicken (use any combination of legs, thighs or drumsticks, or breasts halved crosswise)(I used 8 bone-in chicken thighs)
  • Kosher salt and ground pepper
  • 2 tablespoons canola oil
  • 2 medium red onions, cut into 1-inch wedges
  • 8 large garlic cloves, smashed and peeled
  • 1/2 cup red wine vinegar or white distilled vinegar
  • 1/2 cup chicken stock or water
  • 1/2 bunch thyme, plus leaves for garnish

For the Roasted Mushrooms:

  • 2 pounds mixed mushrooms, such as shiitake, maitake, button, chanterelle or oyster, torn into large pieces or quartered (I used 24 oz cremini mushrooms and 10 oz button mushrooms, quartered)
  • 3 T olive oil
  • Kosher salt and freshly ground black pepper

For the Lemony Salad Greens with Sumac & to Serve:

  • mesclun salad greens or 2 to 3 heads Little Gem lettuces, ends trimmed, quartered lengthwise
  • 2 T fresh lemon juice
  • 1 T finely grated lemon zest
  • Kosher salt and ground pepper
  • sumac, for sprinkling
  • Olive oil, for drizzling
  • crusty bread, for serving
  • Greek yogurt, labneh, or sour cream, for serving
  1. Dry chicken with paper towels and season chicken with salt and pepper.
  2. Heat oil in a large, heavy-bottomed pot over medium-high heat. (I used a large and wide enameled cast iron pan.)
  3. Working in batches, add chicken skin-side down and cook until skin is golden brown and releases easily from the pot, 7 to 10 minutes. Using tongs, turn chicken to brown on the other side, another 4 to 8 minutes, depending on what cut you’re using. As the chicken browns, transfer it to a large plate.
  4. Add onions and garlic to the pot and season with salt and pepper. Cook, without moving them so they have a chance to brown, 4 to 5 minutes.
  5. Add vinegar and stock/water, then use a wooden spoon or spatula to scrape up any browned bits on the bottom of the pot.
  6. Bring to a simmer and return chicken to the pot, skin-side up, nestling all the pieces in there. (They don’t need to be totally submerged.) Scatter thyme around and place the lid on top. Reduce heat to medium-low and continue to cook at a gentle simmer until chicken is cooked through and tender, with an internal temperature of 165 degrees, 20 to 25 minutes.
  7. Meanwhile, roast the mushrooms. Heat the oven to 425 or 450 degrees, preferably on convection roast.
  8. Toss mushrooms with olive oil on a parchment paper-lined, rimmed baking sheet and season with salt and pepper. Roast, tossing once or twice, until the mushrooms are deeply browned and crispy on the outside but tender on the inside, 15 to 20 minutes depending on the type of mushroom and strength of your oven. (I roasted potatoes in the same oven.)
  9. If serving the salad, toss Little Gems with lemon juice and lemon zest. Season with salt and pepper and arrange on a large platter. Sprinkle with sumac and drizzle with olive oil before serving. (I served the chicken with green salad instead.)
  10. Remove chicken from heat and season the cooking liquid with salt and pepper as needed.
  11. Transfer chicken, onions and thyme to a large serving platter, spooning cooking liquid over the top, or alternatively, serve directly from the pot, with the mushrooms and salad alongside you like. Add toast and something creamy if you choose.

Additional Suggestions to Complete the Meal:

  • Bread: Slice any good, crusty loaf of your choosing about 3/4-inch thick and toast until golden brown. Rub with a cut garlic clove and drizzle with olive oil. Garlicky or spicy bread crumbs would also be welcome if you’re feeling carb-inclined. I served the dish with sliced sourdough baguette.
  • Something creamy: Chicken loves more fat, especially this very tangy chicken. A bowlful of any seasoned creamy ingredient like sour cream, full-fat yogurt or labneh sprinkled with chives is excellent for spooning onto or underneath the chicken, over lemony lettuces and onto toast. I served the chicken with a dollop of Greek yogurt.
  • Quick pickles: For a quick, light pickle, toss thinly sliced vegetables such as radishes or fennel with a little thinly sliced shallot and season with a good splash of vinegar, salt and pepper.

Chile-Butter Chicken With Vinegared Potatoes, Scallions, & Herbs

One of my friends is always encouraging me to roast a whole chicken for dinner. Well, needless to say, I have a couple fabulous roast chicken dishes to share! I am so happy that I always take her advice. 🙂

I loved all of the fresh herbs in this first dish- especially because I had tons of CSA cilantro and parsley at the time. The chicken is also roasted over a bed of sliced potatoes- which soaked up a lot of the wonderful pan drippings. Delicious! This wonderful sheet pan recipe was adapted from The New York Times, contributed by Alison Roman. I used a larger chicken and increased the amount of potatoes and garlic.

Yield: Serves 4 to 6

  • 1 (4 1/2 to 5 pound) chicken, or 4 1/2 to 5 pounds bone-in, skin-on chicken parts
  • Kosher salt and freshly ground black pepper
  • 6 tablespoons unsalted butter
  • 2 tablespoons olive oil, plus more as needed
  • 2 teaspoons red-pepper flakes
  • 1 teaspoon hot smoked paprika
  • 4 garlic cloves, finely grated
  • 2 pounds Yukon Gold potatoes, scrubbed and sliced 1/4-inch thick (I used a mandoline)
  • ÂŒ cup distilled white vinegar
  • 1 cup cilantro and/or parsley, tender leaves and stems, coarsely chopped
  • 2 scallions, thinly sliced
  1. Heat oven to 425 degrees, preferably on convection roast. Season chicken with salt and pepper; set aside.
  2. Melt butter and 2 tablespoons olive oil in a small pot over medium heat. Add red-pepper flakes, paprika and grated garlic and swirl to combine. Let sizzle a minute or 2 to really infuse the butter, and remove from heat.
  3. Layer the potatoes on a rimmed baking sheet, drizzle with vinegar, season with salt and pepper and drizzle with a bit of olive oil.
  4. Place chicken on top of potatoes, breast side up, and drizzle with the chile butter, drizzling any extra butter onto the potatoes.
  5. Place in oven and roast until chicken and potatoes are deeply golden brown, and chicken is cooked through, 45 to 55 minutes for a whole chicken, 40 to 45 minutes for parts. (I used the oven temperature probe and cooked the whole chicken until the temperature in the thickest part of the breast reached 165 degrees.) 
  6. Remove from oven and let chicken rest on potatoes for a few minutes so the juices mingle with the potatoes. Carve the chicken (or slice the pieces) and transfer to a large plate or platter along with potatoes.
  7. Scatter with herbs and scallions before serving.

Tzatziki

My mom made this Greek dish a lot when I was growing up. Long long ago, she spent a lot of time in Greece and still absolutely loves Greek food. This dish is great and very versatile. It can be eaten as an appetizer with pita bread, for a light lunch, as a condiment, or as a side dish. It is quick, healthy, and flavorful.

At my bridal shower- also long long ago- each guest brought a recipe to contribute to a special recipe book. This authentic Tzatziki recipe was contributed by my Greek next door neighbor.

Tzatziki tastes better if made with thick yogurt. You can easily make thick yogurt by straining regular plain yogurt inside cheesecloth over a bowl. I usually use store bought Greek yogurt.

  • 1 medium cucumber, seeded (I use a seedless English cucumber)
  • 1 cup Greek yogurt or strained plain yogurt
  • 1 T olive oil
  • 1-2 tsp vinegar (I use red wine vinegar or lemon juice)
  • freshly ground black pepper, to taste
  • coarse salt, to taste
  • fresh dill, chopped, to taste
  • 1-2 cloves garlic, minced through a garlic press
  1. Peel the cucumber and cut it into very small and thin pieces, slice it into rounds on the the thinnest mandolin setting, or grate it.
  2. Add the rest of the ingredients and mix.
  3. Leave in refrigerator one to two hours. Serve with toasted pieces of pita bread, if desired.

Enter your email address to follow this blog and receive notifications of new posts by email.

Join 1,459 other subscribers

Recipe Categories

my foodgawker gallery
my photos on tastespotting

Top Posts & Pages

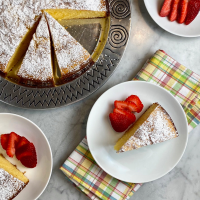
Mexican Sweet Corn Cake (Pan de Elote)
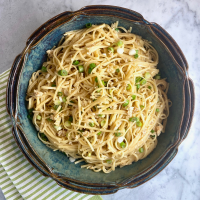
Vietnamese-American Garlic Noodles
One-Pot Crispy Gnocchi with Burst Tomatoes & Fresh Mozzarella
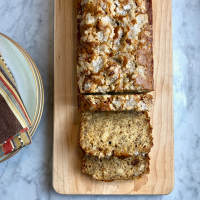
Banana Bread with Crunchy Sugar Topping
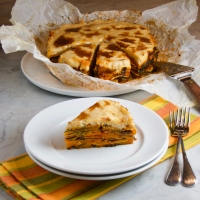
Ottolenghi's Butternut Squash Lasagna Pie
Churro Cupcakes with Cinnamon Cream Cheese Frosting
Oven-Baked Pearl Couscous with Roasted Tomatoes, Chickpeas & Feta
Ethiopian Chickpea Stew (Shiro Wat) & Stewed Collard Greens (Gomen Wat)
Ina Garten's Wild Mushroom & Farro Soup
Chicago Public School Butter Cookies
Foodista Food Blog of the Day Badge